
I’m so excited to share one of our favorite DIY projects with you today.
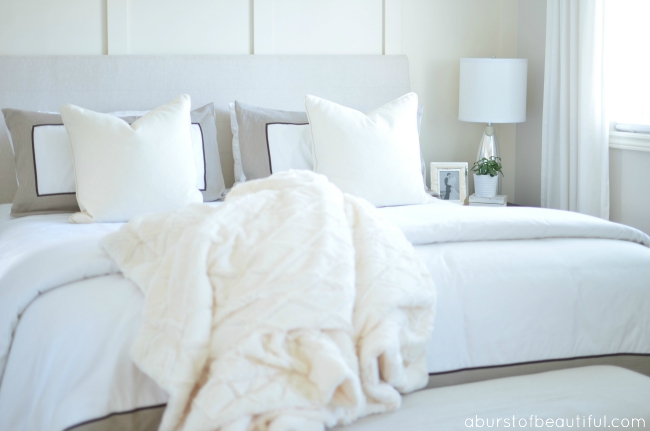
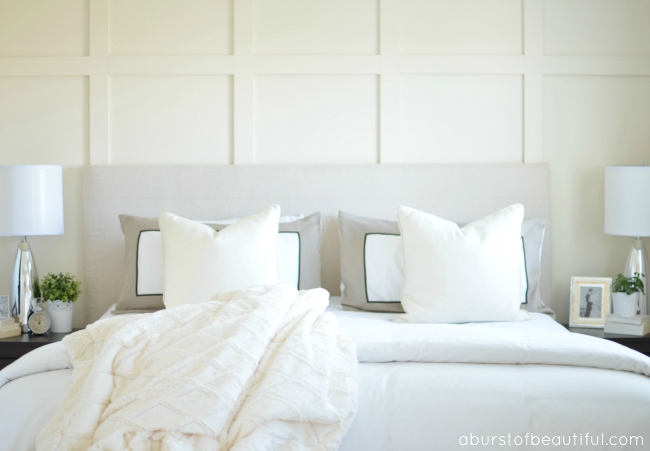
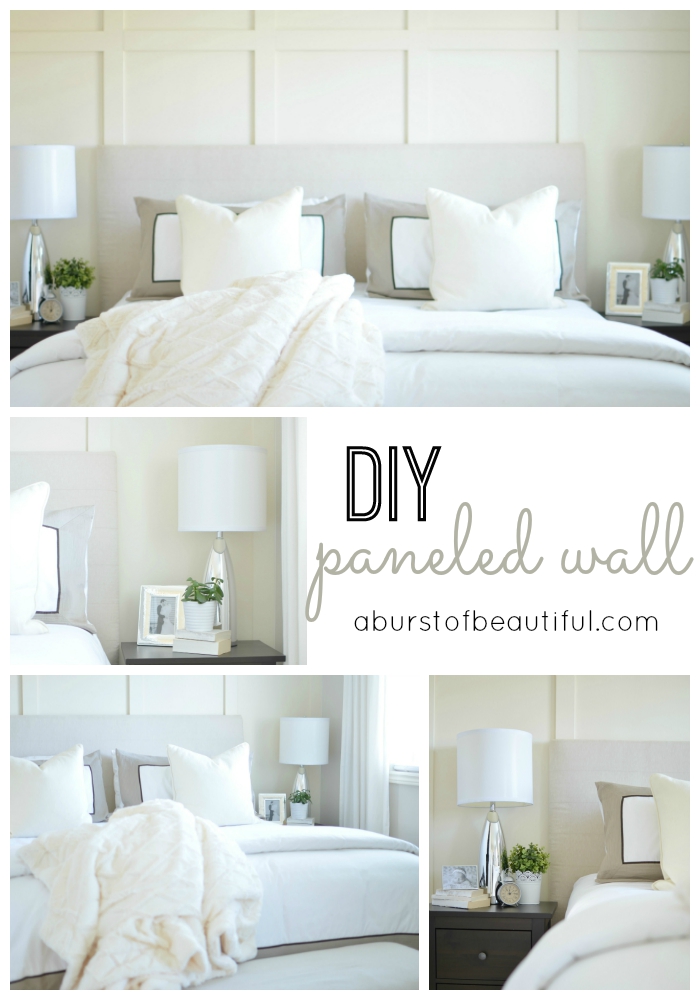
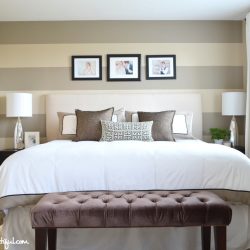
Do you remember when we participated in the One Room Challenge? We completely transformed our tired and boring bedroom into a beautiful farmhouse-inspired retreat with vintage flair. The biggest change we made was installing this gorgeous paneled wall behind our bed.
I’ve always been drawn to farmhouse style. And let’s face it, the farmhouse trend has become a bit of an obsession for many of us right now. I love that cozy, worn-in feeling and I wanted our bedroom to reflect that. I dreamt of a bedroom that conveyed that vintage farmhouse feel, with a little bit of romance thrown in.
I knew I’d have to do a bit of convincing to get my husband on board, but he eventually agreed to help make my vision a reality.

A big part of that vision was adding some much-needed interest and character to our bedroom. It’s a huge room and it lacked any type of architectural elements to help it feel cozy and welcoming.
When we started I had three distinct ideas floating around my head:
First, I thought about adding trim to the walls to create a picture rail. Secondly, I considered adding a plank wall behind our bed (I couldn’t get shiplap out of my head after too many episodes of Fixer Upper). And lastly, I thought about building a paneled wall behind our bed and painting it a creamy white.
I loved all of these ideas, but I finally decided on the paneled wall. I thought it was a timeless choice and I knew it would transition well with whatever future changes we made to the room.
One of the updates we had made to our bedroom prior to this makeover was painting horizontal stripes on the wall behind our bed. I loved these stripes for a long time, so it was with a heavy heart that the Mr. covered over the stripes he had lovingly (and painstakingly) painted for me three years ago. I have to admit, I was a little sad to see those stripes go, but I’m so happy with the end result.

This is one of my favorite projects we’ve completed so far. It was relatively inexpensive (it cost us about $100 for supplies), and it adds so much impact.
There are a few different ways you can create a panel wall, but we decided to go with five small squares along the top with five large rectangles underneath each square. We considered creating the wall solely out of squares, but I thought it might look too busy. I like the simplicity of the rectangles.
Supplies:
- Wood
- Nails
- Nail Gun
- Filler
- Caulking
- Paint
Instructions:
First, measure the width of your wall. Our wall was 132″ so we needed 11′ of wood for the top of the wall along the ceiling line. You can also do this at the bottom of your wall if you don’t already have trim. In our case, you couldn’t see the bottom of the wall behind the bed and end tables so we decided to save the money.
Next, we determine how many panels would ideally fit across our wall. In our case, we wanted five panels on our wall. You will need to determine how many vertical pieces of wood you will require (it will be the number of panels + 1 for the leading edge). We had five panels, so technically we required six vertical pieces, however, our headboard mounts flush on the wall so we wanted it to lay flat and opted to cut one of the pieces in half to accomplish this.


Once you have determined the placement of each panel, secure the pieces of wood on the wall with a nail gun. Fill the holes with filler and any spaces with caulking and allow to dry before sanding.
We made one square panel at the top of each panel to add a little extra depth. For this, we just made it into a perfect square 21.6″ x 21.6″.
Finally, give your new paneled wall a few coats of fresh paint and your project is complete!
If you’re interested in seeing our entire bedroom makeover from start to finish you can check out our progress week by week to see how we pulled it off.
This post was originally published at Ella Claire on July 9, 2015.

Maria Elena Parascan says
Wow! Great job!
Alicia says
Thank you so much Maria! Your comments always brighten my day! xo
Mariah Rose says
I love this I've been wanting to do this for so long you have given me inspiration. But on a side note where did you get your bedding I like how clean and nice it looks.
Alicia says
Hi Mariah! I am so glad you are going to try this. It truly was such an easy project and the end result is so worth it. Our bedding is from Hudson's Bay Company, but we purchased it a few years ago. I believe it was the Steven and Chris line.
rachel says
So did you only apply the trim pieces to the wall and paint the wall or did you add solid board between? Either way, it looks fantastic!
Nick says
Thanks Rachel, we just applied the trim pieces to the wall and painted the wall itself in-between! Easy and inexpensive and the result is the same, but costs a lot less!
Sarah Henning says
Do you see any texture with not adding board behind the batten? I am adding a wall to my living room and am torn between just adding the batten directly to wall and painting it all, or adding board behind so it appears more professional. We don’t have any unusual texture to our walls, just standard skimcoat.
Nick says
Same with us…that’s all we had. We now have 3 rooms in our home with this and we don’t feel like it is missing anything without a board behind it. The trick is to paint all the trim and the wall behind it in a pearl or semi-gloss finish, similar to what you’d paint your regular trim with. This makes it appear very cohesive.
Jillian says
Love these walls and going to embark upon a similar design!
One question I can’t find answered anywhere… What are the boards nailed and secured to when studs are every 16″?
Many thanks!
Nick says
Hi Jillian,
Yes, the horizontal boards are nailed in on studs, however the vertical boards are just nailed into the drywall. The nails coupled with the little bit of caulking you’ll have to use to fill in any gaps will be enough to hold the board in place. We’ve had ours in 4 rooms like this for years an not one board has ever even come loose!