BROWSE BY CATEGORY

  • Design
  • Projects
  • Lifestyle
  • Recipes
  • Shop Our Home
  • Home
  • About
  • Work With Us
  • Design Services
  • Contact
  • Design
    • View All Design Posts
    • Decor
    • Design Tips
    • Makeovers
    • Design Plans
    • Shopping Guides
  • Projects
    • View All Project Posts
    • Woodworking
    • DIY
  • Lifestyle
    • View All Lifestyle Posts
    • Entertaining
    • Seasons
      • Spring
      • Summer
      • Fall
      • Winter
    • Holidays
      • Gift Guides
      • Valentine’s Day
      • Easter
      • Thanksgiving
      • Halloween
      • Christmas
    • Recipes
      • View All Recipe Posts
      • Appetizers
      • Drinks
      • Breakfast
      • Dinner
      • Dessert
      • Seasonal
        • Easter Recipes
        • Fall Recipes
        • Halloween Recipes
        • Christmas Recipes
  • Browse by Room
    • Kitchen
    • Dining Room
    • Living Room
    • Bedroom
    • Kids Bedrooms
    • Family and Playroom
    • Office
    • Outdoor Living
  • Shop
    • Shop Our Home
    • Shop Our Cottage
    • Nick’s Workshop

Nick + Alicia

Timeless Design

April 12, 2016 | by Nick

DIY Rustic Industrial Pipe Table

This post contains affiliate links, see our full disclosure policy here.
Thank you for helping support our blog.

Learn how to build this rustic industrial pipe table with this simple tutorial | A Burst of Beautiful

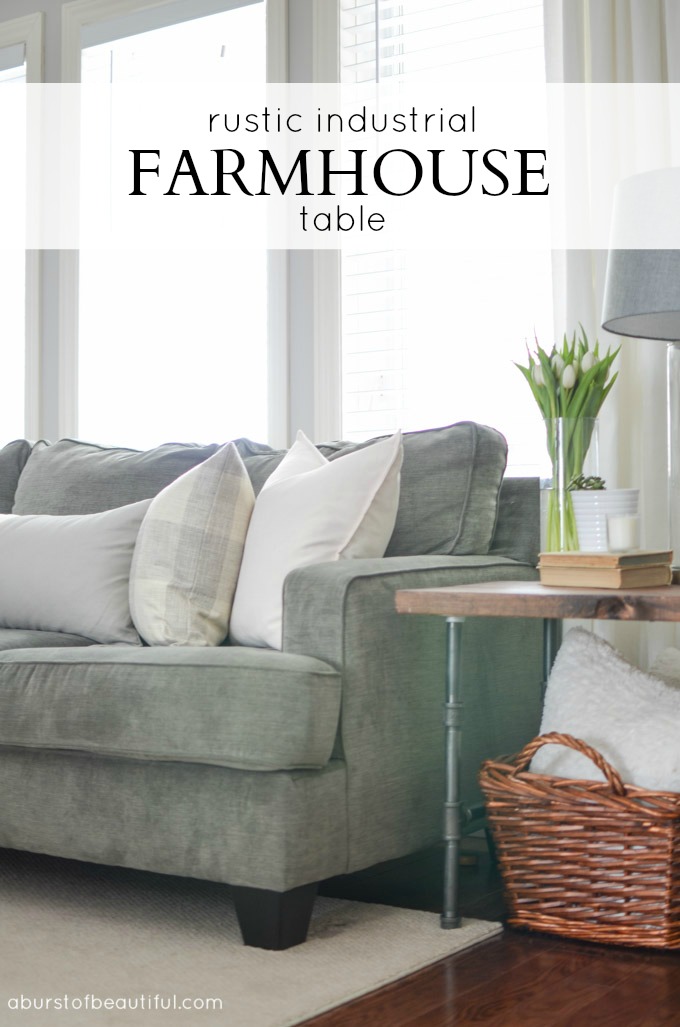
I’ll start by saying this post is a long time coming. I built this rustic industrial pipe table months ago, and it’s been in our living room for quite some time now (so you may have noticed it in some of our home tour posts), but today we are finally getting around to sharing our tutorial.

Our DIY Rustic Industrial Pipe Coffee Table quickly became one of our top posts and we received a lot of positive feedback from those who tried to follow our plans. Since then, Alicia has always hinted that it would be nice to have a similar side table. As a husband, you learn to read between the lines when your wife makes a not-so-subtle hint. I kept this idea in my back pocket, with plans to build it for her in the future.

Learn how to build this rustic industrial pipe table with this simple tutorial | A Burst of Beautiful

For our second anniversary, I was stuck for a gift idea. I wanted to do something personal and DIY (because that’s what we like to do rather than buying something), but the second anniversary gift is cotton. I have no idea how to knit or sew, nor do I plan on learning, so I thought to myself, what can I build that is similar to working with cotton? The answer is: nothing. So she was getting a gift made of galvanized pipe and wood instead. At least I knew she would like it!

Learn how to build this rustic industrial pipe table with this simple tutorial | A Burst of Beautiful

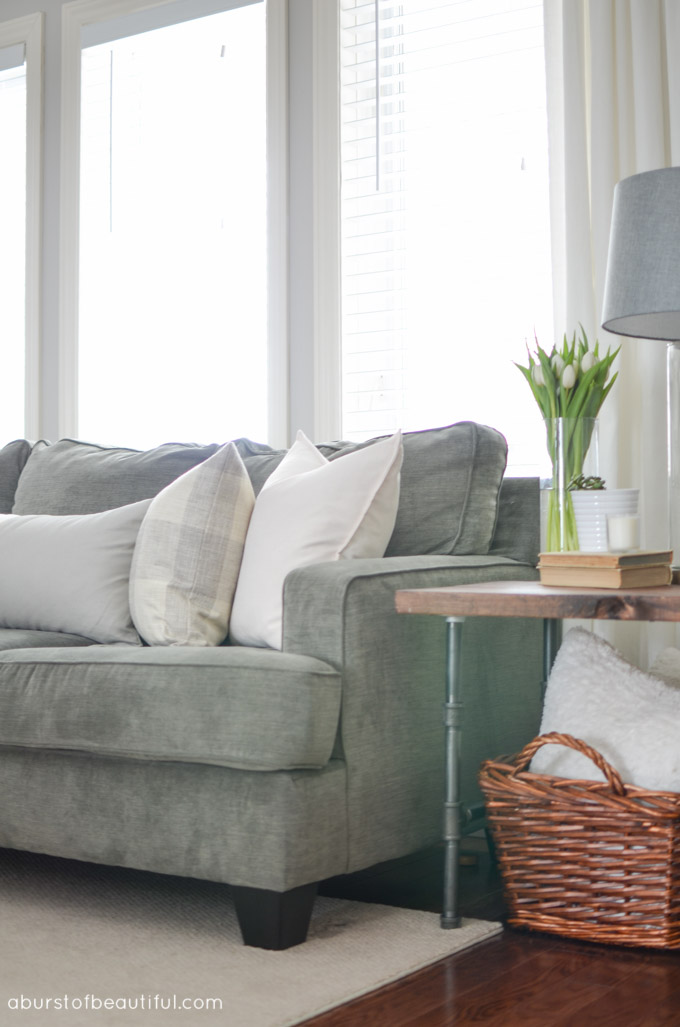
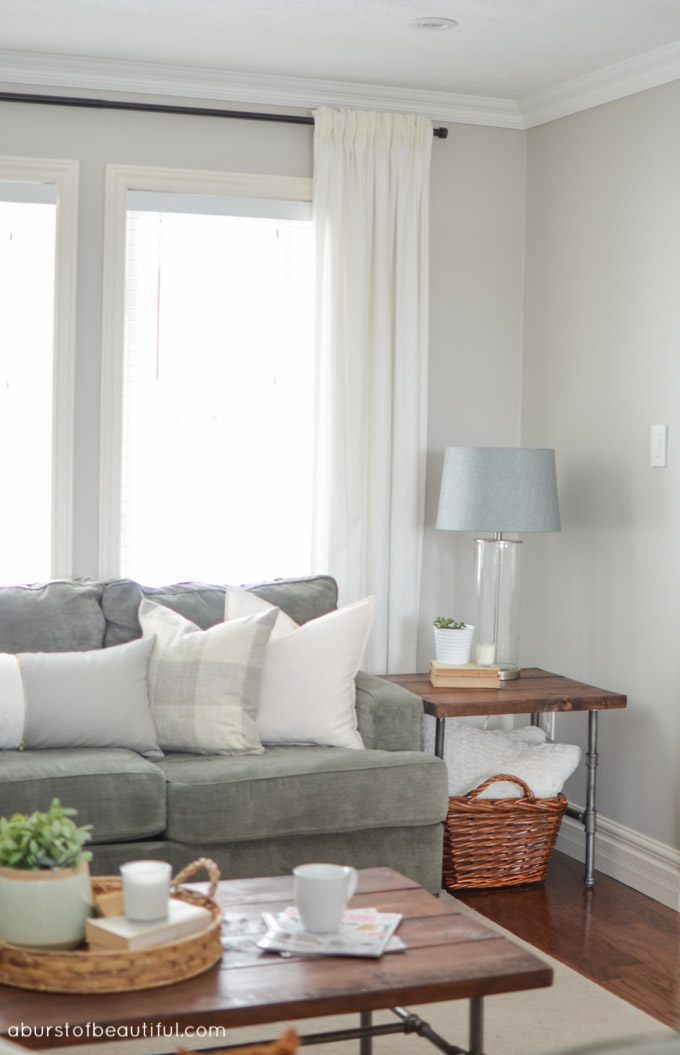
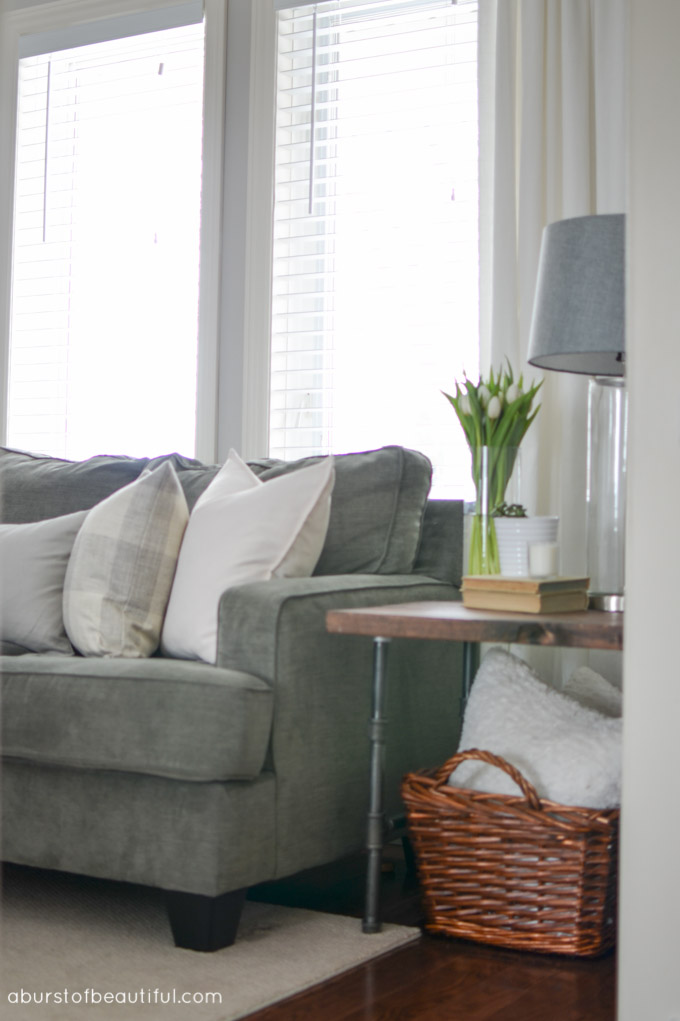
Just like our DIY Rustic Industrial Pipe Coffee Table, this plan is incredibly easy to assemble and inexpensive. It is such a great balance of rustic and industrial that it works in almost any decor. This smaller table can also be used as a bed-side table or adjusted in size to fit any space. Another great idea would be to add a shelf across the support bars for some additional display area or storage.

And if you like this rustic industrial look, you’ll love our Rustic Industrial Shelf too.

Learn how to build this rustic industrial pipe table with this simple tutorial | A Burst of Beautiful

DIY Rustic Industrial Pipe End Table

Supplies

1 – 2″ x 8″ x 6′ wood plank cut into 2-foot lengths (I used spruce framing boards for a rough rustic look, but you can use pine, cedar, etc.)
4 – 3/4″ diameter flanges
4 – 3/4″ diameter end caps
16 – 3/4″ diameter 6″ length pipe
4 – 3/4″ diameter T shaped connectors
6 – 3/4″ diameter couplings
6 – 7/8″ x 8″ steel brackets
1 1/2″ screws
Wood Stain in your choice of color
11.5 oz. Satin Fast-Drying Polyurethane Aerosol Spray (6-Pack)


Learn how to build this rustic industrial pipe table with this simple tutorial | A Burst of Beautiful

 Instructions

  1. Using the diagram above, attach the metal parts of the end frames together. You will need to do this diagram x2 since there are two ends.
  2. Cut your wood planks into 3 x 24″ pieces. Lay the cut wood planks on a flat surface and attach together on the bottom using the 8″ steel brackets. Make sure you leave the area you plan to attach the flanges to free of brackets. Or you can use a Kreg Jig to create pocket holes and attach the boards together, eliminating the need for the brackets, and it creates a much stronger top.
  3. Place frame upside-down on wood planks and attach to the metal flanges.
  4. Once you have the frame attached to the wood top, flip the table over. The nice thing about using the threaded galvanized piping is that you can just twist various parts to adjust the level of each leg if you have uneven floors.
  5. Feel free to distress the top for a more rustic look using a hammer, crowbar, golf club…whatever you have in your garage that will make a mark!
  6. Sand top and all edges.
  7. Stain in any color you choose and seal with polyurethane for protection from liquids.

Some of the tools we used and love…

Simple as that, you have a beautiful side table in no time at all!

Nick
 
Learn how to build this rustic industrial pipe table with this simple tutorial | A Burst of Beautiful

YOU MAY ALSO LIKE...

  • Learn how to build this easy and inexpensive rustic industrial pipe coffee table
    Industrial Pipe Coffee Table | Free Plans
  • DIY Rustic Industrial Shelf
  • DIY Rustic Wood Joy Sign

Comments

  1. Shawnna says

    April 12, 2016 at 9:22 pm

    Love the table! So cool! Great job Nick!

    Reply
    • Alicia says

      April 13, 2016 at 9:55 am

      Thank you Shawnna, he did a good job! 😉 xo

      Reply
  2. Celeste says

    April 13, 2016 at 9:48 am

    This turned out beautifully, and I just love those pipe legs on the table! It looks so lovely in your home!

    Reply
    • Alicia says

      April 13, 2016 at 9:55 am

      Thank you Celeste, I love how it adds just that little bit of extra character. xo

      Reply
  3. Vicki Packham says

    April 14, 2016 at 2:30 am

    About how much did they cost to build?

    Reply
    • Nick says

      April 14, 2016 at 3:12 pm

      Hi Vicki, the table cost approximately $50 not including the stain or polyurethane.

      Reply
  4. Annie says

    April 17, 2016 at 1:59 am

    Love this table and it looks beautiful in your home!

    Reply
    • Alicia says

      April 18, 2016 at 2:34 pm

      Thank you Annie! xo

      Reply
  5. Rebecca says

    August 26, 2016 at 9:16 am

    How tall was the finished project? It looks like around 21″ based on my math?

    Reply
    • Alicia says

      August 26, 2016 at 1:09 pm

      Hi Rebecca, the finished table is 23″ high. 🙂

      Reply
  6. Shelley says

    October 29, 2016 at 11:55 am

    Hello,
    We just finished building the coffee table and it turned out perfect! I want to do this side table next. How would you add the shelf underneath?

    Reply
    • Nick says

      October 31, 2016 at 11:05 am

      Hi Shelley,
      Glad to hear that you love your coffee table! I hope the instructions were easy to follow. We would love to see photos of the finished product! You can send them to nick@aburstofbeautiful.com

      To add a shelf, I would cut two 6″ – 2×6″ boards a little bit longer than the span between the two legs. Put them on either side of the center 3/4″ coupling in the diagram and secure from underneath with clamps. Or, if your boards don’t fit because they are too wide, notch or cutout space for the legs so that the boards will fit snugly. Then you won’t have to put the clamps on. Hope this helps!!

      Reply
  7. Allison says

    May 28, 2019 at 9:21 pm

    Hello! I love your designs! I’m wondering what paint color you have in this living room. Beautiful!!!

    Reply
  8. Allison says

    May 29, 2019 at 4:40 pm

    I love all your designs so inspiring! I have the same couch, and I love your paint color. I was wondering what paint color you had in this living room? Thank you!!

    Reply
    • Alicia says

      May 31, 2019 at 11:36 am

      Thank you, Allison! Our walls are painted Collingwood by Benjamin Moore, it’s a really pretty neutral. 🙂

      Reply
  9. Sue says

    March 11, 2020 at 3:25 pm

    I was wondering how sturdy the table is. We wouldn’t sit on them, but would they be strong enough to sit on? Is it wobbly at all? I am adding a second shelf hoping it add some stability,

    Reply
    • Nick says

      March 12, 2020 at 10:24 am

      We used to sit on it all the time! It was a sturdy as can be. The metal is very very strong. If you use a pocket hole tool to attach the top boards together as well (like the Kreg Jig) with lots of glue between the boards, it will be even stronger!

      Reply
  10. Signy says

    June 6, 2021 at 2:27 am

    Hello,
    These table are fantastic! I’m looking forward to doing both the coffee table and the end table. What is the Length, Width and Height of the finished coffee table?
    Thanks so much!

    Reply
    • Nick says

      July 12, 2021 at 10:02 pm

      Hi Signy,

      I believe the coffee table size was 48″L x 29″W x 16″H. We have a new coffee table that I’ve built now, so I don’t have the pipe one on hand to measure it…I sure do miss that table…it was one of my favourite projects!

      Reply

Leave a Reply Cancel reply

Your email address will not be published. Required fields are marked *

Sweeping away the cobwebs to make room for summer Sweeping away the cobwebs to make room for summer adventures! ☀️#playhouse #playhouserefresh #springcleaning #interiordesign #interiordesigner #cottagecorehome #modernvintage
Vintage art prints: my secret to infusing charm, c Vintage art prints: my secret to infusing charm, character, and nostalgia into any space.While remodelling our family cottage, I incorporated a handful of beautiful pieces of coastal art into each room to evoke the timeless charm and character of days gone by.Head to nickandalicia.com today for a peek into my process of selecting, printing, and framing the perfect vintage coastal art prints, along with links to my fave pieces!
Our homes are so much more than just walls and roo Our homes are so much more than just walls and roofs—they’re where some of life’s best moments unfold.Do you have a favourite memory in your home?#modernhome #interiorinspiration #collectedhome #modernvintage #vintagestyle #transitionaldesign#smmakelifebeautiful
This is the drink of the summer! 🍹 With just fo This is the drink of the summer! 🍹 With just four simple ingredients, our lychee, guava, and elderberry cocktail is easy to make and oh-so-delicious. Save this recipe for your go-to summer drink!Lychee, Guava & Elderberry CocktailIngredients •1.5 oz St Germain liqueur •1/3 glass guava juice •1/3 glass lychee juice •Lemon-flavoured sparkling water: Top off glass •Fresh lemon juice: Squeeze from lemon wedge •Lemon zest: A pinch for garnish •Thyme sprigs: For garnishInstructions 1. Mix Ingredients: In a glass, combine 1/3 of the glass with lychee juice and 1/3 of the glass with guava juice. Add 1.5 oz of St Germain Liqueur.2. Add Sparkling Water: Top off the glass with lemon-flavored sparkling water.3. Add Lemon Juice: Squeeze in fresh lemon juice from one lemon wedge and stir everything gently to mix.4. Garnish: Garnish the drink with a pinch of lemon zest and a sprig of thyme for a fragrant touch.5. Serve and Enjoy: Your lychee, guava, and elderberry cocktail is ready to be served. Enjoy this refreshing summer drink!Will you be giving it a try this summer?
Obsessed with this versatile shade of green, it’ Obsessed with this versatile shade of green, it’s perfect for walls, trim, or cabinetry!Looking for more? Check out our all-time favourite green paint colours at nickandalicia.com today!#paint #greenpaint #kitchen #kitchenisland #kitchencabinets #classicdesign #traditionalcharm #vintagevibes
You’re tired of waiting on your dream home, so y You’re tired of waiting on your dream home, so you decide to make your house the dreamiest it can be. Who’s with me? 🙋🏻‍♀️#kitchen #kitchendecor #modernhome #interiorinspiration #homedesign #collectedhome #transitionaldesign #traditionalcharm
April Recap: thrift finds, spring vibes, and our f April Recap: thrift finds, spring vibes, and our first trip to the cottage! Catch up on our favourite moments of the month at nickandalicia.com.

Join our Newsletter

Copyright ©2025 Nick + Alicia
  • Contact
  • POLICIES + DISCLOSURE