
Let’s talk about dining tables for a minute…
The dining table is the main focus of any dining room. It’s the gathering place when family and friends come over and where memories are created and stories are told over great food and drink. It’s a place for the family to gather every night for dinner and share the day’s triumphs and tribulations – no matter how big or small. It’s a place to convene on rainy days to play board games and let creativity shine with craft projects. And it’s a quiet place to focus and learn while completing homework after a busy day at school.
So much is done around the dining room table, and that’s why it’s important to take the time to choose the perfect table for your space and your family. It’s a piece that doesn’t get replaced often throughout a lifetime and is highly utilized in the home.
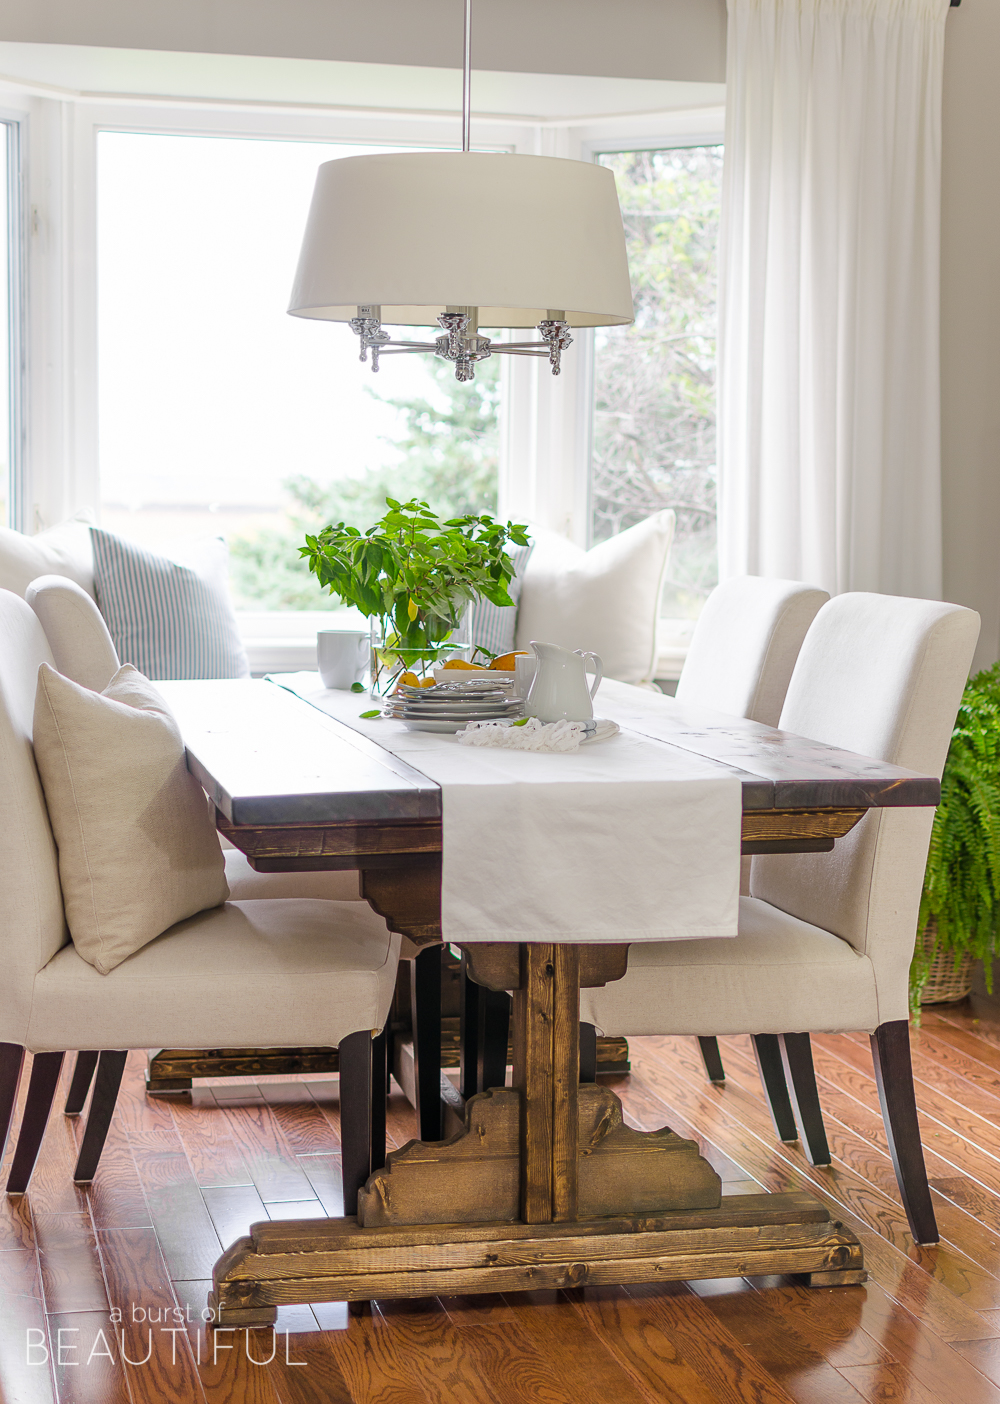
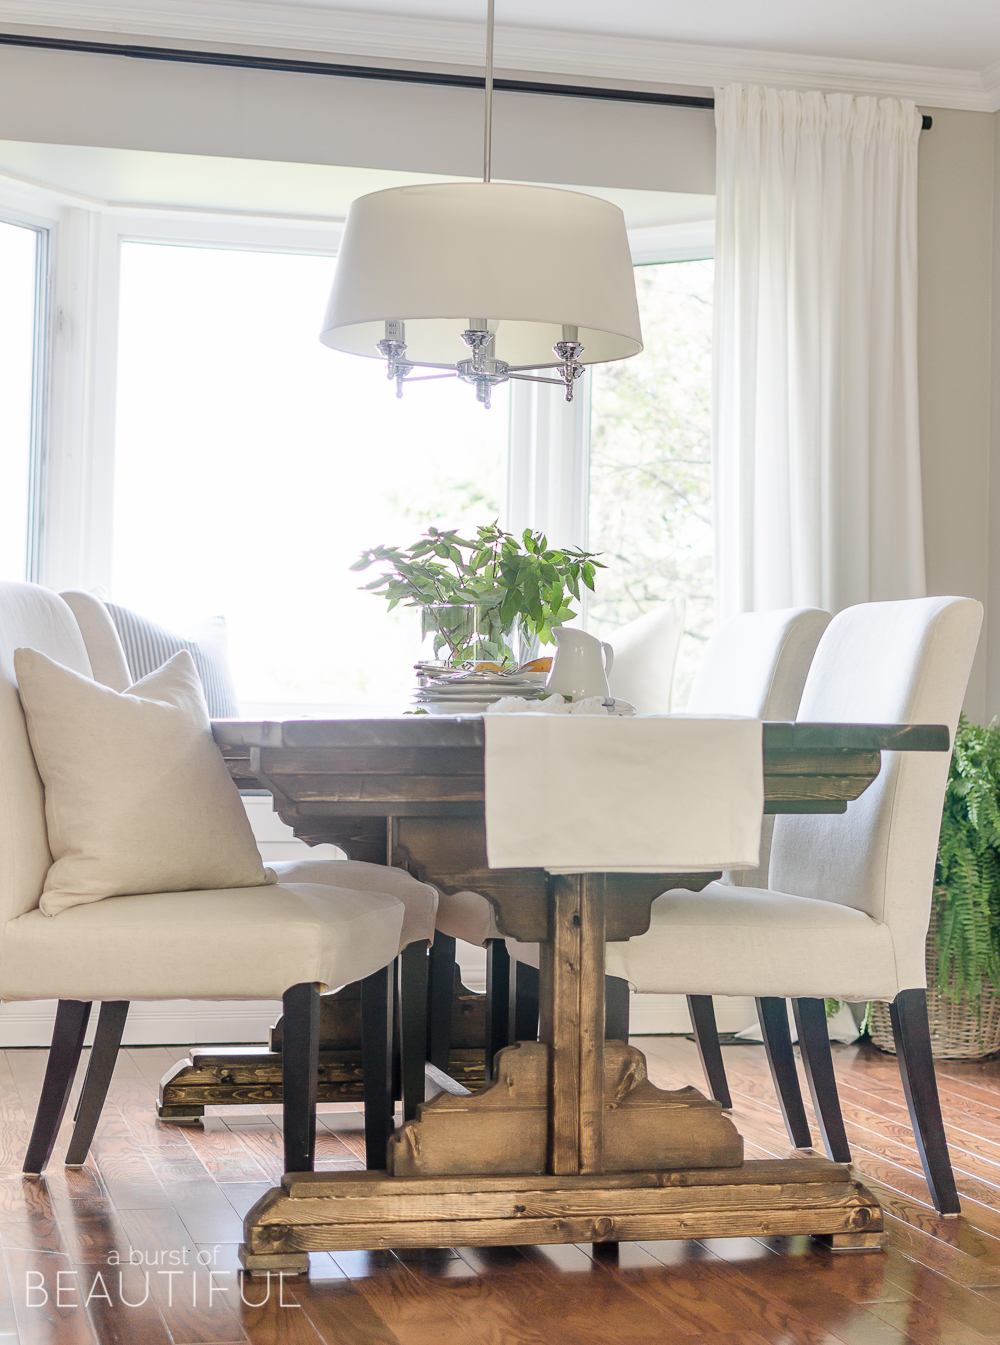
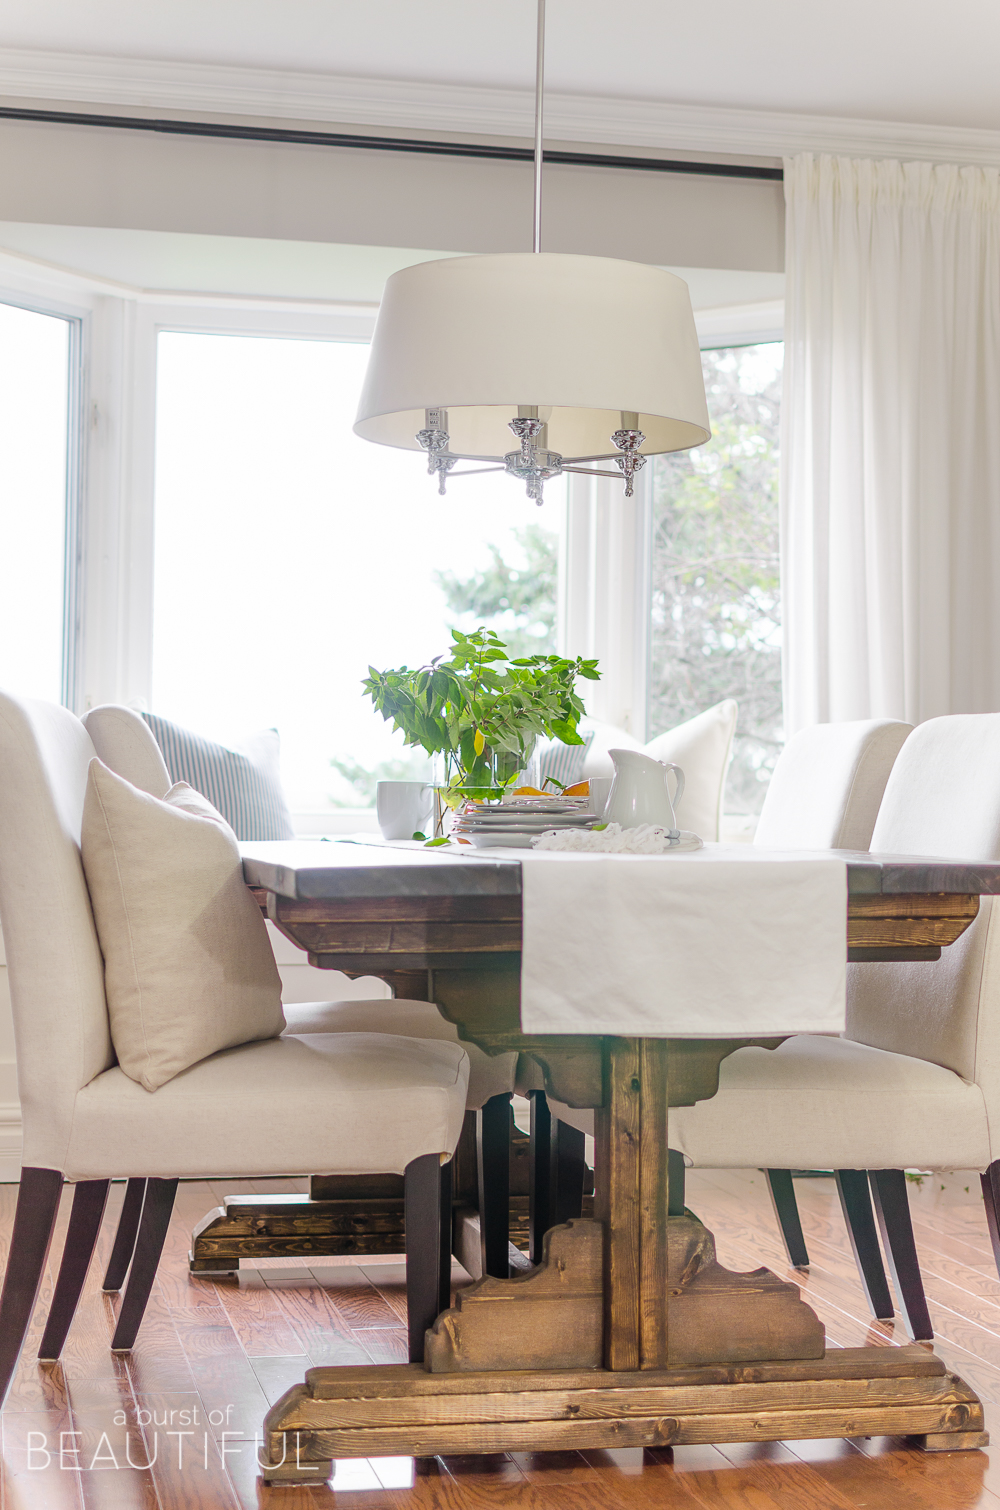
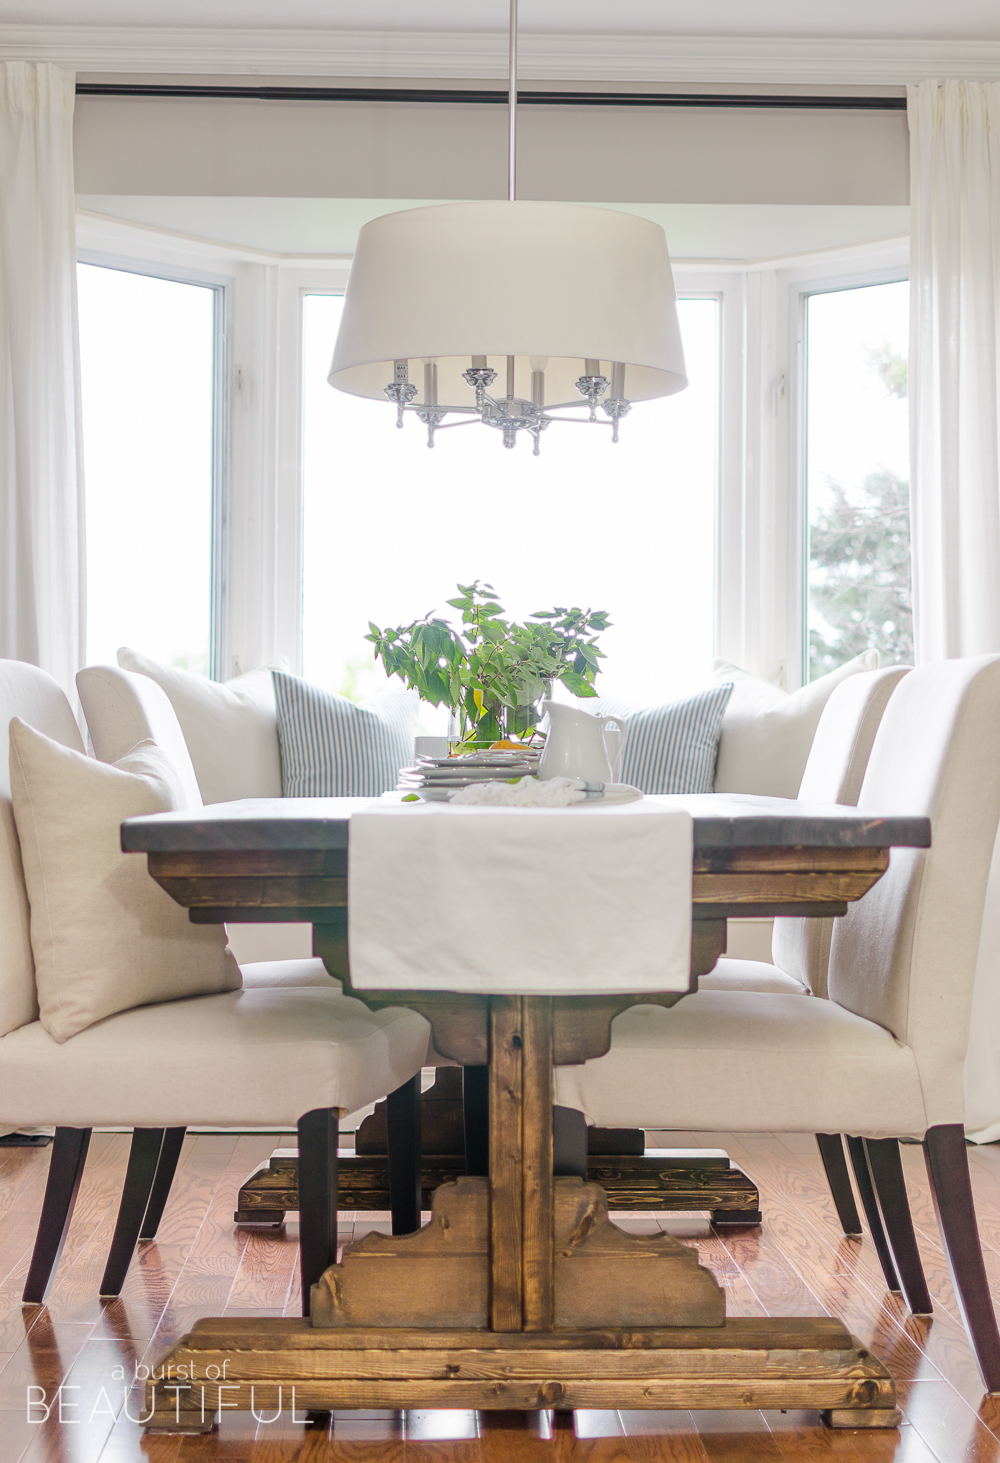
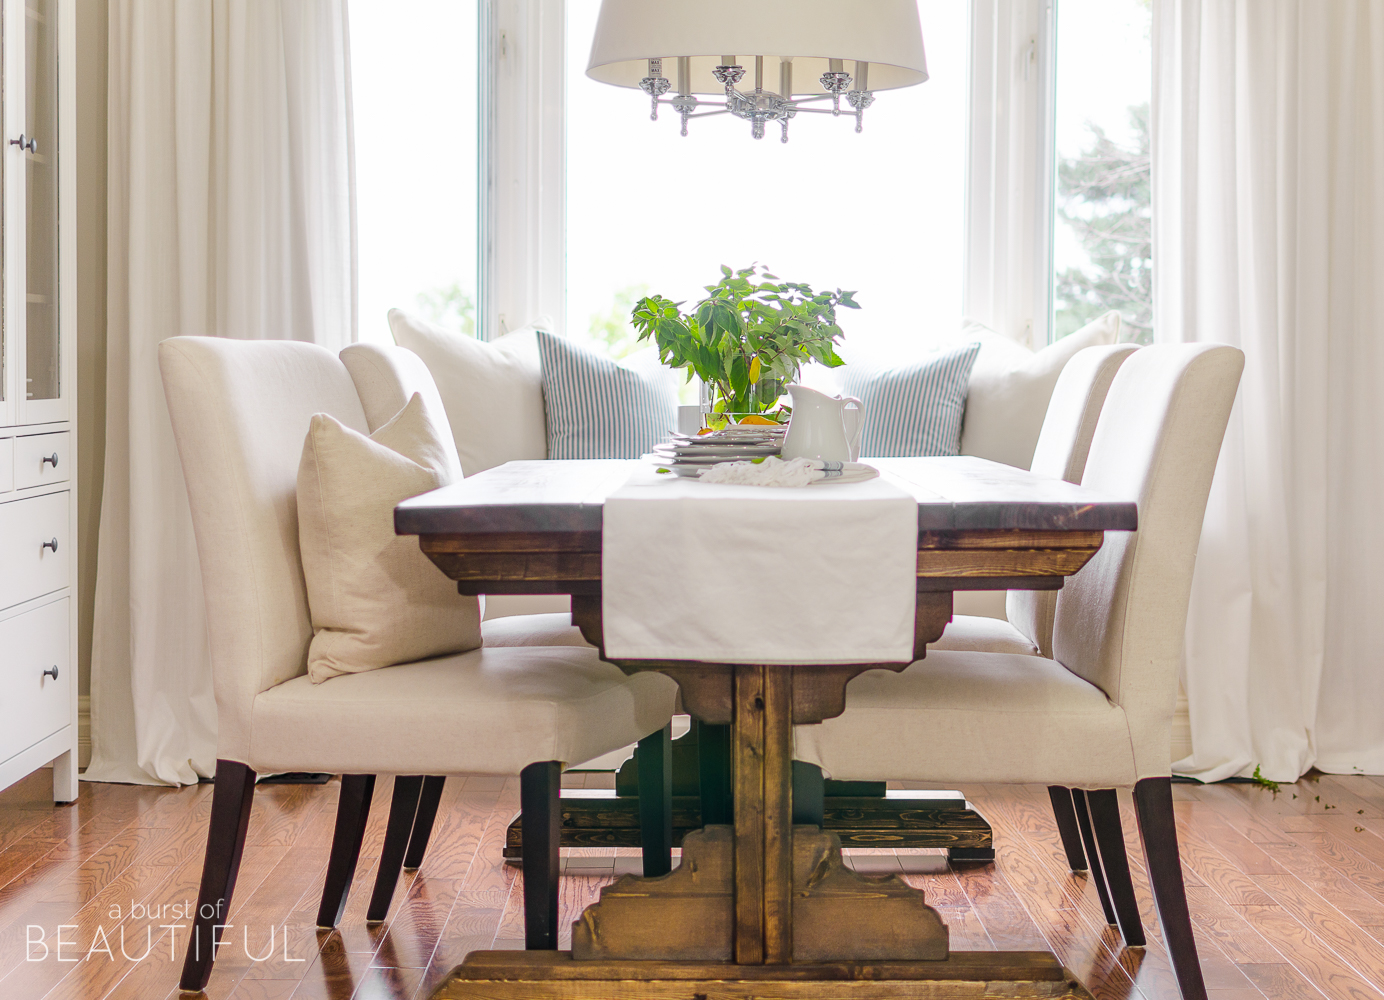
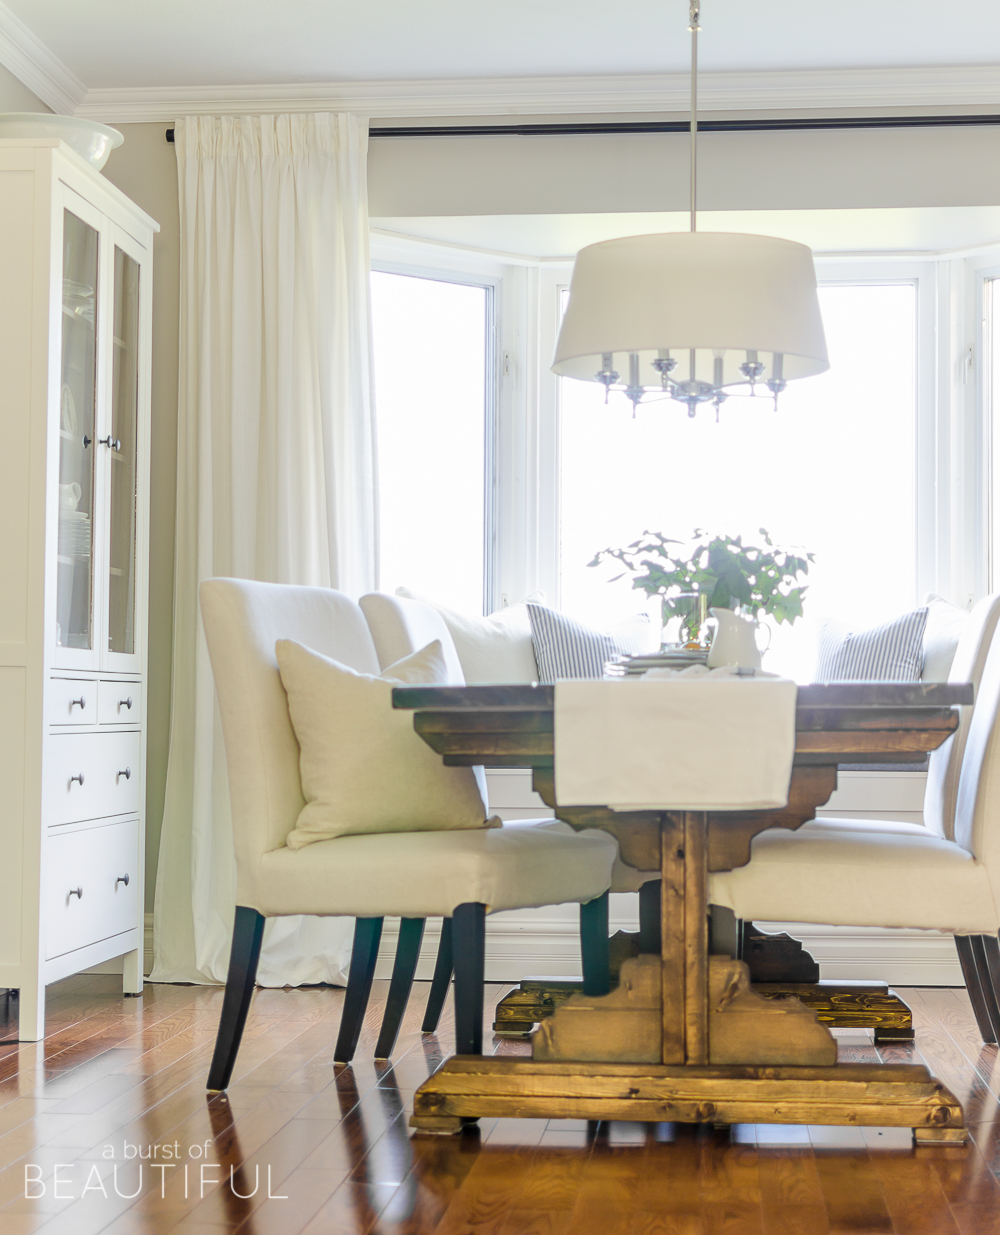
When it came time to replace our existing dining table we took our time to design a piece that would work well for our family and our small dining space. It’s a beautiful piece that looks right at home in our open concept living and dining room, and has all of the character and charm I was hoping for. Since revealing the space we’ve been asked time and time again for the plans, so today we are so excited to share them with you!
And because Nick is our resident handyman and he made this beautiful table I am going to turn this story over to him…
The number one issue we wanted to address in our dining room was our dining table.
Our previous table was large, dark and heavy. We had anticipated hosting large family gatherings in our new home, so we purchased the largest table we could find. We soon learned that when you only use it for that purpose a few times a year, it just ends up taking up precious space and looking big and awkward in a tiny space. I always heard Alicia talk about the importance of anchoring a space in a design sense, so I thought it was a good thing. I soon learned she was not referring to that type of anchor when mentioning our existing table.
When we set out to find a new table, we couldn’t find one that we were absolutely in love with or one that fit within our budget. Some of the tables we had our heart set on were just too pricey, and we have a toddler who isn’t very gentle on our furniture.We would browse various shops and find a table we liked and I would casually say to Alicia, I could build a similar one, or maybe even better (for much less money)!
I was hoping I hadn’t committed to something I couldn’t actually produce. I had designed and built smaller pieces like our coffee table and side table, and items like our chalkboard and vintage-inspired toolbox. But this was a large and important addition to our home!
Well, this fall Alicia finally took me up on my offer and trusted me to build our new table. That’s when we partnered with The Home Depot to bring you this great DIY project.
I could browse the aisles of The Home Depot all day long and get ideas on the fly. I’m always leaving with more than I came for, whether it’s supplies or new tools! I’m always met with friendly hellos and eager associates willing to help me find everything I need.
We were inspired by this plan, but it wasn’t exactly what we were looking for. So after some tweaking of size and design, we had come up with our own plan. You don’t have to be an experienced woodworker to be able to build this table. It is done with mostly standard cuts and angles.

I was very surprised that it only took one afternoon to build, and another to stain and seal. I promise this plan will make you feel like a pro and you’ll be able to impress all of your family and friends. It will be a unique piece that you will be proud of, and it is a fantastic feeling to know you created something beautiful that your family will create memories around for years to come. And guess what…the wood materials only cost around $100!!! Now, that’s a deal!
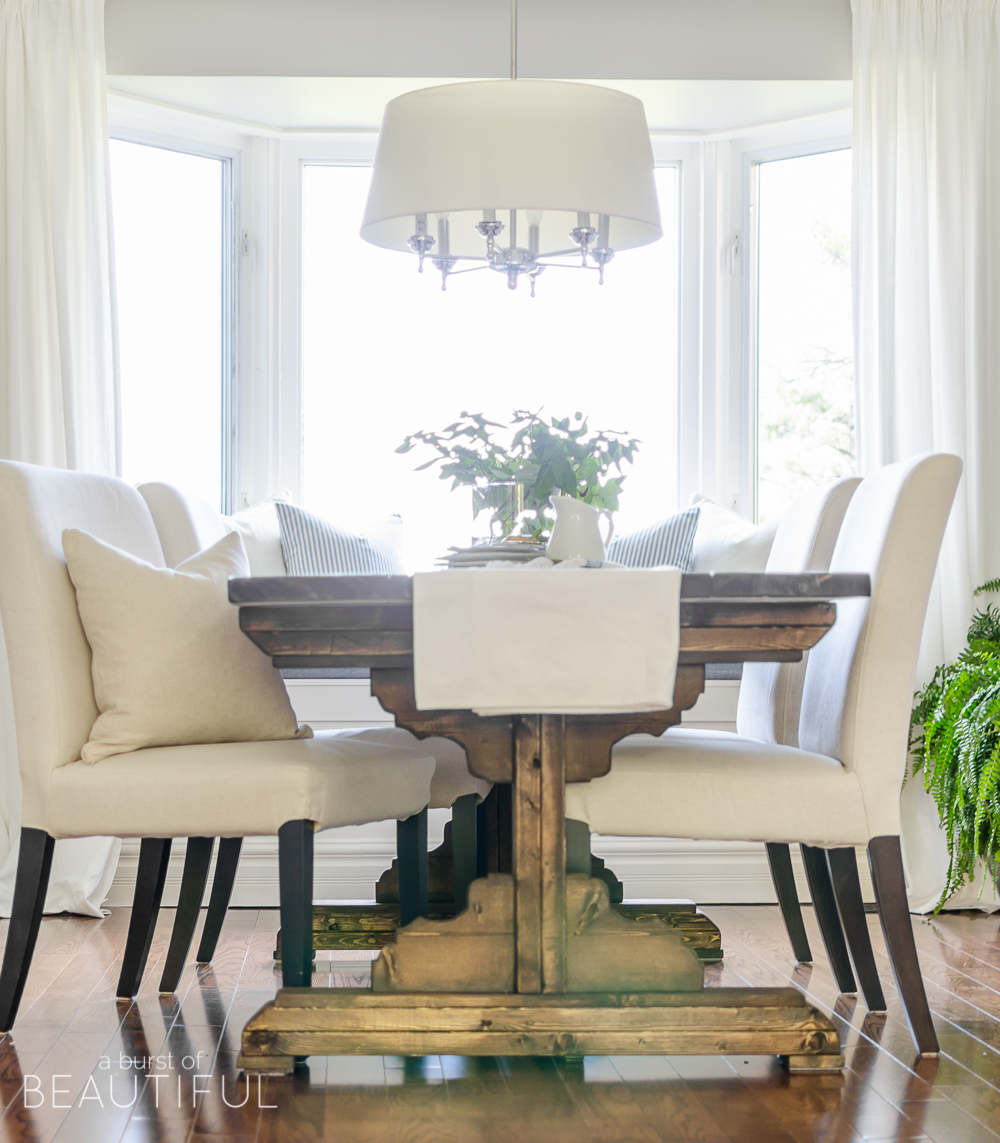
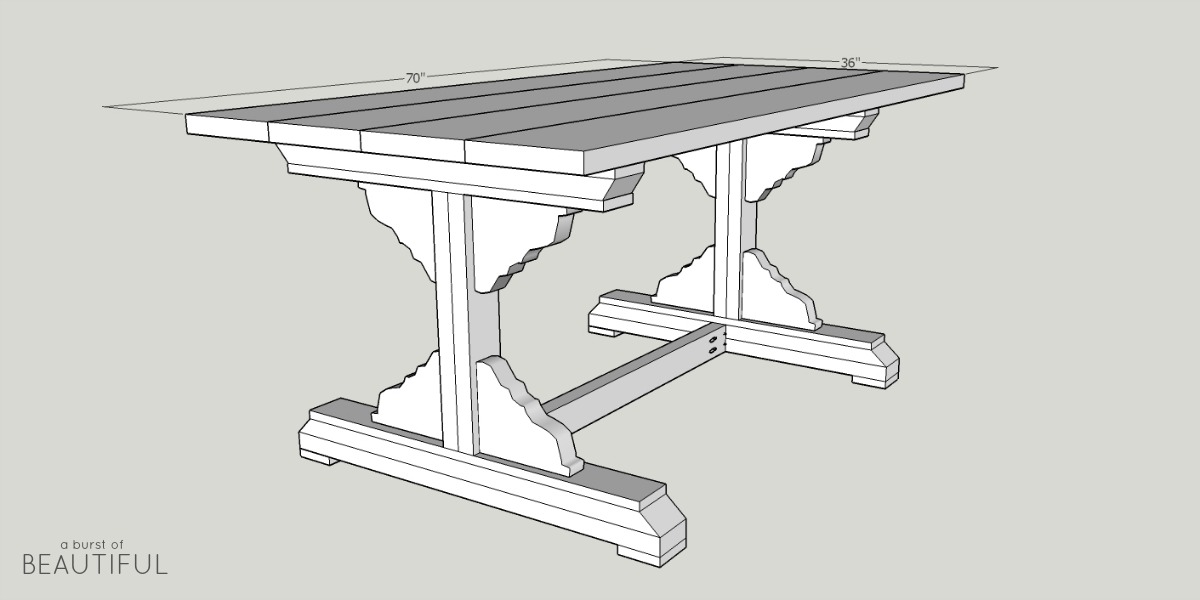
These plans are for a finished table size of 36″ x 70″. It is important to check each board to make sure they’re square when purchasing, pay the closest attention to the 2″ x 10″ x 12′ boards you will use for the top. Also, make sure that it has a grain pattern you like, free of cracks and large imperfections. I also had these boards cut in half at the store so that they would fit in our car, plus it saves you a couple of cuts when you get home!
First and foremost, when working with power tools please ensure you are using the proper personal protective equipment. Of course, you can find everything you’ll need at The Home Depot, simply tell any associate what tools you are working with and they will point you in the right direction. Safety first!
Farmhouse Dining Table Plans
Download a printable version of the plans here
Shopping & Cut List
- 3 Boards – 2″ x 10″ x 12′
- Board #1 – Cut to 72″ / 72″
- Board #2 – Cut to 72″ / 72″
- Board #3 – Cut into 8 x 8.5″ pieces
- 2 Boards – 1″ x 4″ x 6′
- Board #1 – Cut to 32″ / 32″ / 3.5″ / 3.5″
- Board #2 – Cut to 32″ / 32″ / 3.5″ / 3.5″
- 5 Boards – 2″ x 4″ x 8″
- Board #1 – Cut to 36″ (45° ends) / 36″ (45° ends) / 20″
- Board #2 – Cut to 36″ (45° ends) / 36″ (45° ends) / 20″
- Board #3 – Cut to 36″/ 36″ / 20″
- Board #4 – Cut to 36″/ 36″ / 20″
- Board #5 – Cut to 46″/ 46″
Additional Supplies
- 2.5″ Kreg Pocket Hole Screws (60)
- 2.5″ wood screws (12)
- 80 / 120 / 220 grit 5″ sanding discs
- Gorilla wood glue
- Wood filler
- Minwax Pre-Stain Wood Conditioner
- Minwax Dark Walnut Stain (or your choice)
- Minwax Polyurethane Clear Satin
Tools Required
- Kreg Jig
- Jigsaw
- Drill
- 5″ circular sander
- Mitre saw
- Circular saw
Steps
- Cut your lumber according to the “CUTS” column in the shopping list above. To make things easier when it comes time to assemble the pieces, mark the length on each board with a pencil as you cut it.
- Create a template using various size round and square items to create your corbels. I used a combination of plant pots, spray paint cans, and scrap pieces of wood to come up with a design. Trace it onto one of the 8.5″ boards, ensuring the wood grain is running horizontally. Carefully cut the corbel using a jigsaw. Use the first corbel as a tracing guide and cut out the remaining 7.
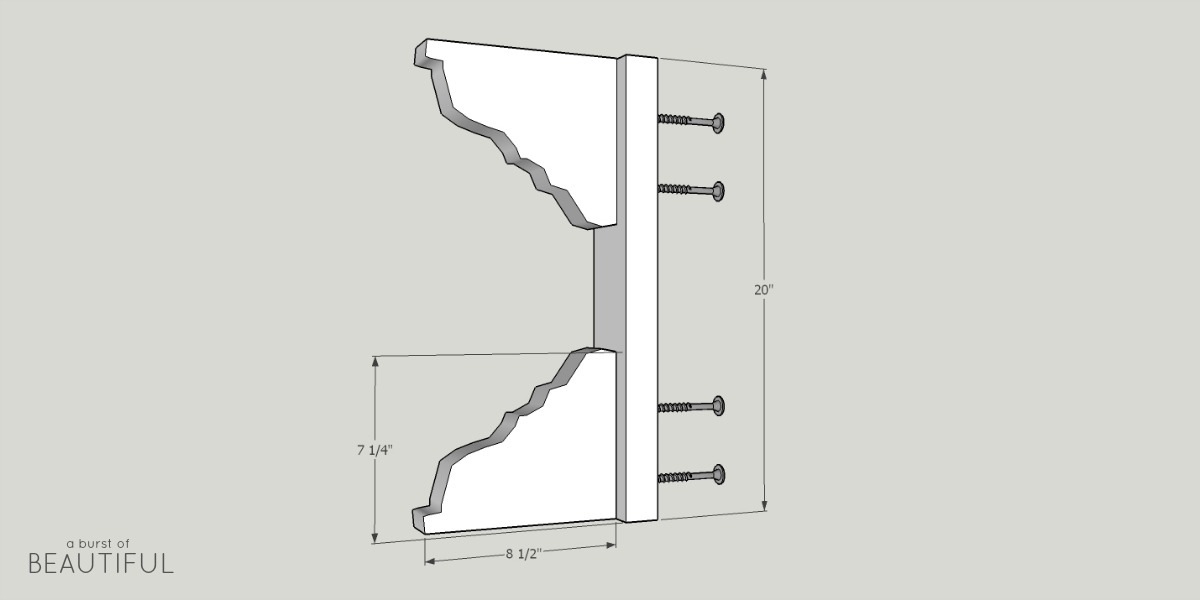
- Create 4 of these using the 20″ boards and corbels by gluing together and drilling 2.5″ wood screws from the back of the 20″ board.

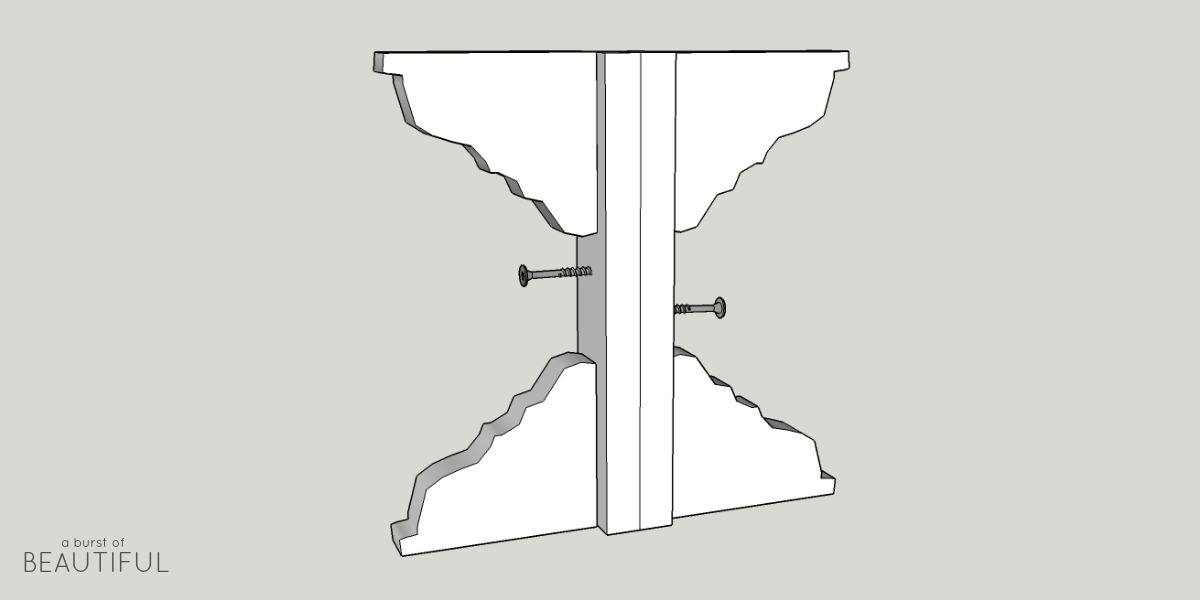
- Attach 2 of these together and secure with wood glue and two 2.5″ wood screws, or you can use a nail gun loaded with 2″ nails.
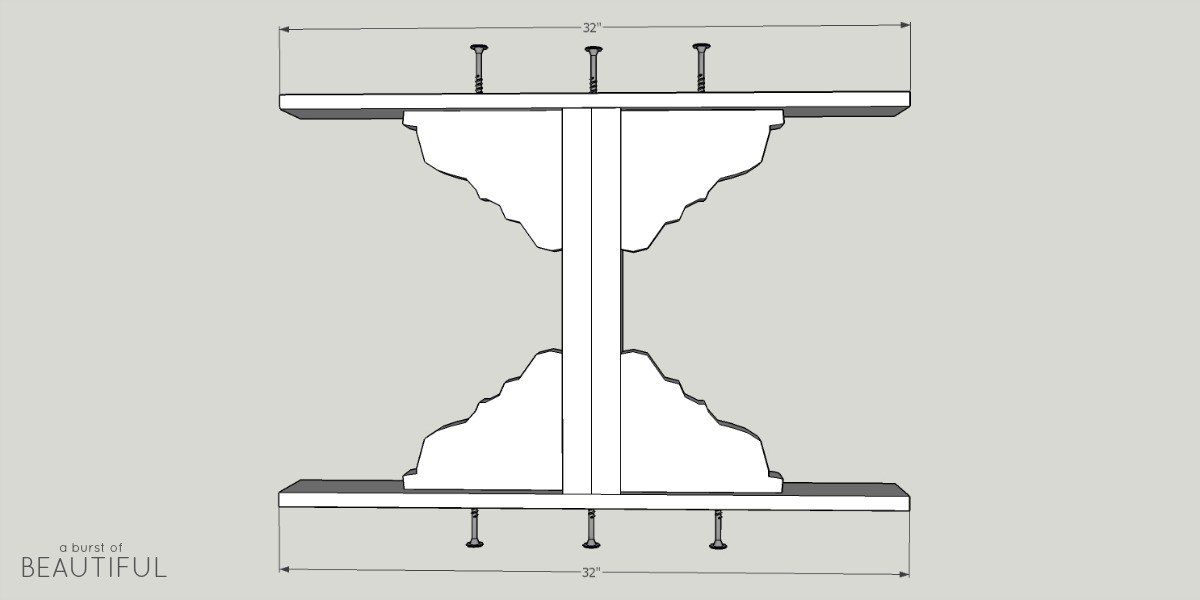
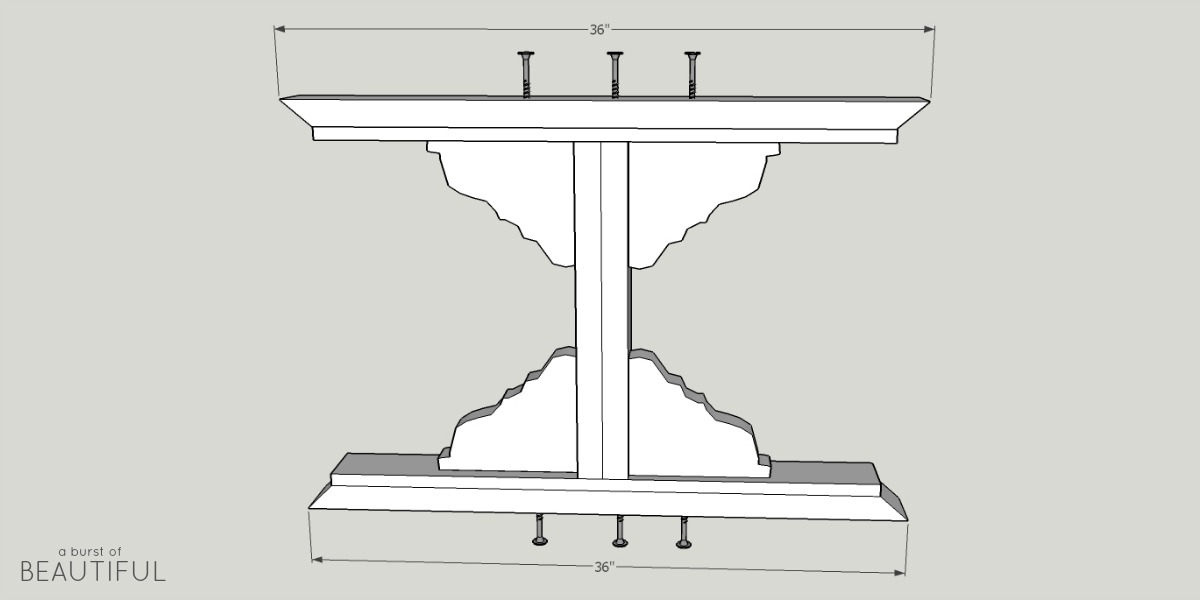
- Next, center and attach a 32″ 1″ x 4″ board to the top and bottom of each piece you built in the last step using 2.5″ wood screws (be careful to drill into a deep part of the corbel or you may go right through). Check to ensure that the boards are level and square so that your table isn’t crooked.
- Then add the 36″ 2″ x 4″ pieces to the top and bottom, ensuring the 45° angles are facing the correct way, with glue and 2.5″ wood screws (again aim for the same thicker area on the corbels.
- Secure a 36″ 2″ x 4″ non-angled piece to the top and bottom of each with 2.5″ wood screws.
- Secure two 3.5″ 1″ x 4″ pieces to the bottom of each leg using two 2.5″ wood screws.
- Sand each leg using 80 grit sandpaper, followed by 150 grit, rounding out any corners, or you can leave them square.
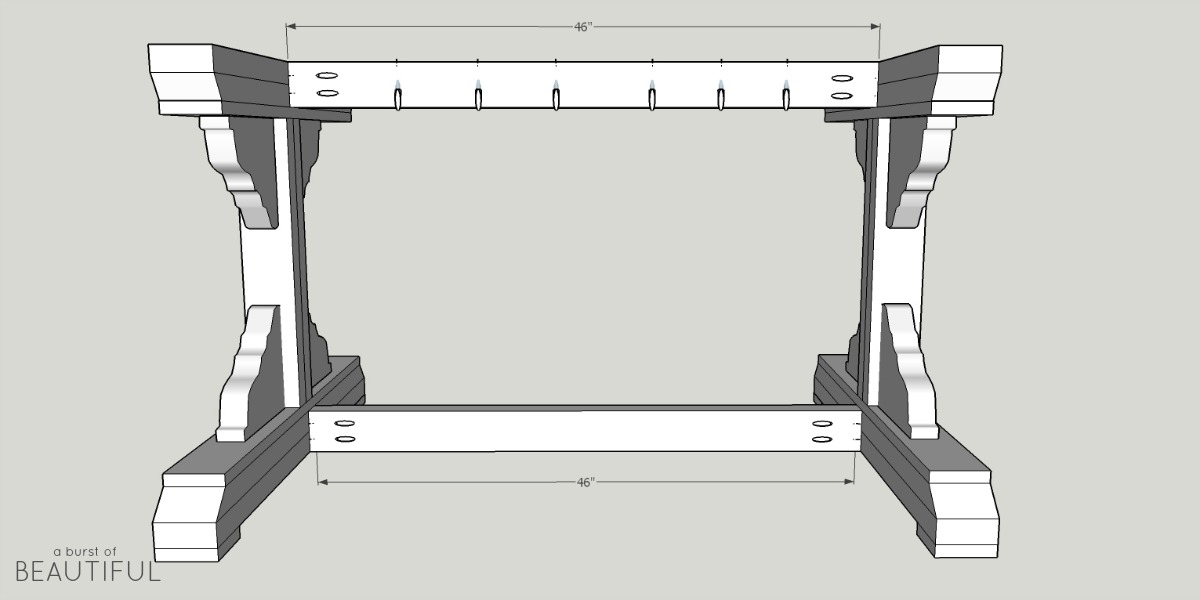
- For the upper 46″ cross-brace, drill 2 pocket holes on each end of the board, but both on the same side so that when your table is complete, you’ll only have pocket holes along one side. Drill 6 pocket holes along the top. You will use these holes to attach your tabletop to the base when finished. For the lower 46″ cross-brace, you will only need to drill the two pocket holes on each end. Square everything up and attach the cross braces to the top and bottom of each leg.
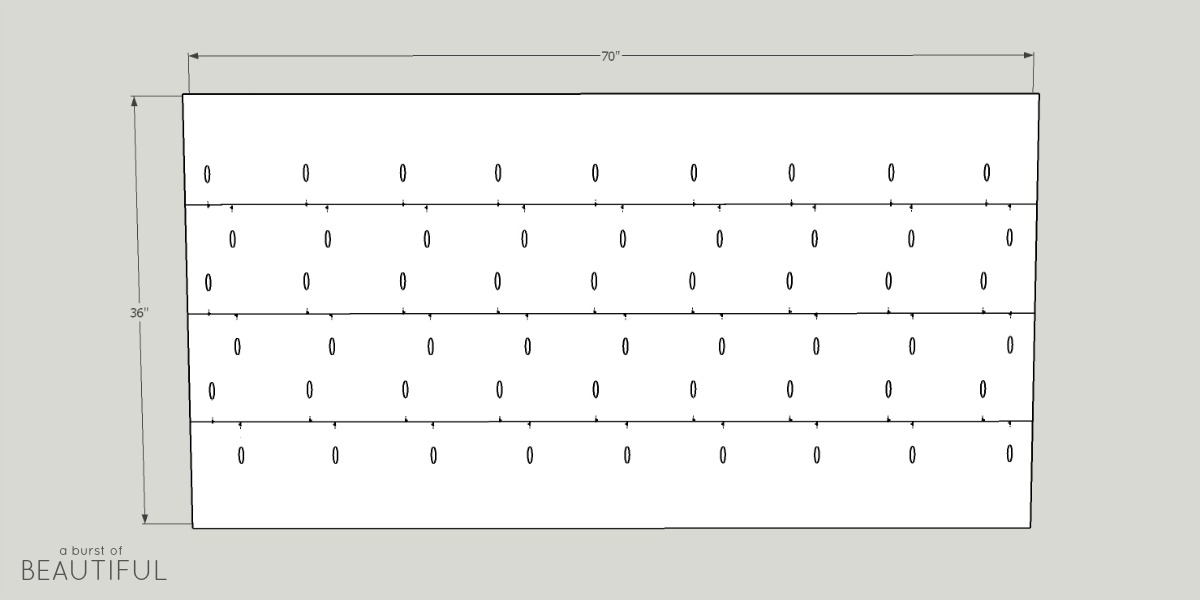
- To create the tabletop, lay down the four 72″ boards and pick the best sides for your tabletop. Once you have done so, flip your boards over so that they are face down on a clean level surface. Line up all of the boards on one side. You will cut the excess 2″ off of the opposite side, or you can leave it as-is if you want a 72″ table.
- Drill pocket holes every 8″, starting 2″ from each side. As you can see from the pattern below, the two end boards only have pocket holes on one side, and the two inside boards have pocket holes on both sides. This will help create a stronger tabletop.
NOTE: If you don’t have a Kreg pocket hole system (which is a must-have if you do a lot of DIY projects), you can try and find some heavy-duty mending plates or you can drill from the tabletop directly into the end pieces and then fill the holes with wood filler. It won’t be as clean looking, but will still look great!
- Use wood glue between the boards and secure with clamps while you screw in the pocket hole screws. Continue this until you have finished all holes.
- Flip the top over and wipe off any excess glue.
- Sand down the top well using 80 grit, then 150 grit, then 220 grit sandpaper to finish.
- Center and secure the top to the base using the pocket hole screw holes on the cross-brace (You might want to wait until you’re ready to move it into your dining room before doing this. The table is very heavy and may not fit through a doorway when assembled).
- Apply Minwax Pre-Stain Conditioner to help the stain absorb evenly.
- Within two hours apply your stain using a wide paintbrush. Let absorb for 5-15 minutes and wipe off the excess with a clean rag.
- Once the stain has dried, apply a satin polyurethane coating on the surface. Allow to dry, sand lightly with a 220 grit sandpaper, and apply a second coat.
- Enjoy making memories at your new table with family and friends for years to come!


Click here to download a printable version of the plans above
This post contains affiliate links, see our full disclosure policy here.
dining room sources
- Wall color – Collingwood by Benjamin Moore
- Hutch – Ikea
- Dining chairs – Ikea
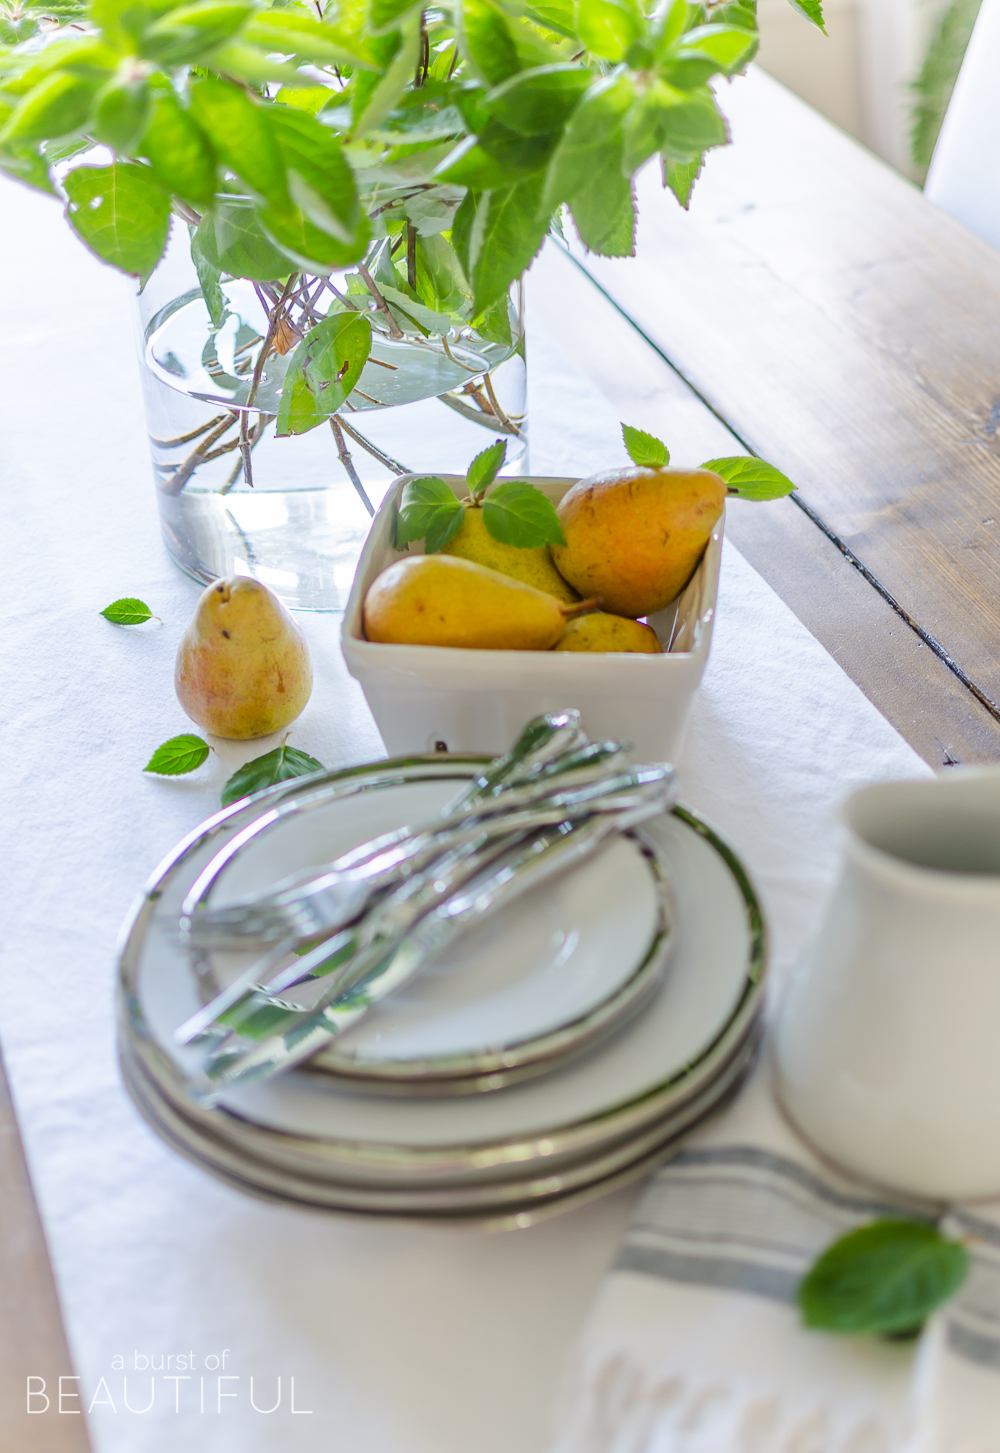
- Berry basket – HomeSense/ HomeGoods (similar)
- Dishes – Pottery Barn (similar)
- Flatware – Vintage (similar)
- Navy & cream ticking stripe pillows – Studio Pillows
- Cream pillows – HomeSense/ HomeGoods (similar)
- Window bench fabric – Local (similar)
- Curtains – Ikea
- Chandelier – The Home Depot (similar)

Leave a Reply