
This post contains affiliate links, see our full disclosure policy here.
Thank you for helping support our blog.
One of the rooms in our home I am most proud of is our kitchen. We have worked really hard to create a beautiful, inviting and functional space for our family using what was already here and carrying out a lot of do-it-yourself projects.
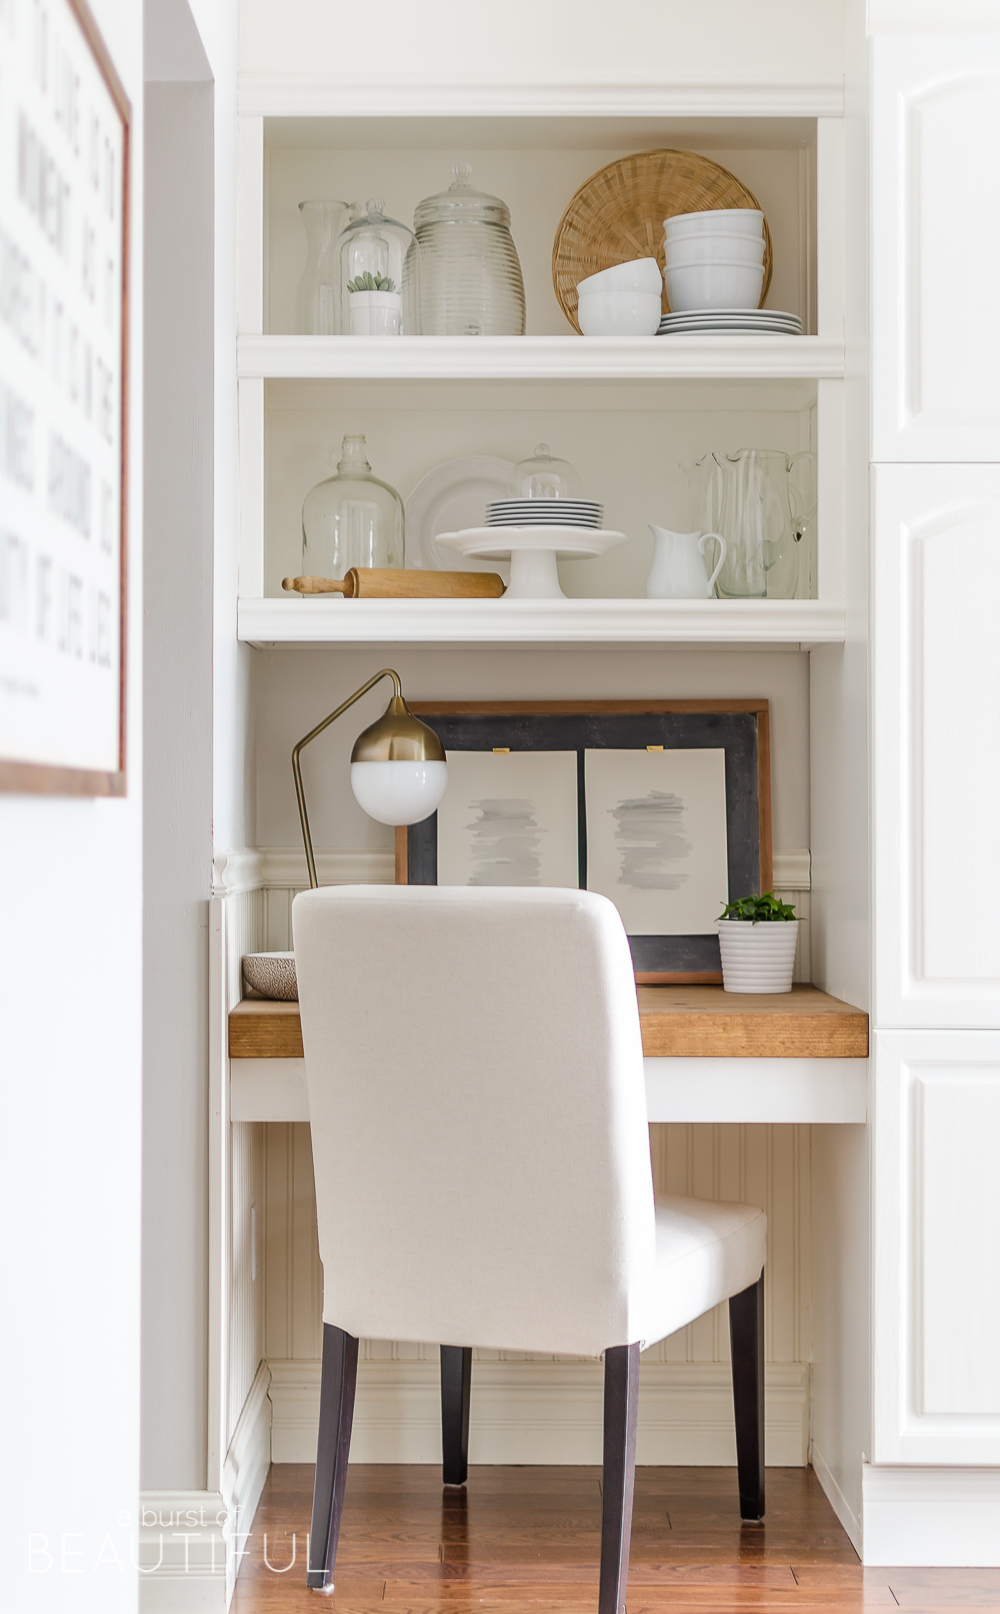
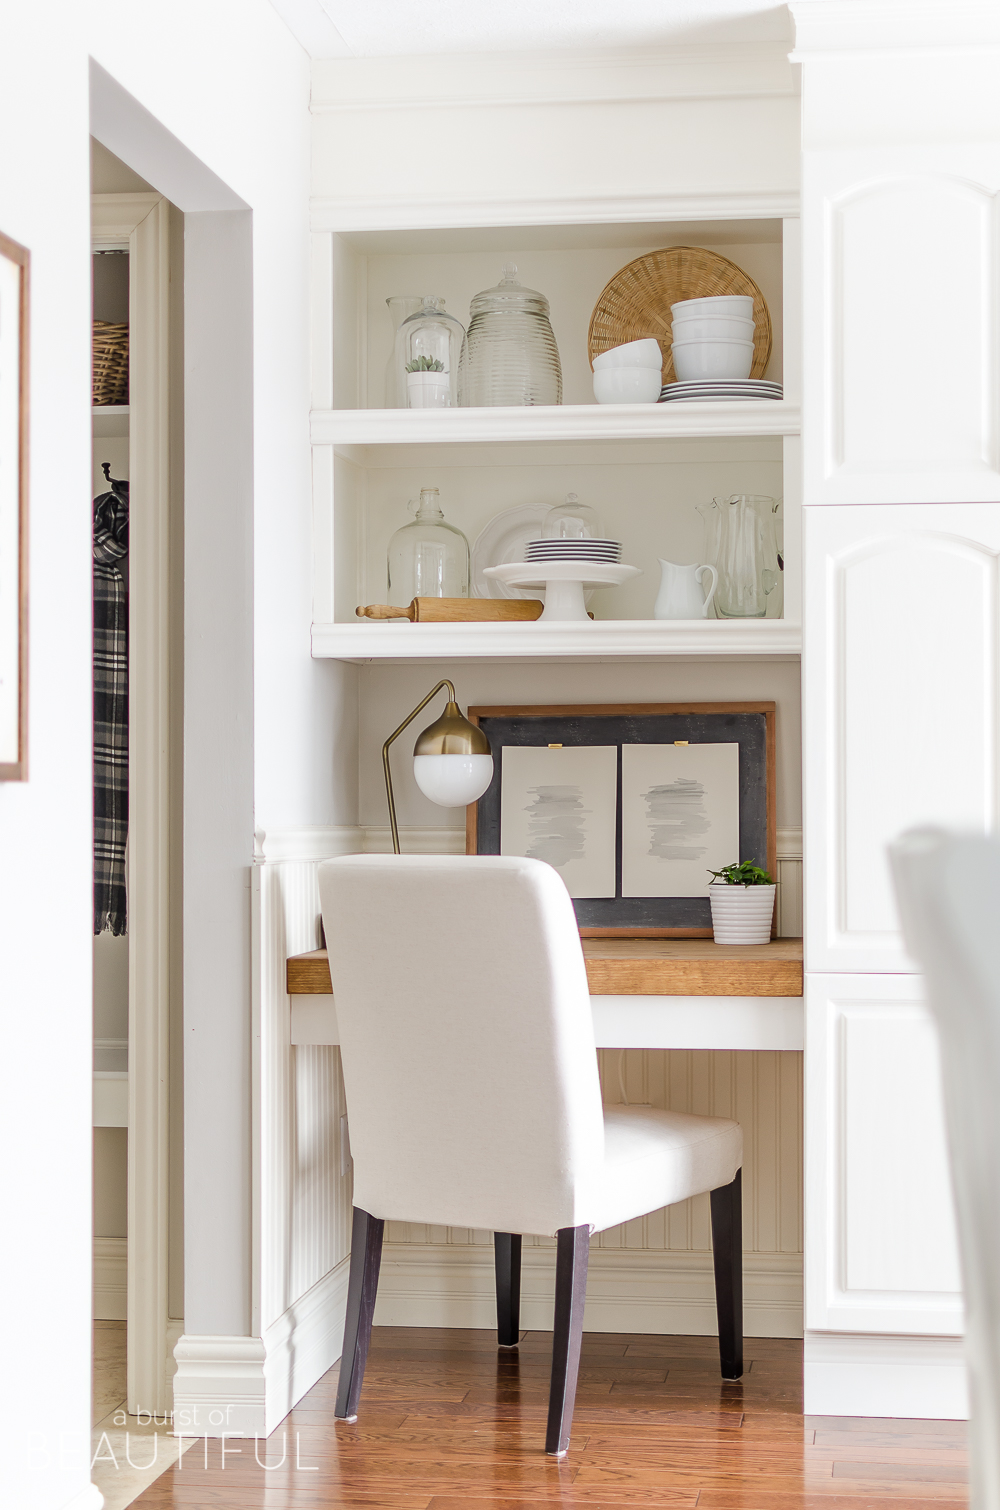
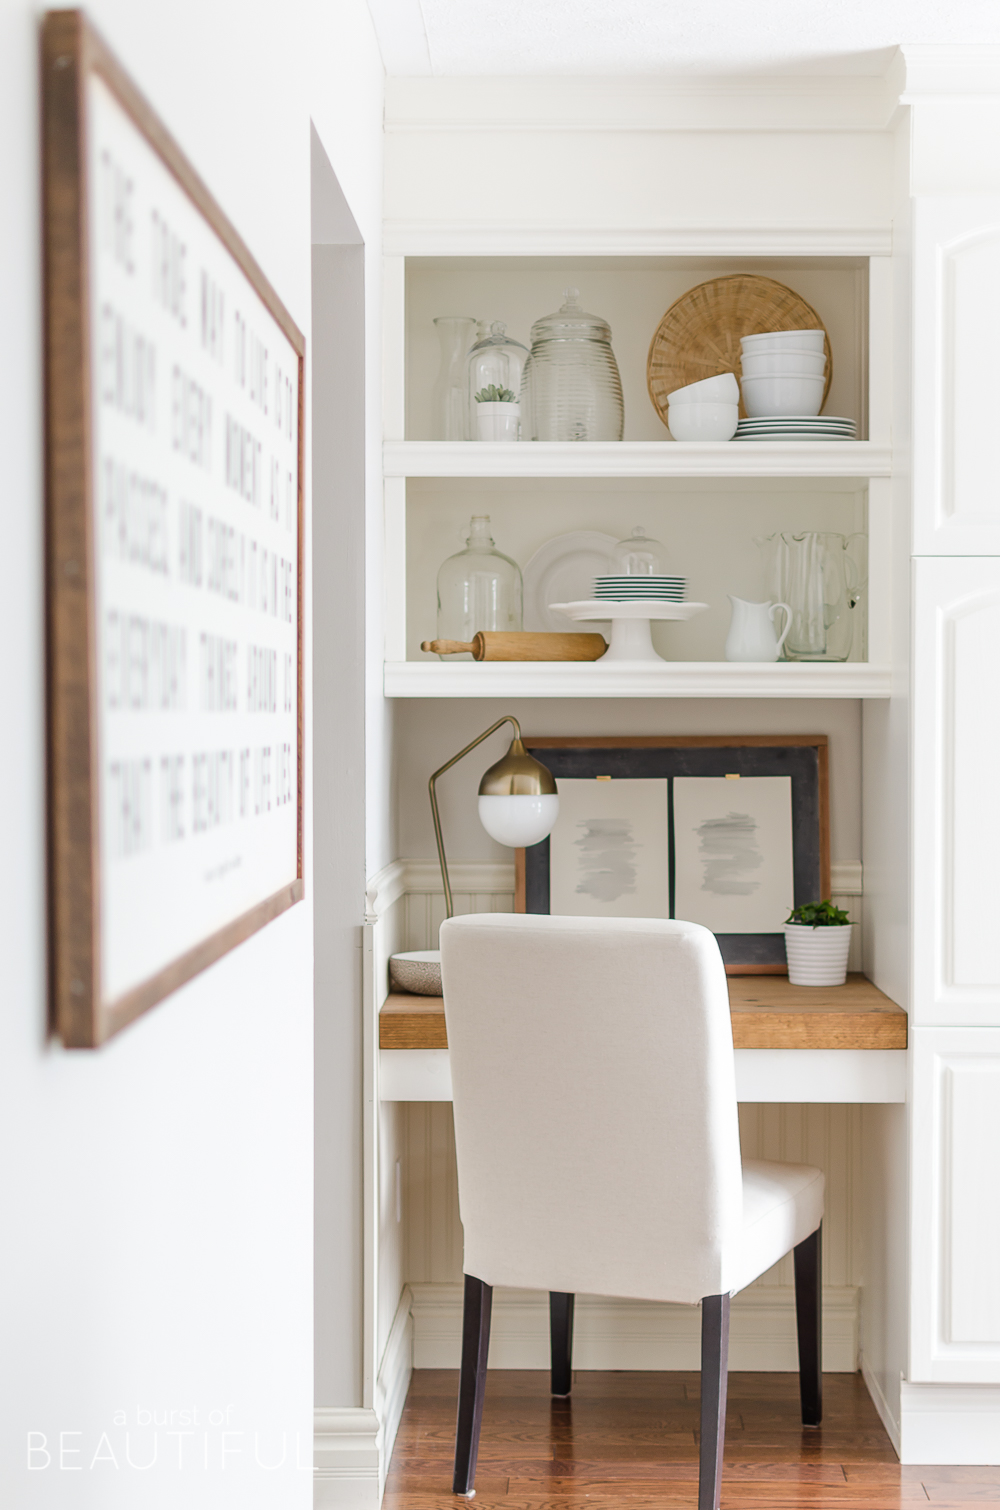
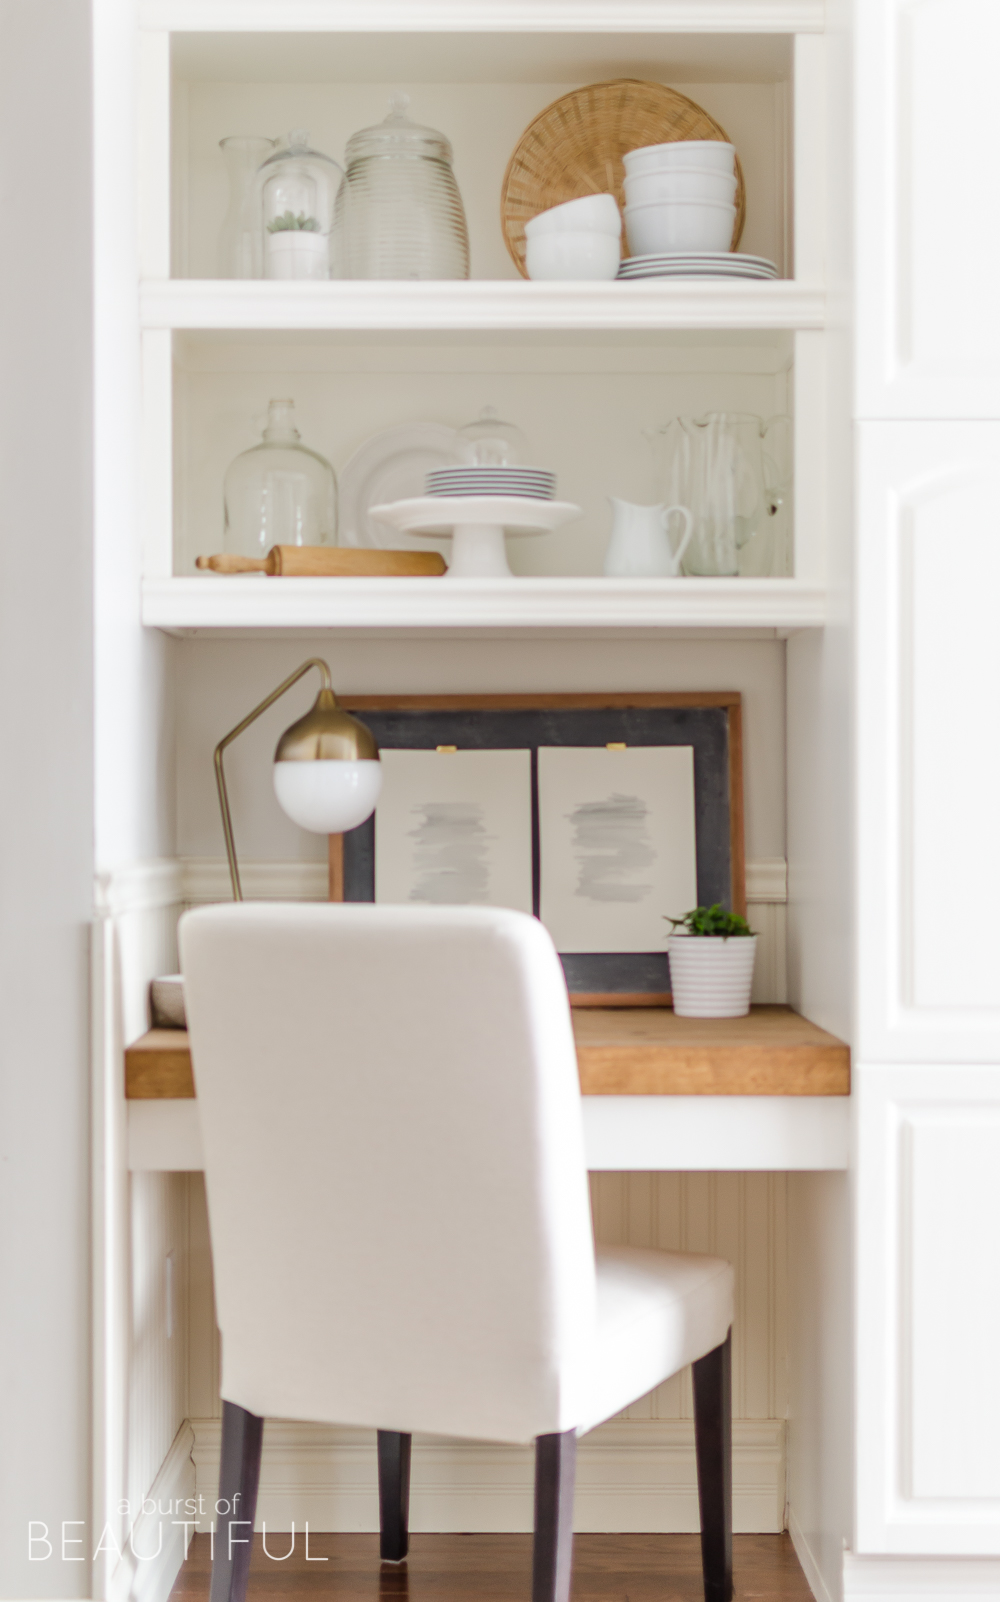
During the holidays we shared the latest update to our kitchen, these beautiful DIY floating desks with storage. And as promised, today we are sharing how we designed and built them.
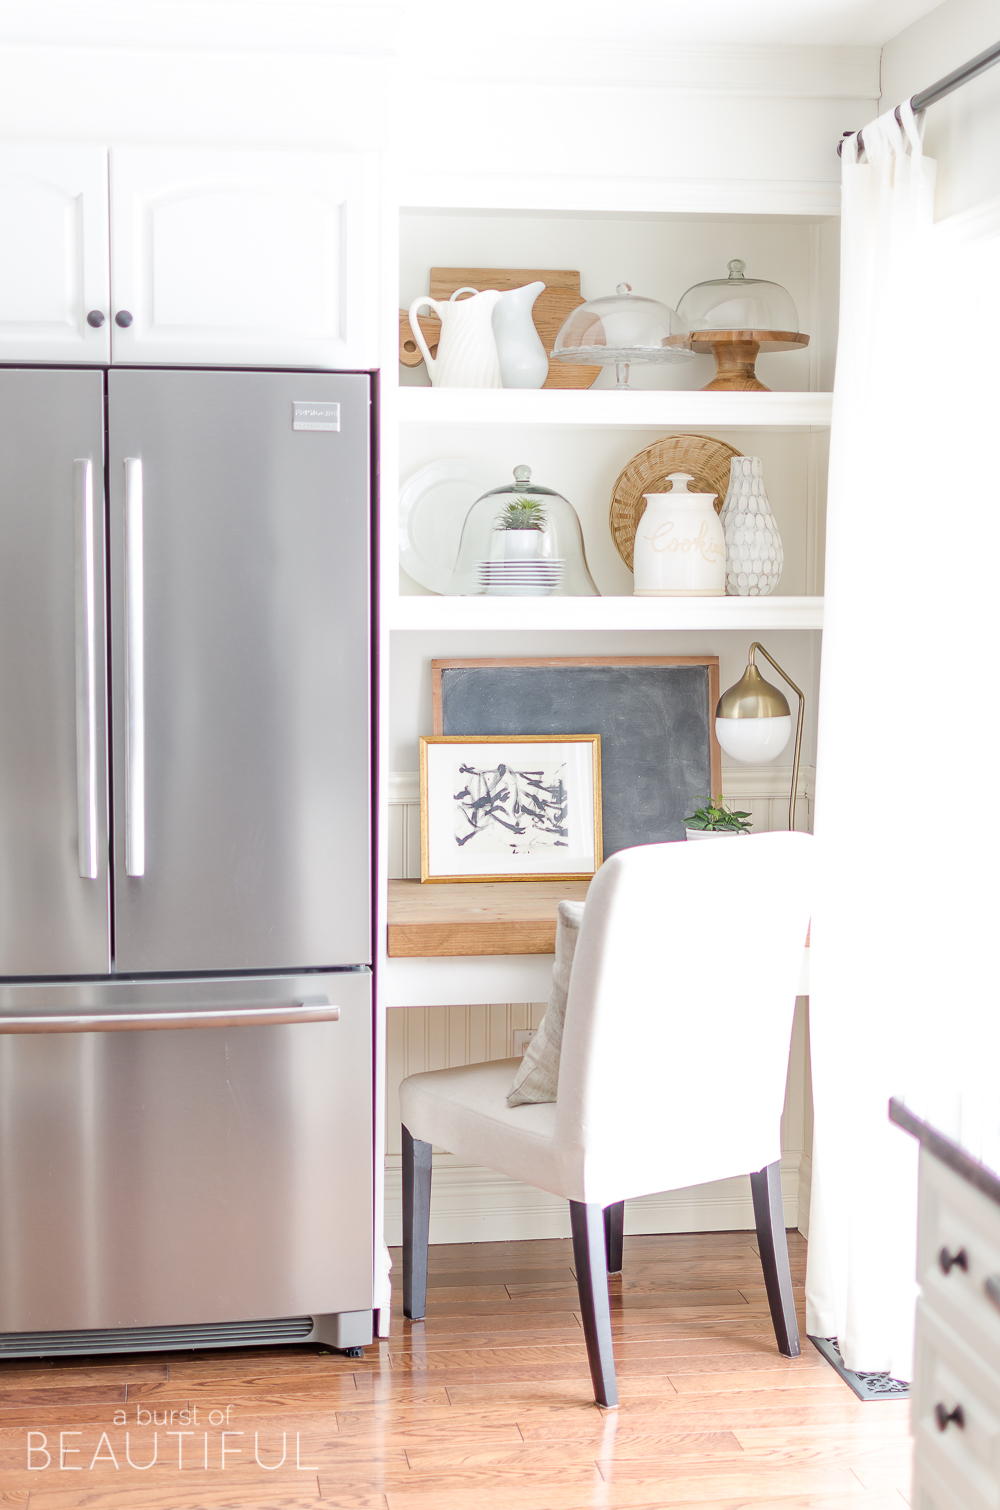
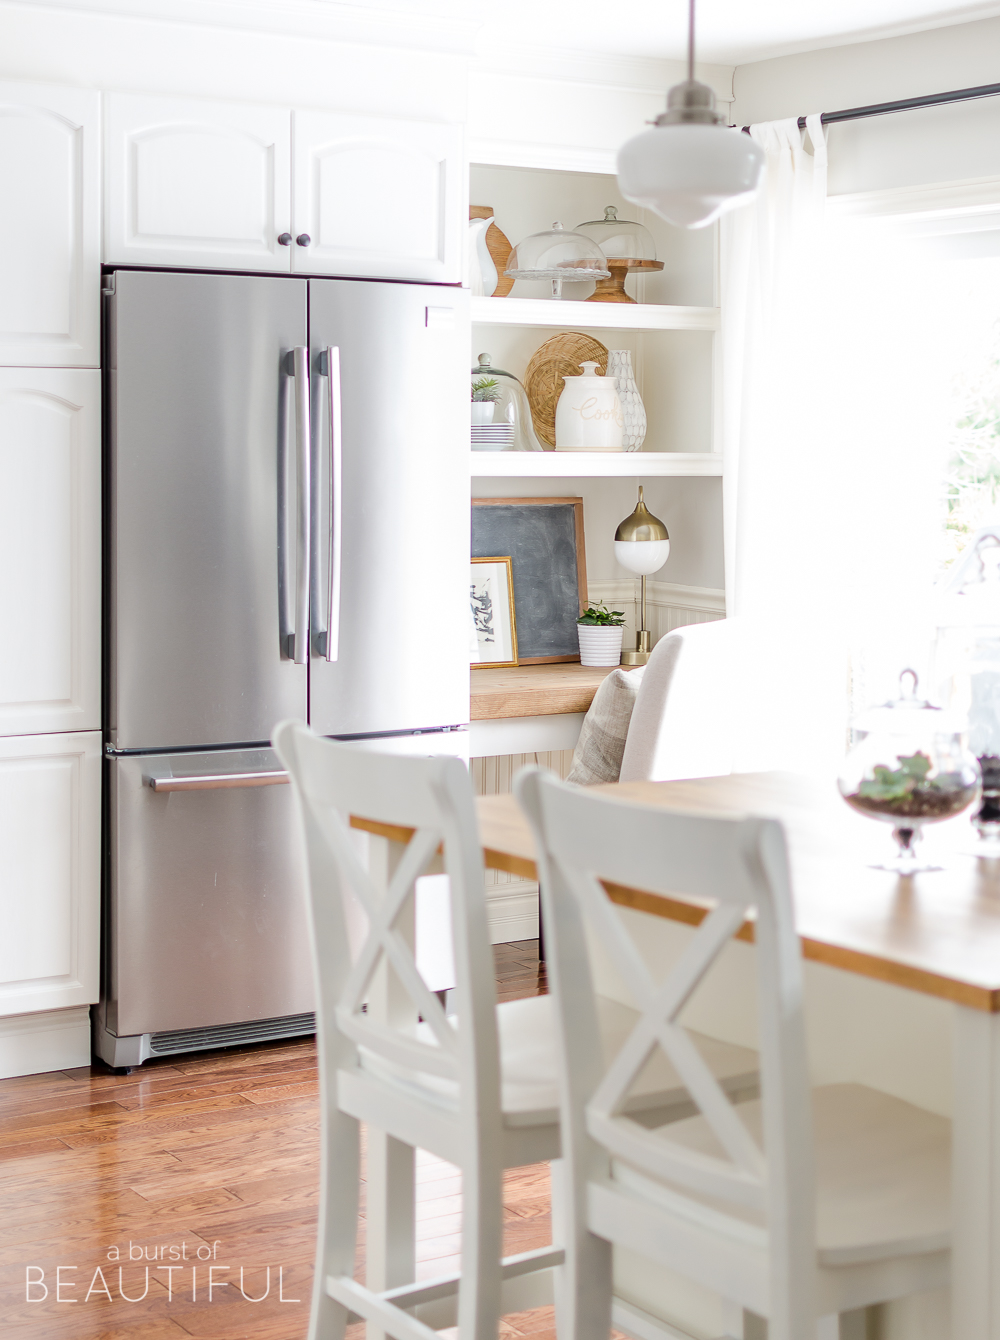
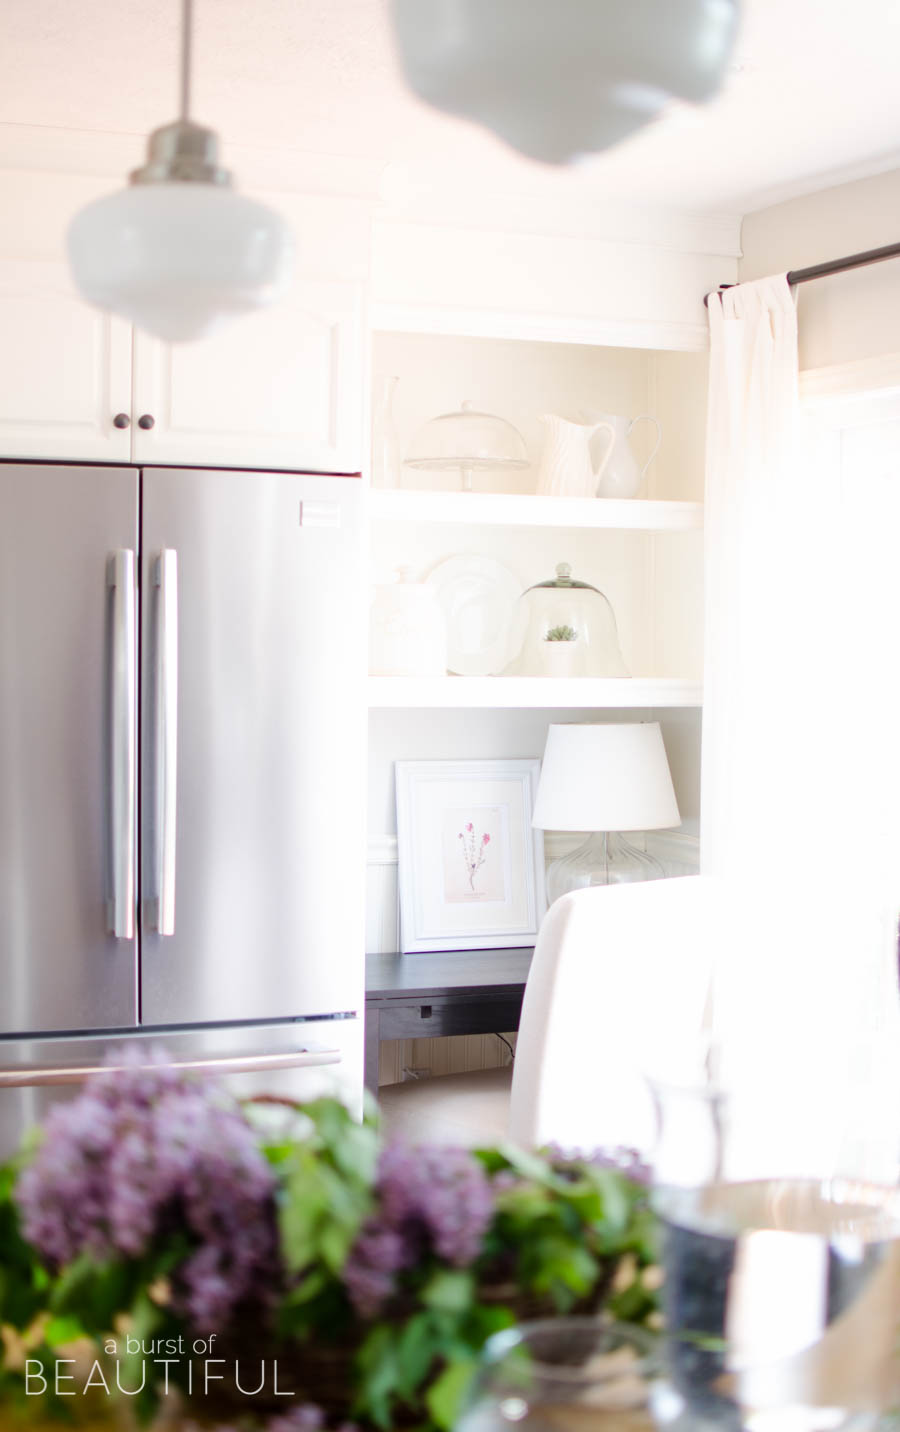
But first, I want to take you back a few years to when we moved into our home and our kitchen looked nothing like it does today (you can see a few before photos here). The fridge and pantry were originally on the wall that our hand-lettered sign now hangs, creating an awkward layout. To create more space we moved both the fridge and pantry cabinets to the wall you see them on now. It immediately opened up the kitchen and gave us the space to add the island we wanted.
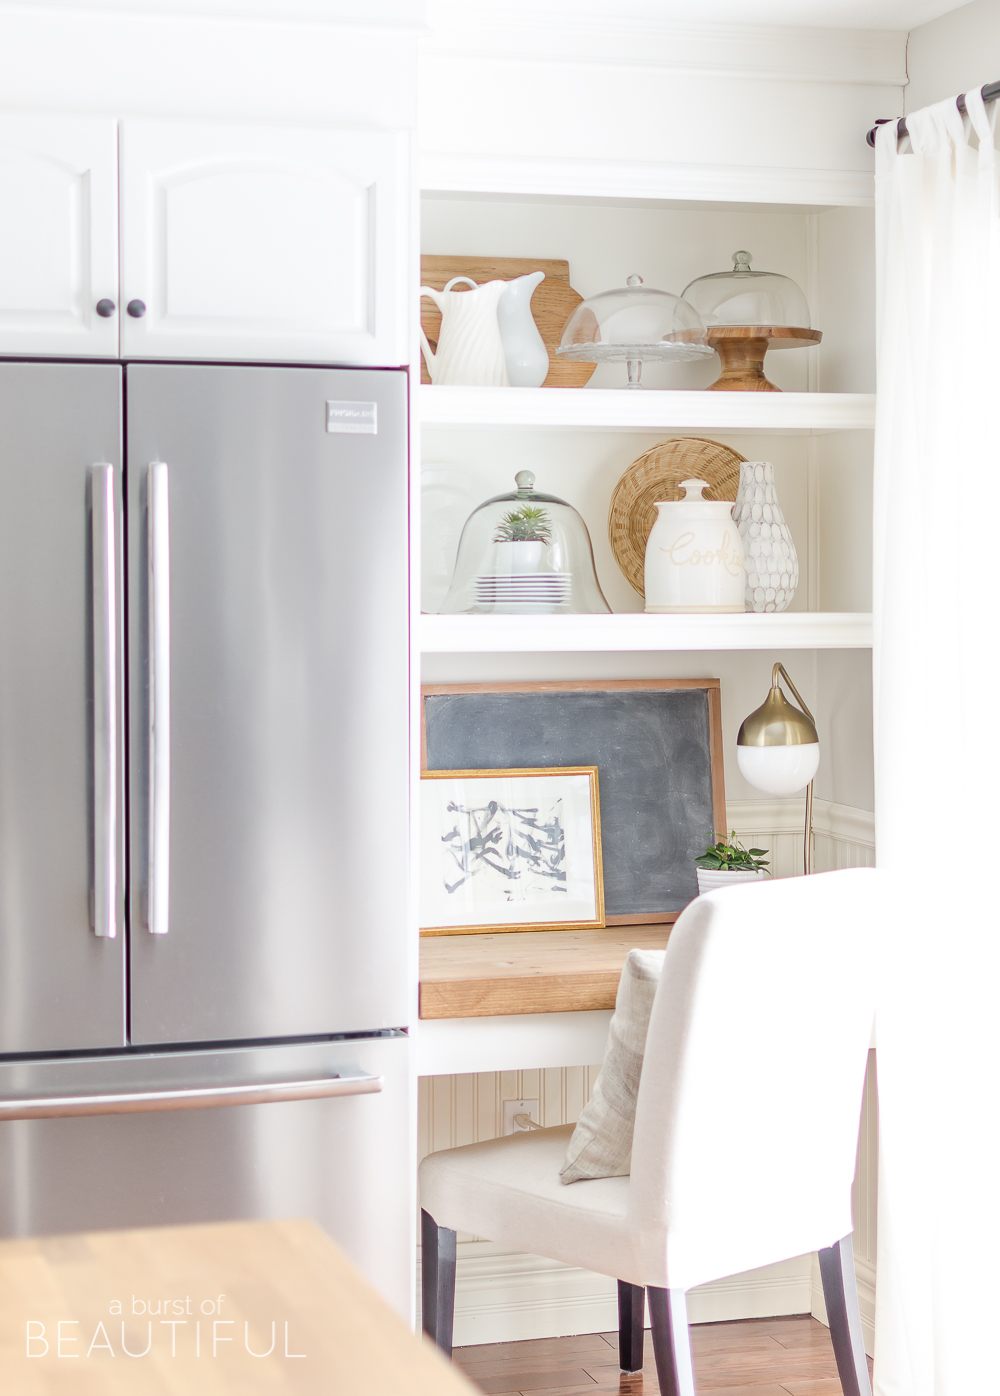
Making this move was great for the flow of our kitchen, but the pantry and fridge were lost against that big expanse of wall. That’s when our next kitchen project started, we built open shelving on either side to fill in the empty space, and underneath we added these simple black tables from Ikea (I don’t really have a great example of these tables as I tried my best to keep them out of our photography!).

It worked for a time, but late last year we decided to update this space yet again. We wanted to mimic the look of our island’s butcher block countertop with simple, streamlined floating desks. After we discussed the design, Nick got to work making them a reality.
GET THE LOOK

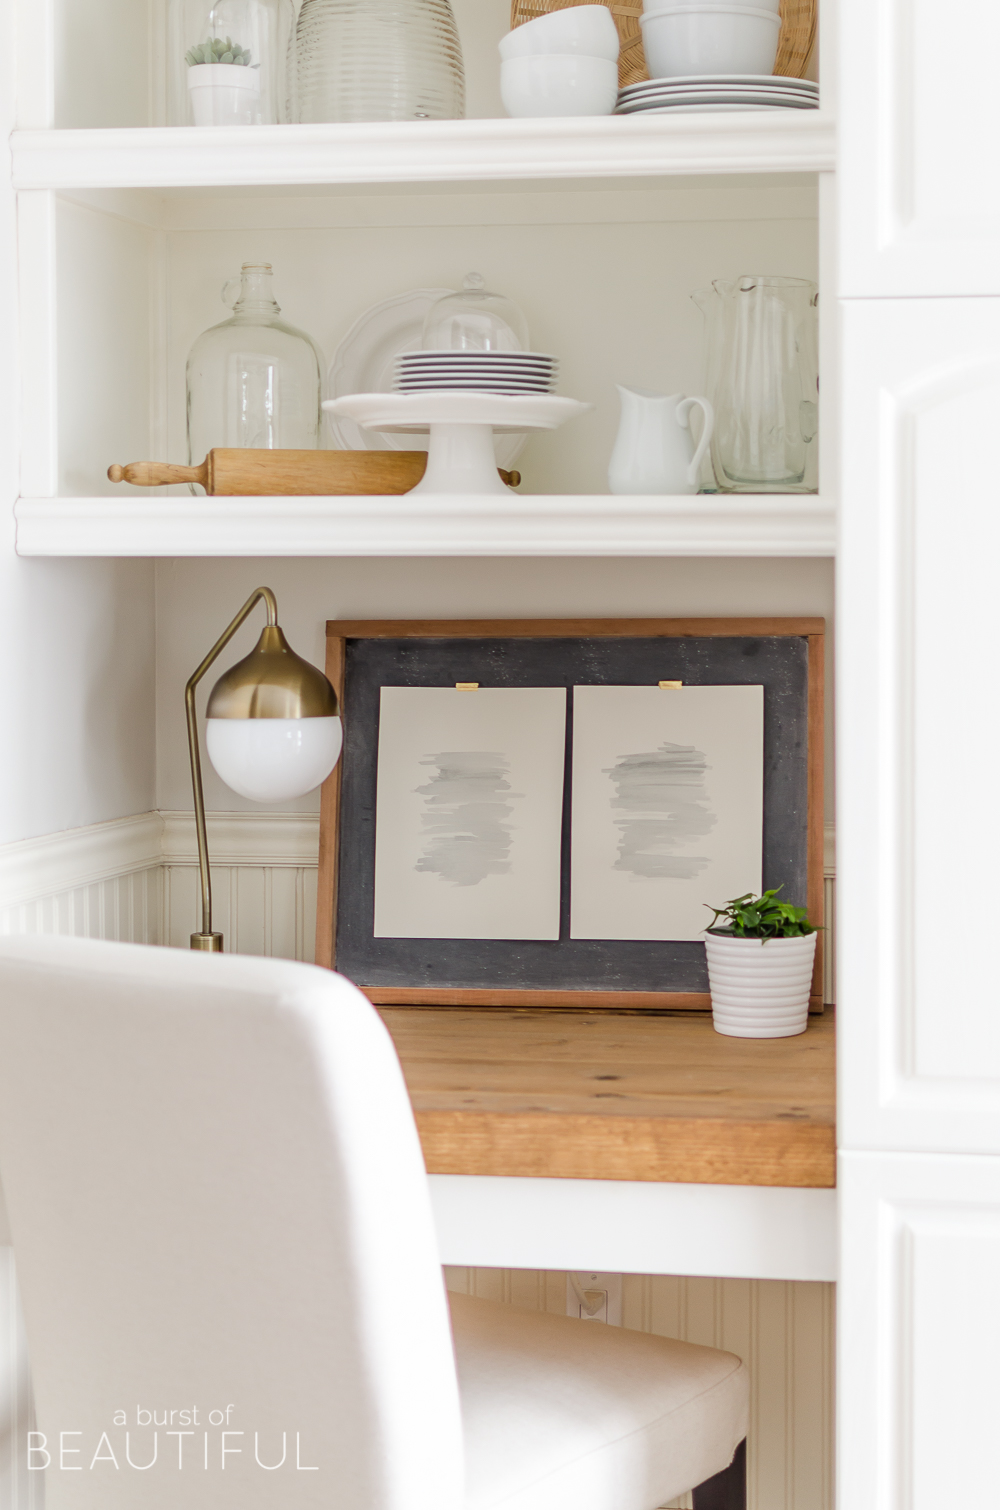
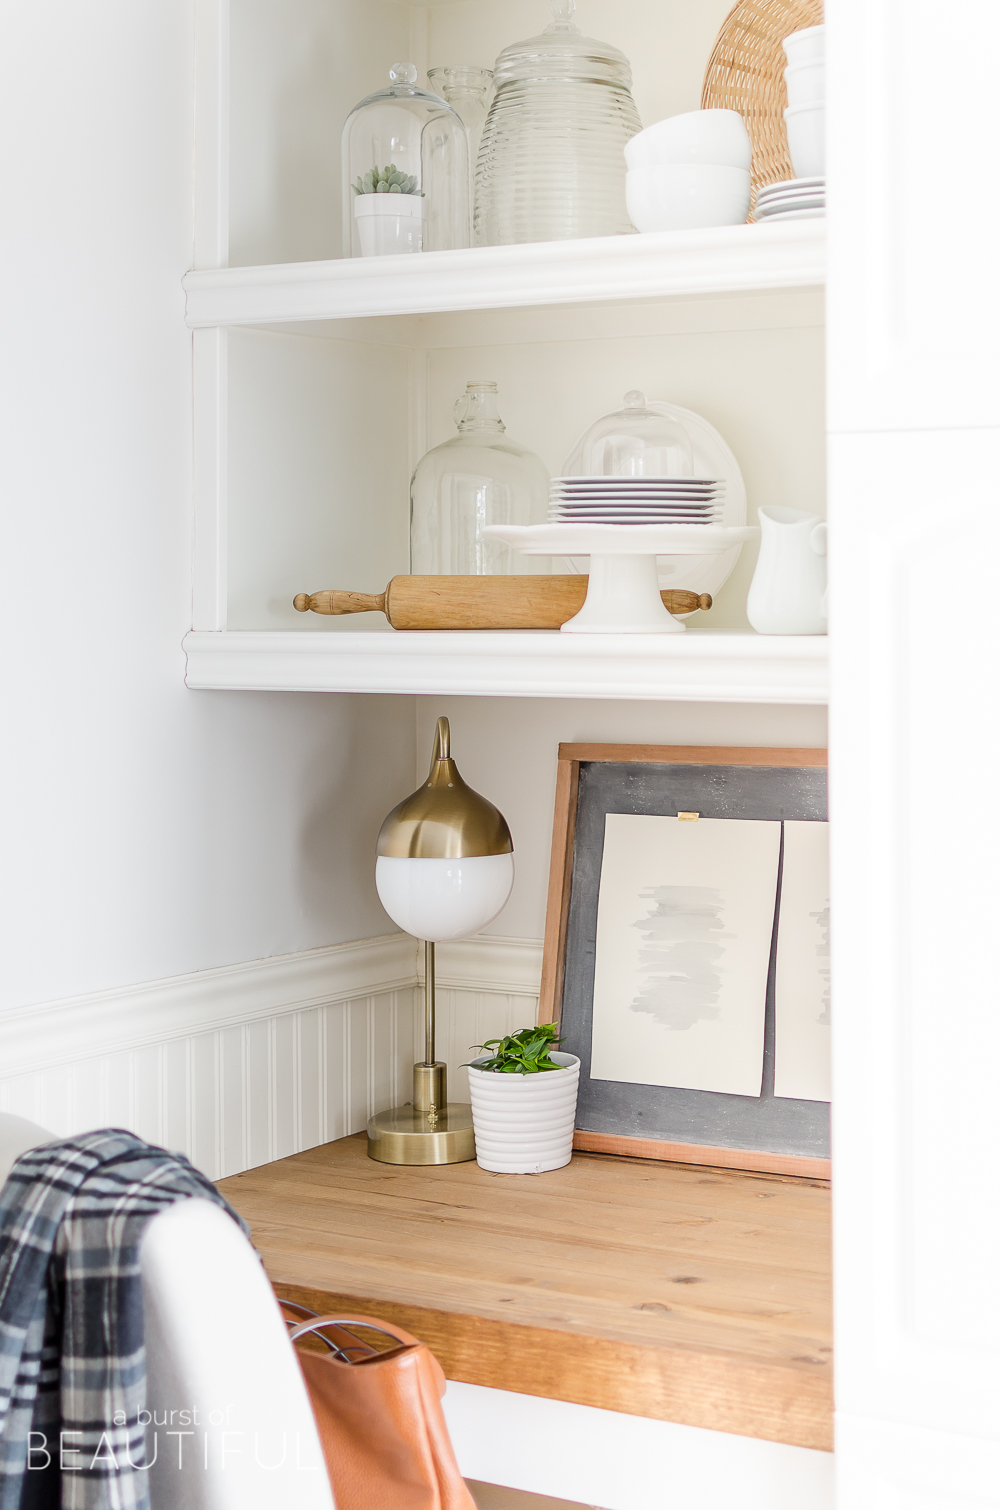
Now, this little built-in area of our kitchen looks like it has always been there. The contrast between the white cabinets and the warmth of the natural wood desks catch me every time I walk into our kitchen, and I just love the simple design.
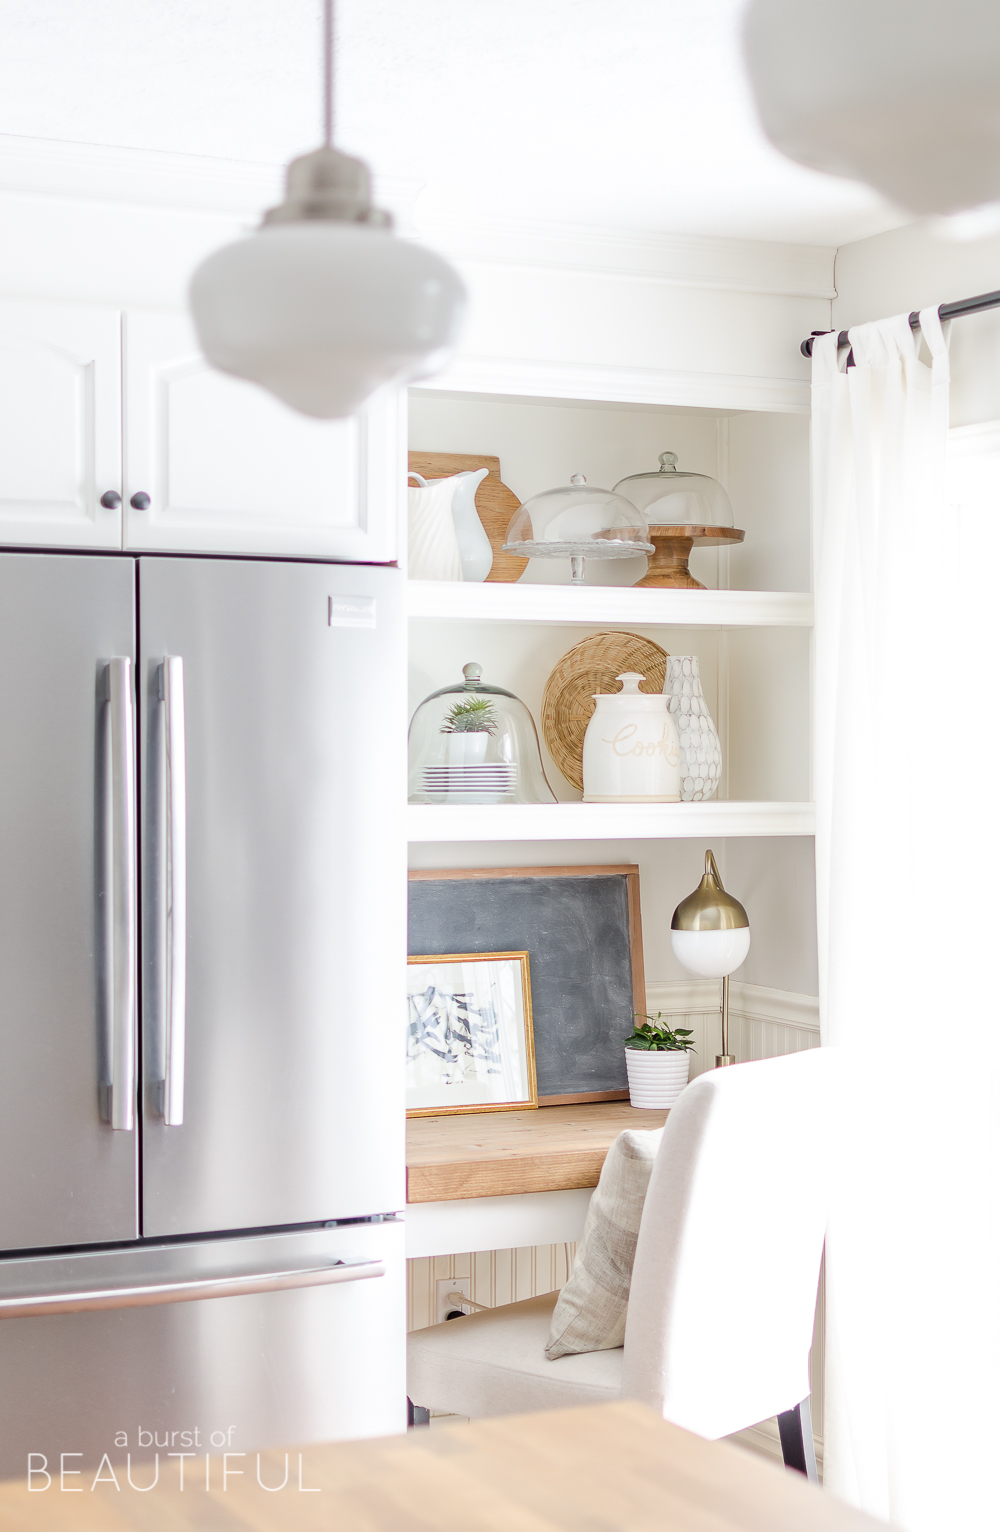
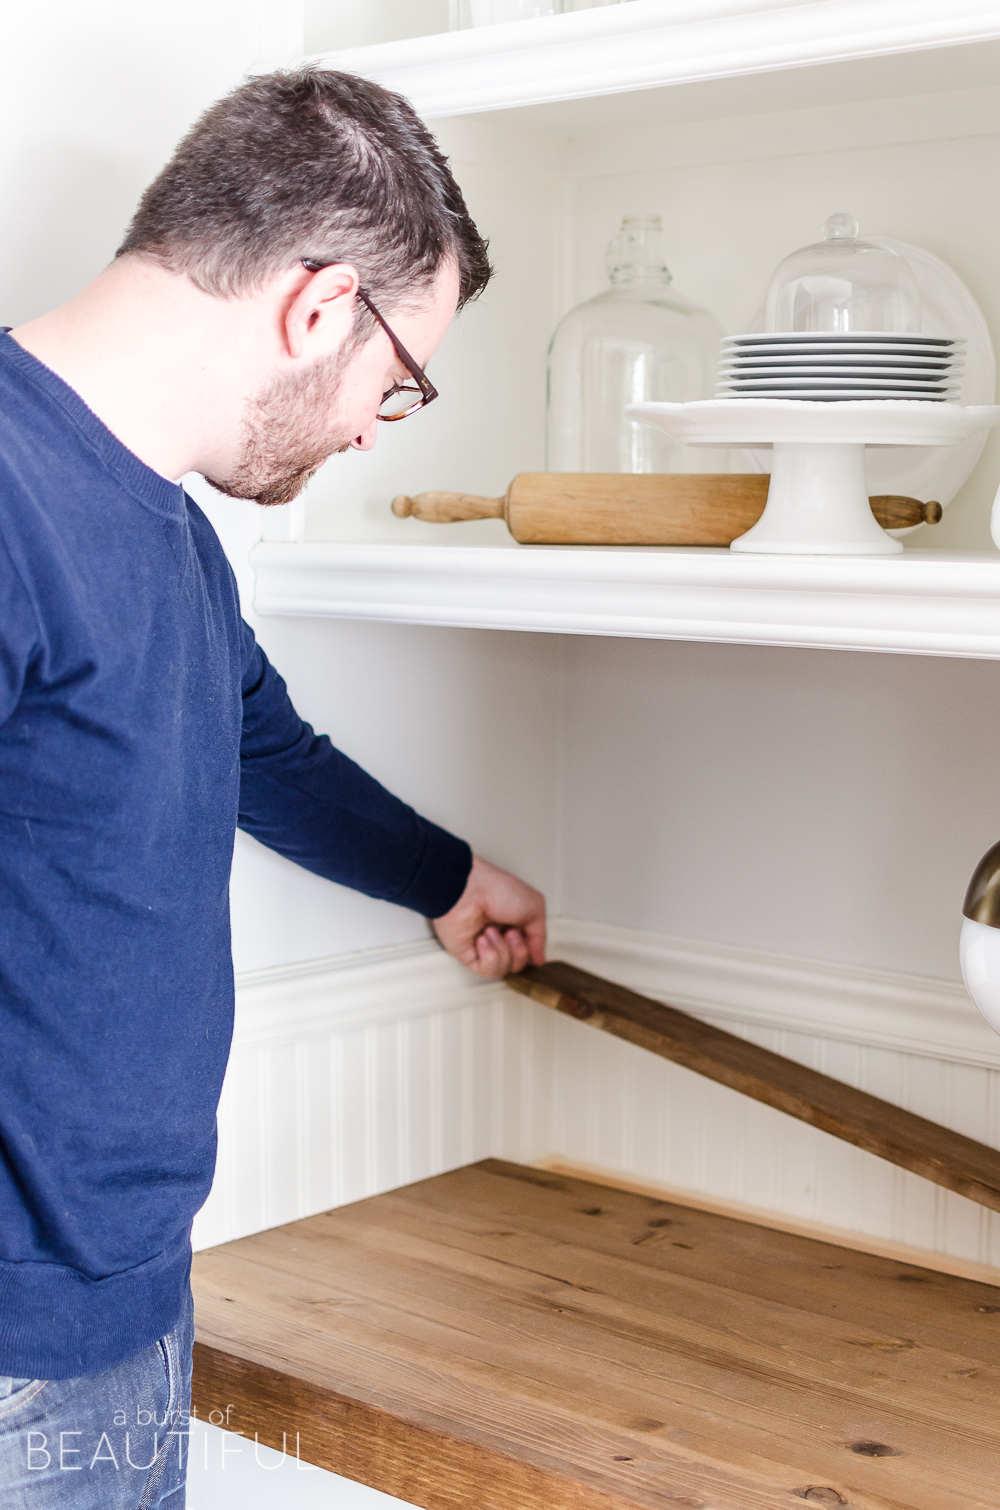
In keeping with the clean, streamlined look of the desks we designed built-in storage to hide unsightly power cords and chargers. There is a small length of wood at the back of each desk that simply lifts to reveal a hidden pocket – it’s the perfect solution for keeping the desks looking clean and organized.
Just before Nick gets to the tutorial on these floating desks I wanted to share a little bit about the art you may have noticed in these photos. Recently I shared a little about my creative passions and my hopes for this year on Instagram (you can read the post here). I was inspired by this beautiful gallery wall created by my friend, Lucy, she is such a talented artist, and I felt encouraged to try my own abstract watercolor paintings – these are my first attempt. 🙂 And the abstract-like painting on the other side of the pantry (in the gold frame) is actually a finger painting by our daughter. We are truly trying to embrace and nurture creativity in our home, and I love being able to display our own works of art.
DIY Floating Desk with Storage
Here are the instructions on how we built a 36″ x 25″ floating desk. You can tailor the measurements to fit your space, or if you are not building your desk between two walls, you can add legs at the front using some 2″ x 4″ boards or turned legs from your local hardware store.
Materials
2 – 1″ x 6″ x 8′ pine boards
2 – 1″ x 4″ x 8′ pine boards
1 – 3/4″ x 20″ x 36″ Pine Shop Shelving (or you could use plywood and cut it to the proper size)
10 – 2 1/2″ construction screws
32 – 1 1/4″ Kreg pocket hole screws
Wood Glue
Minwax Pre-Stain Wood Conditioner
Minwax Provincial Wood Stain
Tools we used on this project
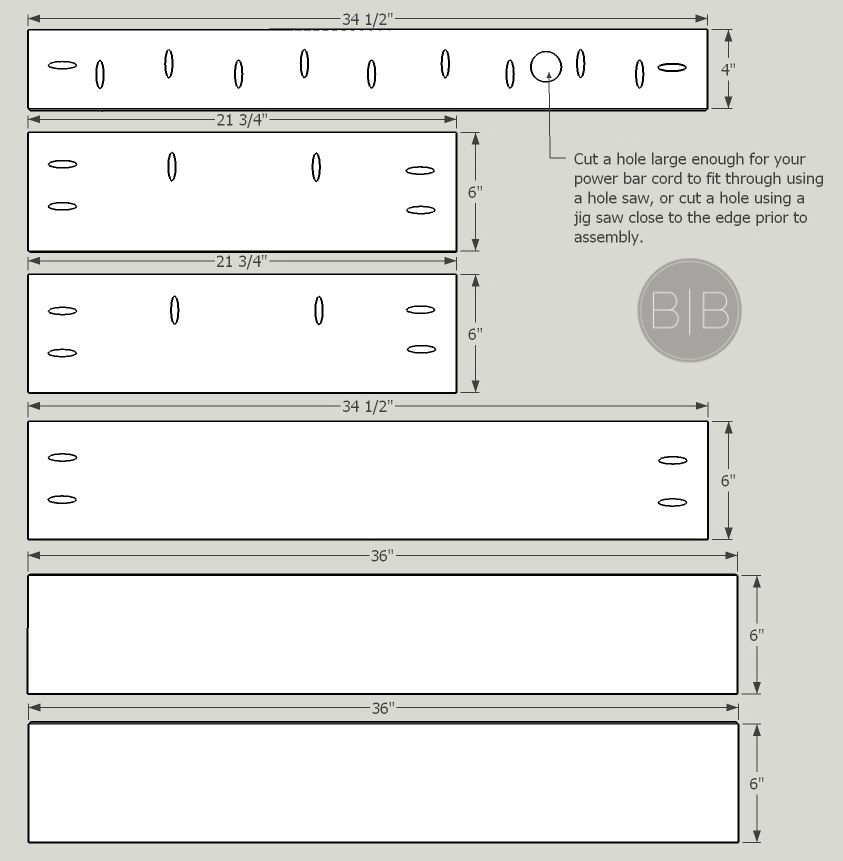
Step One – Frame Cuts
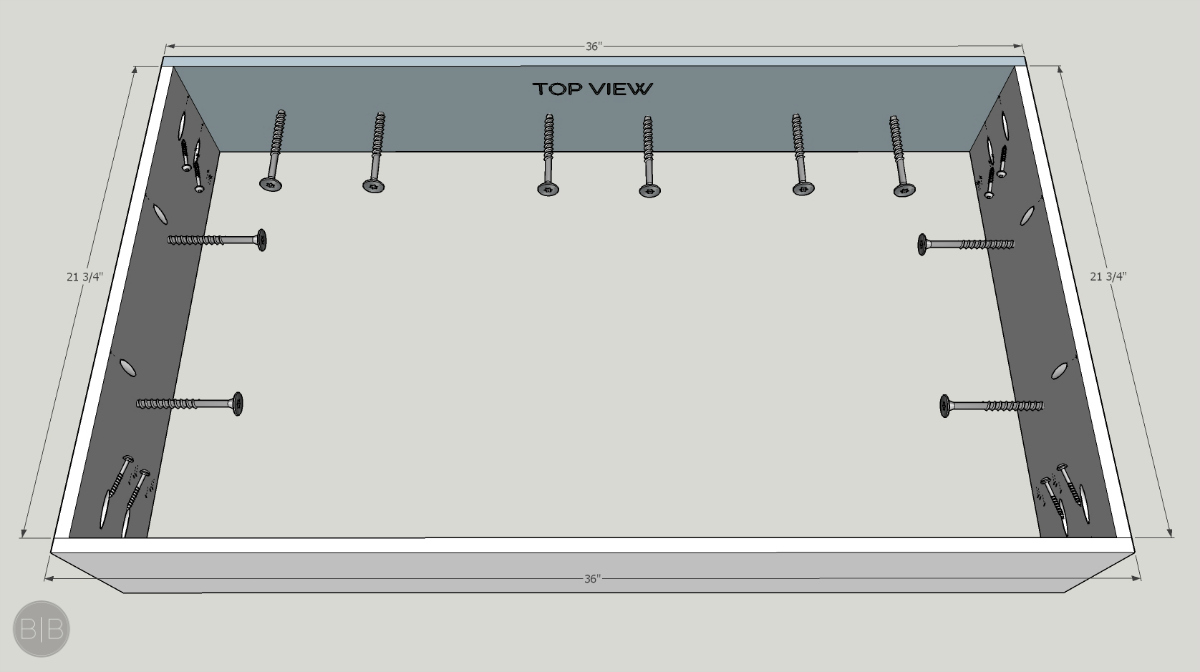
- Cut the pieces for the frame based on the diagram below.
- Using a Kreg Jig, drill all of the pocket holes indicated by the oval marks.
- Cut a hole large enough for a power bar cord to fit through using a hole saw on your drill, or you can also cut a hole using a jigsaw close to the edge of the board prior to assembly.
 (Click on image for larger view)
Step Two – Frame Assembly
- Determine the desired desk height. Typical desk height is 28″, but if you’re looking to make this counter height, go with 36″. Subtract 3/4″ to allow for the top of the desk and using a level draw a line on the back wall. Locate wall studs and secure one of the 1″ x 6″ x 36″ using wood glue and 2 1/2″ construction screws.
- Using a level, draw a level line on each of the side walls, matching up with the piece you just attached to the back wall. Locate wall studs, using a stud finder, and secure the 1″ x 6″ x 21 3/4″ boards using wood glue and 2 1/2″ construction screws, ensuring that the pocket holes are facing inward, not towards the wall. Screw the side boards to the board on the back wall using 4 – 1 1/4″ pocket screws for extra stability.
- Attach the second 1″ x 6″ x 36″ board to the front using wood glue, and secure with 4 – 1 1/4″ pocket hole screws.
(Click on image for larger view)
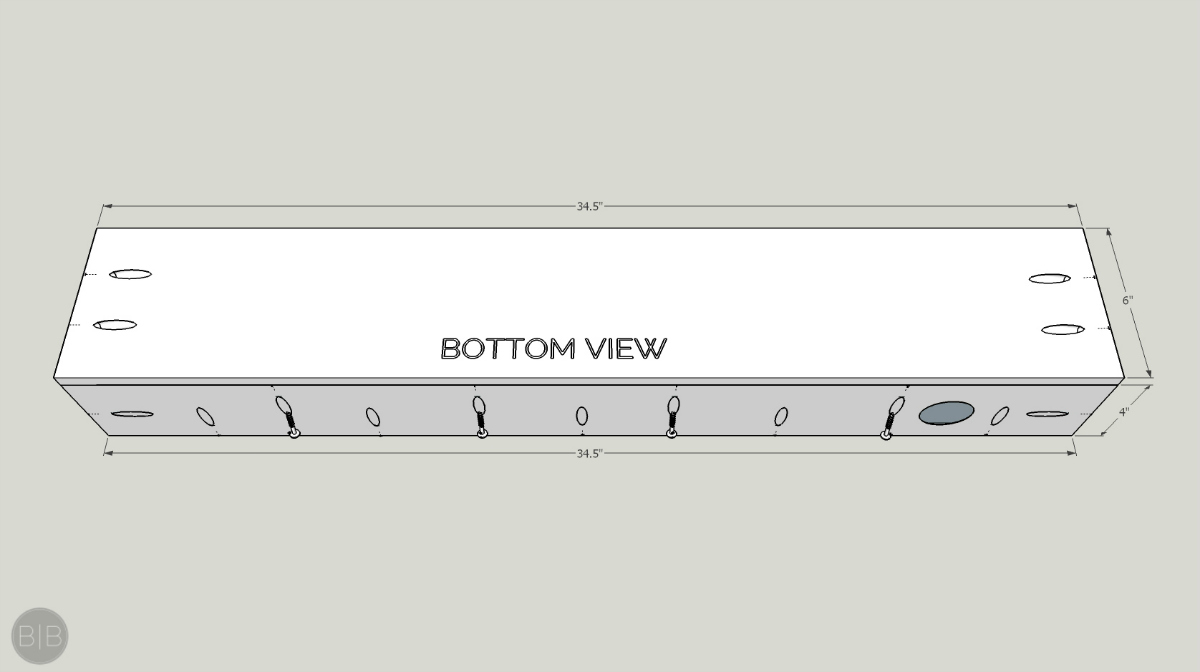
Step Three – Hidden Storage Box Assembly
- Assemble the bottom and side of the box using 4 – 1 1/4″ pocket screws.
(Click on image for larger view)
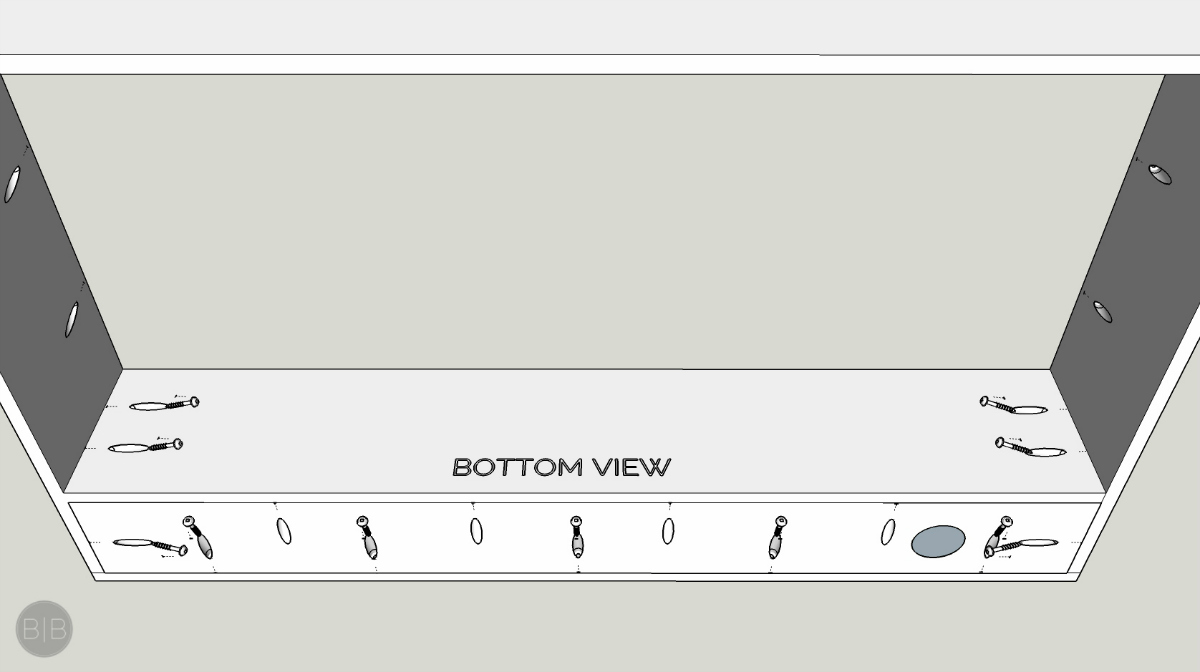
Step Four- Install Hidden Storage Box
- Have someone hold the box in place while you attach it to the back of the frame and sides using 11 – 1 1/4″ pocket screws.
(Click on image for larger view)
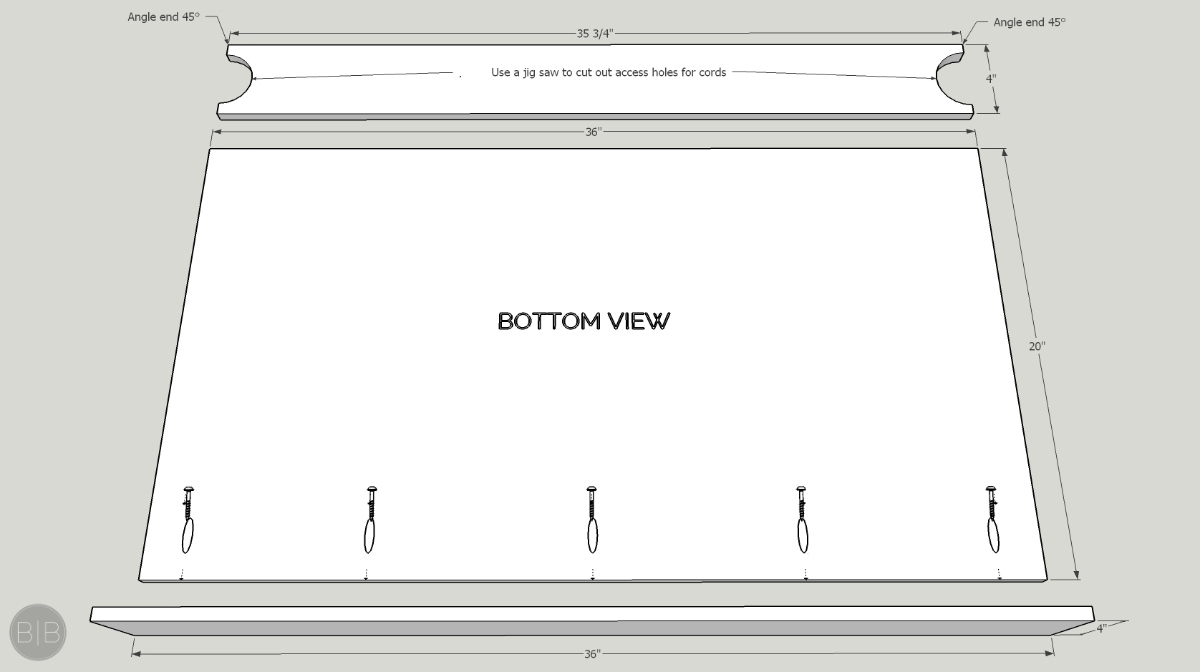
Step Four- Cut and assemble the desktop
- Cut pieces to the sizes shown below (note the 45° angles on ends of the 35 3/4″ piece – this will make it easier to take the board in and out when accessing power cords). Dry fit the 20″ x 36″ piece and make any cuts necessary to make it fit. Remove it and lay it top side down.
- Drill five pocket holes into the front edge of the desktop. Attach the 1″ x 4″ x 36″ front lip using 5 – 1 1/4″ pocket hole screws.
- For the rear piece, use a jigsaw to cut out access holes for the cords to pass through (you can also just cut one single hole, similar to the one you cut in the storage box).
- If you are going to stain the desktop, now would be the time to do it. We used Minwax Pre-Stain Wood Conditioner on the pine, followed by their Provincial Stain Color on all of the pieces in the diagram below. Then sealed it with their Polyurethane in Clear Satin finish.
- Once they are dry, place the rear piece in place – do not attach in any way. Then fit the desktop in place, leaving a 1/8″ gap between it and the rear piece. Secure in place using 4 – 1 1/4″ pocket hole screws on the underside of the frame (you can see the location of the pocket holes in the step three diagram above).
- Paint the front of the frame and you’re all finished!
(Click on image for larger view)
What do you think of this new look?
We hope you like it, and if you give this project a try we would love to hear from you!
Alicia & Nick


Kendra says
What a fantastic idea! Love the stylish combination of shelf space and desk space. It really adds something to the whole room. Also, the entire VintageStyleLiving.com staff loves your blog! keep sharing great ideas like this. Thank you!
Alicia says
Thank you, Kendra! 🙂
Leanna says
I would be very proud of this kitchen as well, and I love love love those shelves. I pinned your valentines arrangement in those same shelves and of course pinning this as well. I need to find an alcove somewhere in our home for one of these.
Alicia says
I am so glad to hear you love this little nook too, Leanne! I have no doubt you’ll be able to create a similar look in your own home!
Troy says
Great job. Great Detail.
Thanks
Alicia says
Glad you found it helpful, Troy!
Dowden says
Great article on floating desk storage. Thanks for sharing with us.