
Design an open concept family room and playroom that create a feeling of comfort and cohesion, while sparking creativity and imagination with these design ideas and inspiration
Good morning, friends! I hope you all had a restful weekend. I wish I could say the same for ourselves, but we were busy working away on our family room and playroom makeover. Well, I guess I wouldn’t really call it a makeover since it was basically just an empty space before now. Let me fill you in…
When we moved into our home 5 years ago, the basement was finished, which we loved. It was a big space and included a laundry room and full bathroom. Total bonus, right? Except, we never really used it. We just didn’t have the need. And then our firstborn came along and when she hit the two and a half year mark, we started thinking that just maybe we should be utilizing that space. But still, we didn’t…
And now with our second baby arriving early this summer, we’ve finally decided to make this space livable and practical for our busy (and growing!) family. We really wanted to make sure we were making the most of the space and using every last inch possible.
This post contains affiliate links, see our full disclosure policy here. Thank you for helping support our blog.
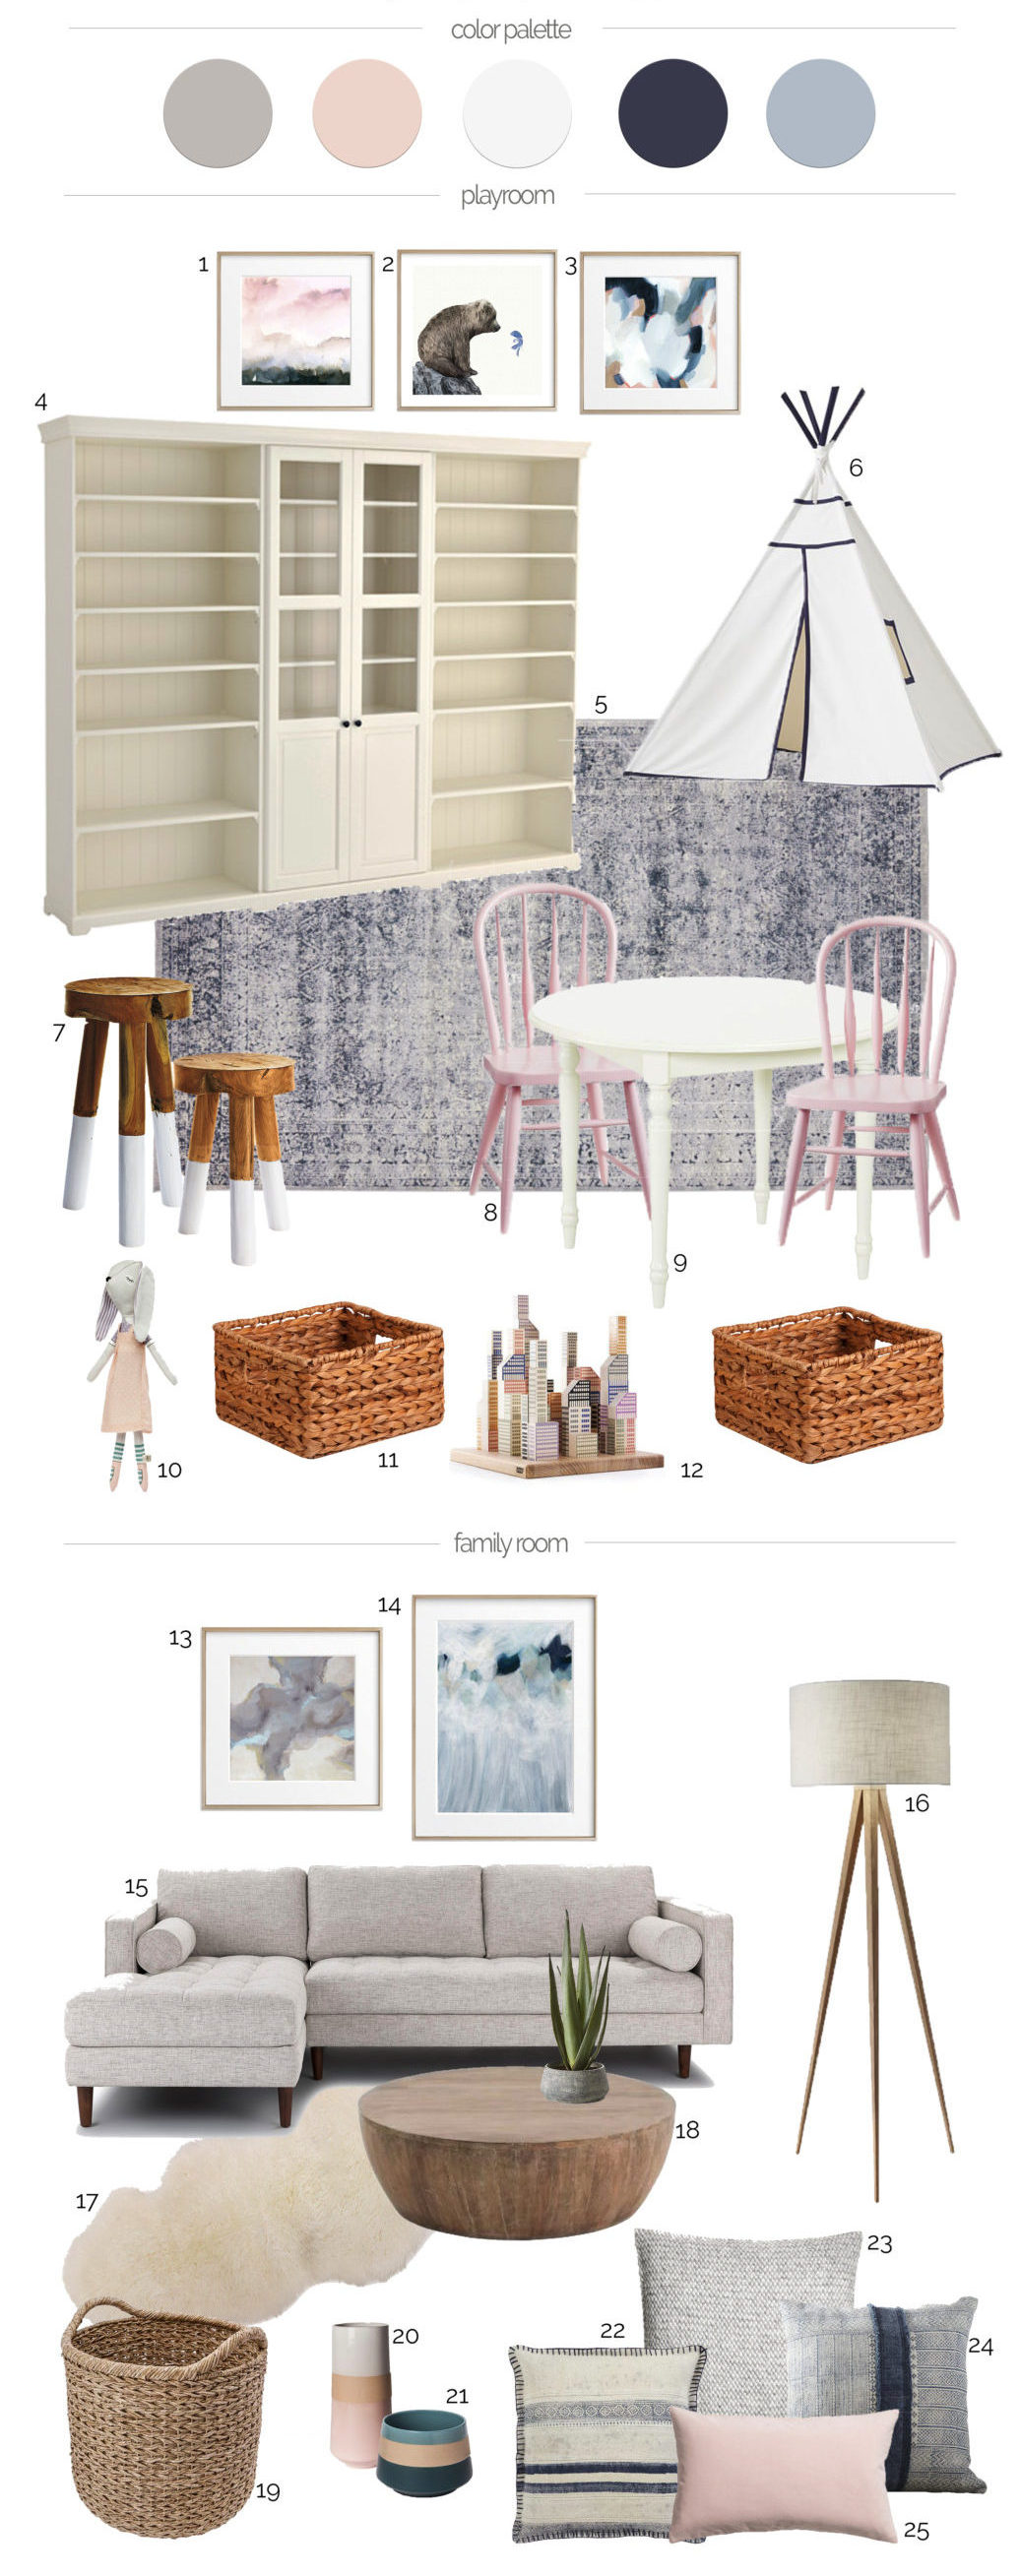
one | two | three | four | five | six | seven | eight | nine | ten | eleven | twelve | thirteen | fourteen | fifteen | sixteen | seventeen | eighteen | nineteen | twenty | twenty-one | twenty-two | twenty-three | twenty-four | twenty-five
We’ve divided the main living space into two distinct sections, one for a playroom and one for a family room. And even though we’ve made this distinction the spaces are still open to one another so our design plan definitely had to take that into consideration. I wanted the two areas to feel cohesive and flow well together, I also wanted these two areas to be able to grow with our family. So with that in mind, I designed a playroom that feels sweet and playful, while still having many grown-up aspects to it.
Just like our living room and dining room, the main living space is one long and narrow area, which can make designing a functional and pretty space a little tricky, but I think we’ve done a good job of planning it out. There were three distinct areas we knew we wanted to include when we started this space:
- Office
- Playroom
- Family Room
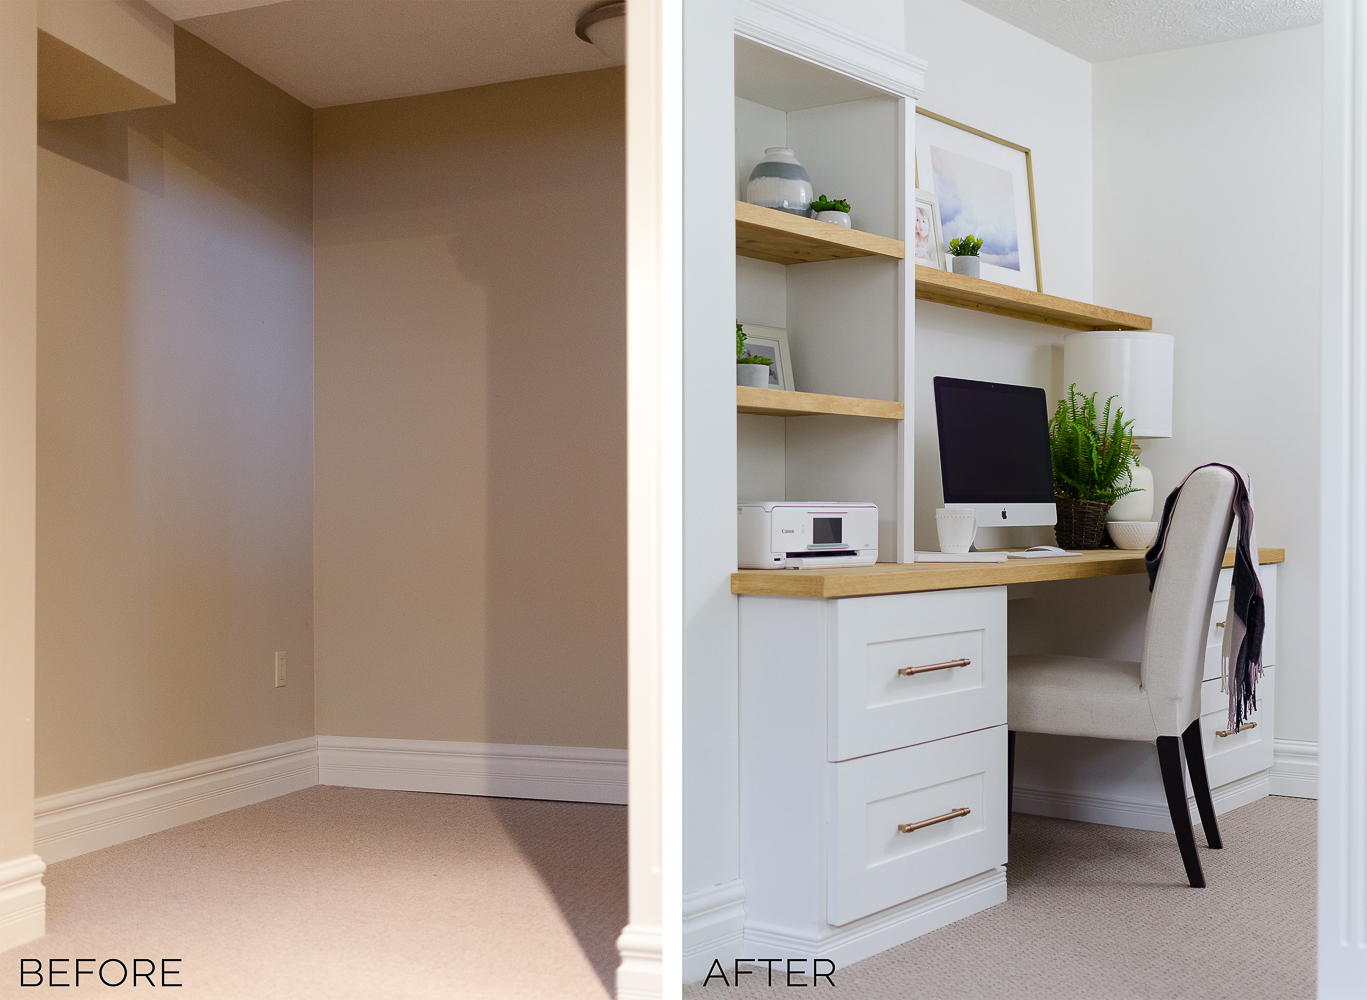
We started with the office space first, because it was on a smaller scale and we knew it wouldn’t take as long to complete. I shared a little glimpse of it here, but I’ll be expanding more on it when we reveal the entire makeover. I can honestly say having a dedicated office space has been life-changing. Ok, maybe I am being a bit dramatic, but it really has made such a difference in how and when I can work. Knowing I have a space all to myself helps to keep me more organized and productive, and I love being able to pop downstairs and use my computer if I need 5 minutes to respond to a few emails or schedule a new post. If you read our post above, you’ll know I was working from the dining room, which meant either leaving our computer plugged in all of the time, or moving it around when I needed to work – not ideal!
Once the office was finished (or nearly finished) we started on the playroom. I think I was most excited about this space because I longed to give our little one a space of her own to play, imagine and create. We used to keep all of her toys in the living room, which made for a cramped and messy living space, but it worked for us. I liked having her close by if I needed to be in the kitchen or somewhere else on the main floor. But as she grew (and her toy collection did too!), we realized this set up wasn’t really working for us anymore. That’s when we really decided to complete our lower level.
For example, I played with the idea of a really fun, colorful rug, but in the end, I decided on a classic vintage-inspired rug in navy and gray. It works well with the colors throughout the space, it’s practical (i.e. it will hide stains and spills!), and will grow with the space as our children outgrow the playroom.
get the look

And even though I want it to feel more sophisticated, I am still having fun incorporating whimsical and child-like elements too. Pieces that are inexpensive and can be easily changed over the months or years, like art, pillows and big toys (play kitchen, chalkboard, teepee…).
Decorating this space has definitely been fun, but we also had to really think about the practicality of the space. And for us, that meant storage! I needed this area to house toys, dress-up clothes, games and arts and crafts. That’s a lot of stuff to fit in a little space. But I think with a bit of creativity we’ve done it!
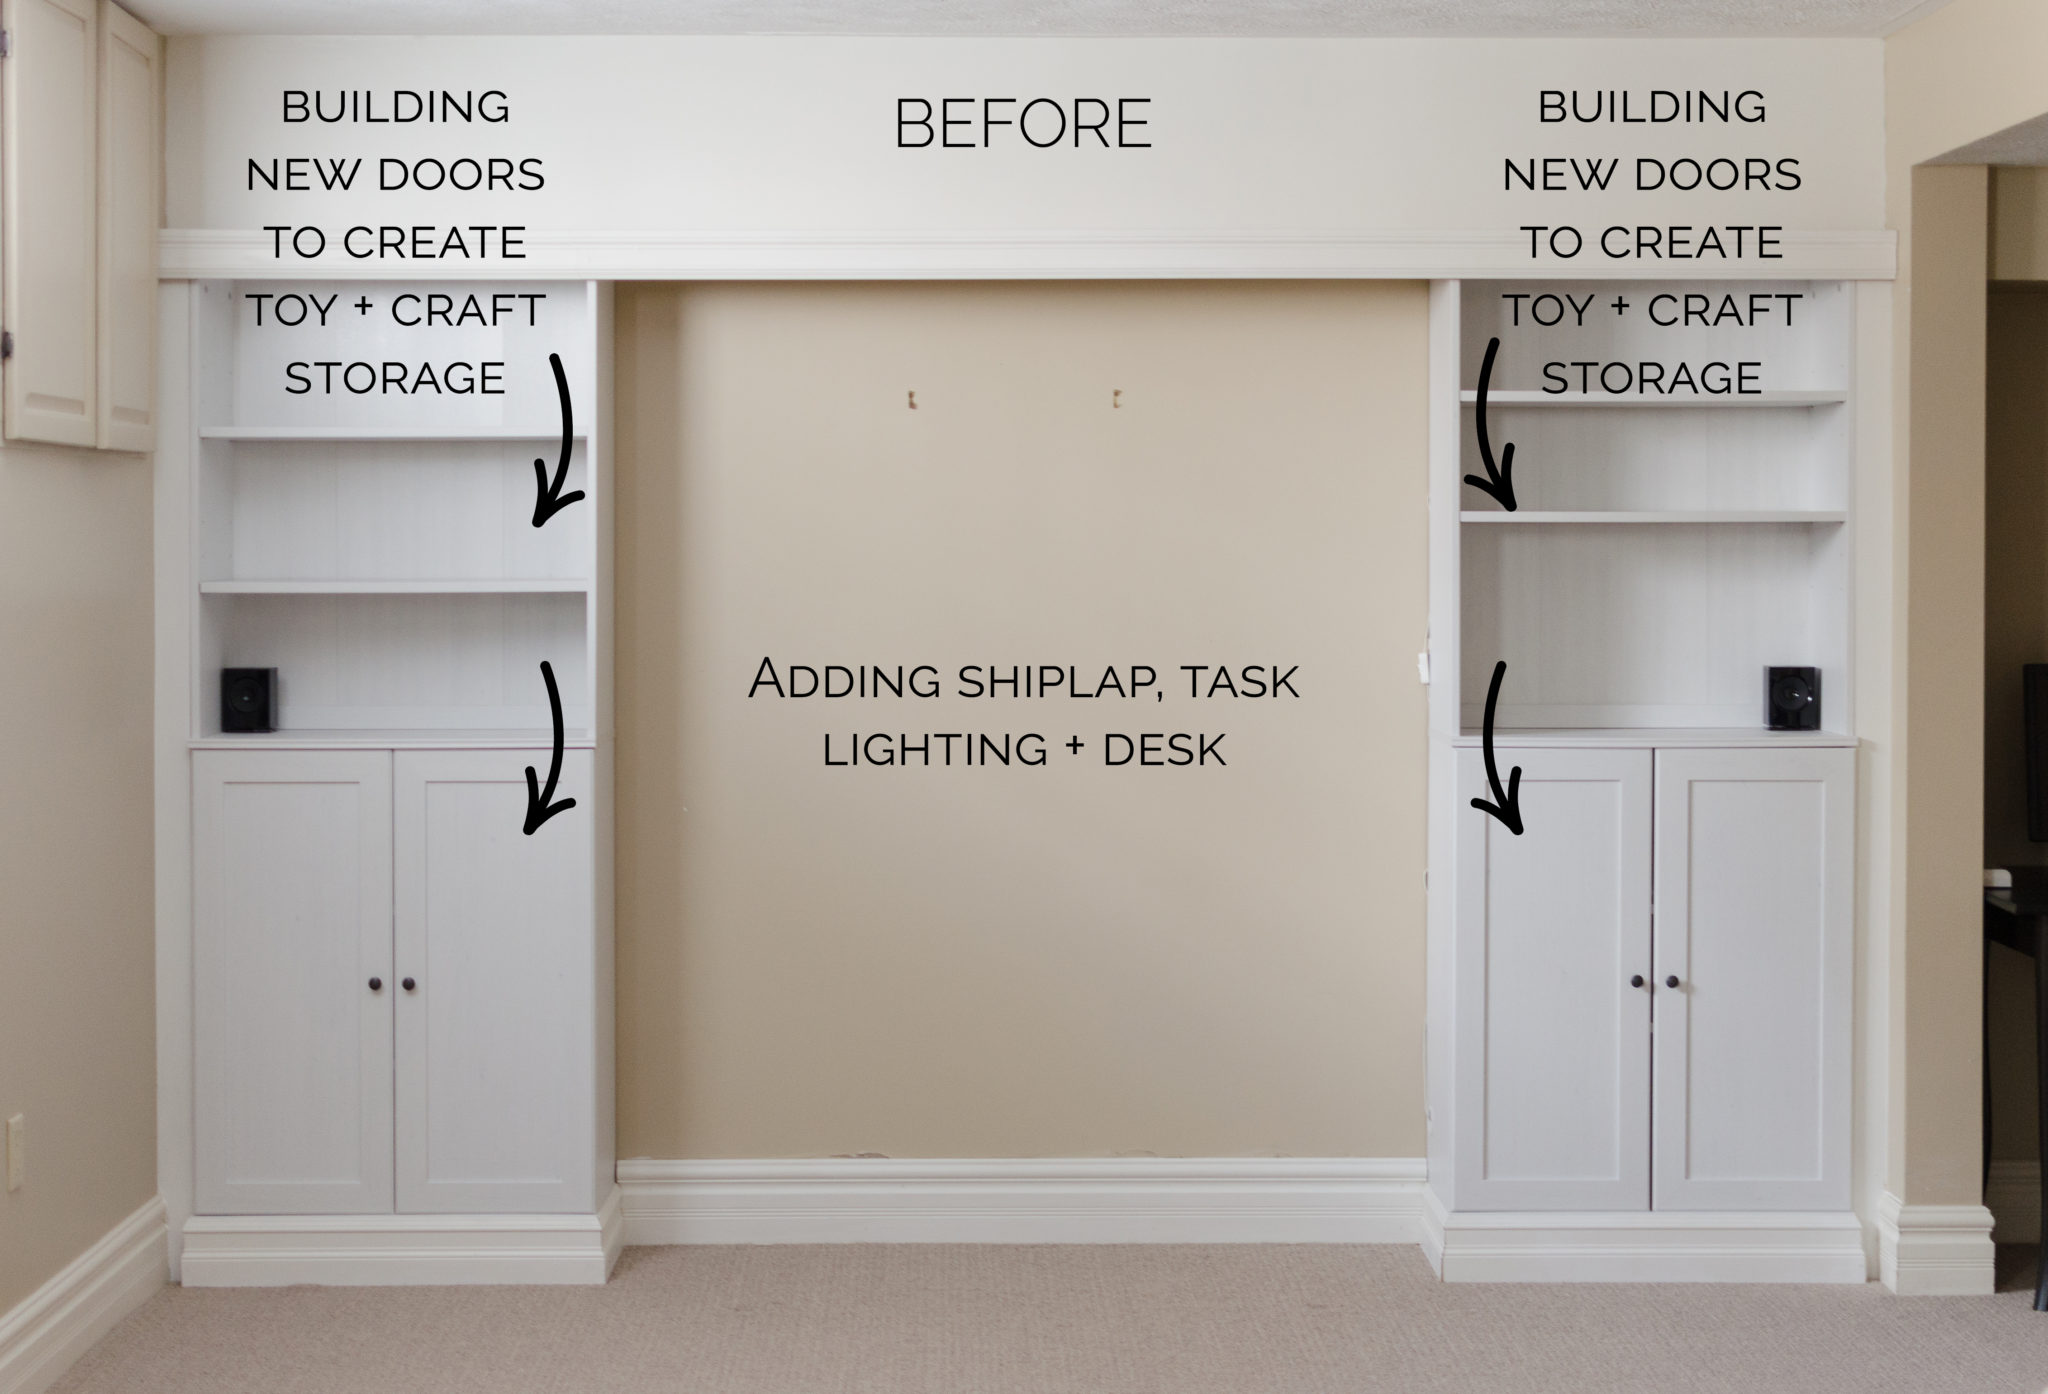
Along the back wall of the playroom, you’ll see some make-shift built-ins. We are retrofitting these with new doors on top and bottom to match the style of my office desk. This is giving us lots of space to store everything I mentioned above, and by far my favorite way to do this is with clear shoe boxes. They are easy to stack and you can see what’s in each one! I think giving everything a home is the key to keeping any room tidy and organized. It’s definitely helped our little one learn where everything goes when she’s done playing.
We considered adding more closed in storage to the middle section, but then Nick suggested creating a desk area here for the kids. I had originally planned on incorporating a round table in the middle of the playroom for crafts and coloring, but when Nick suggested building a desk into this area (that can be pulled out to accommodate more kids), I knew it was a genius idea. It freed up so much space in the actual playroom, and that’s what we needed, space for our kids to stretch out and play!
I also plan on adding some big woven baskets (hopefully with lids) to conceal all of the stuffed animals and dolls we have laying around. But I am still on the hunt for something that I love and will work.

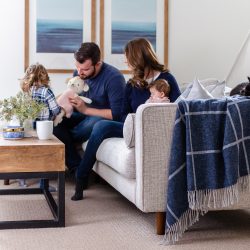
Now, onto the family room. The biggest change we’ve seen here so far is the beautiful new sectional we received from Article (you might have seen a sneak peek on my Instagram stories a few weeks ago). It has made such a difference in making this space feel more open and light, it’s amazing what a good sofa can do for a room! But I will be sharing more on it when we reveal the finished space, so stay tuned. Oh, and the sectional was taken apart when I took this BEFORE photo if you’re wondering what’s going on here! 🙂
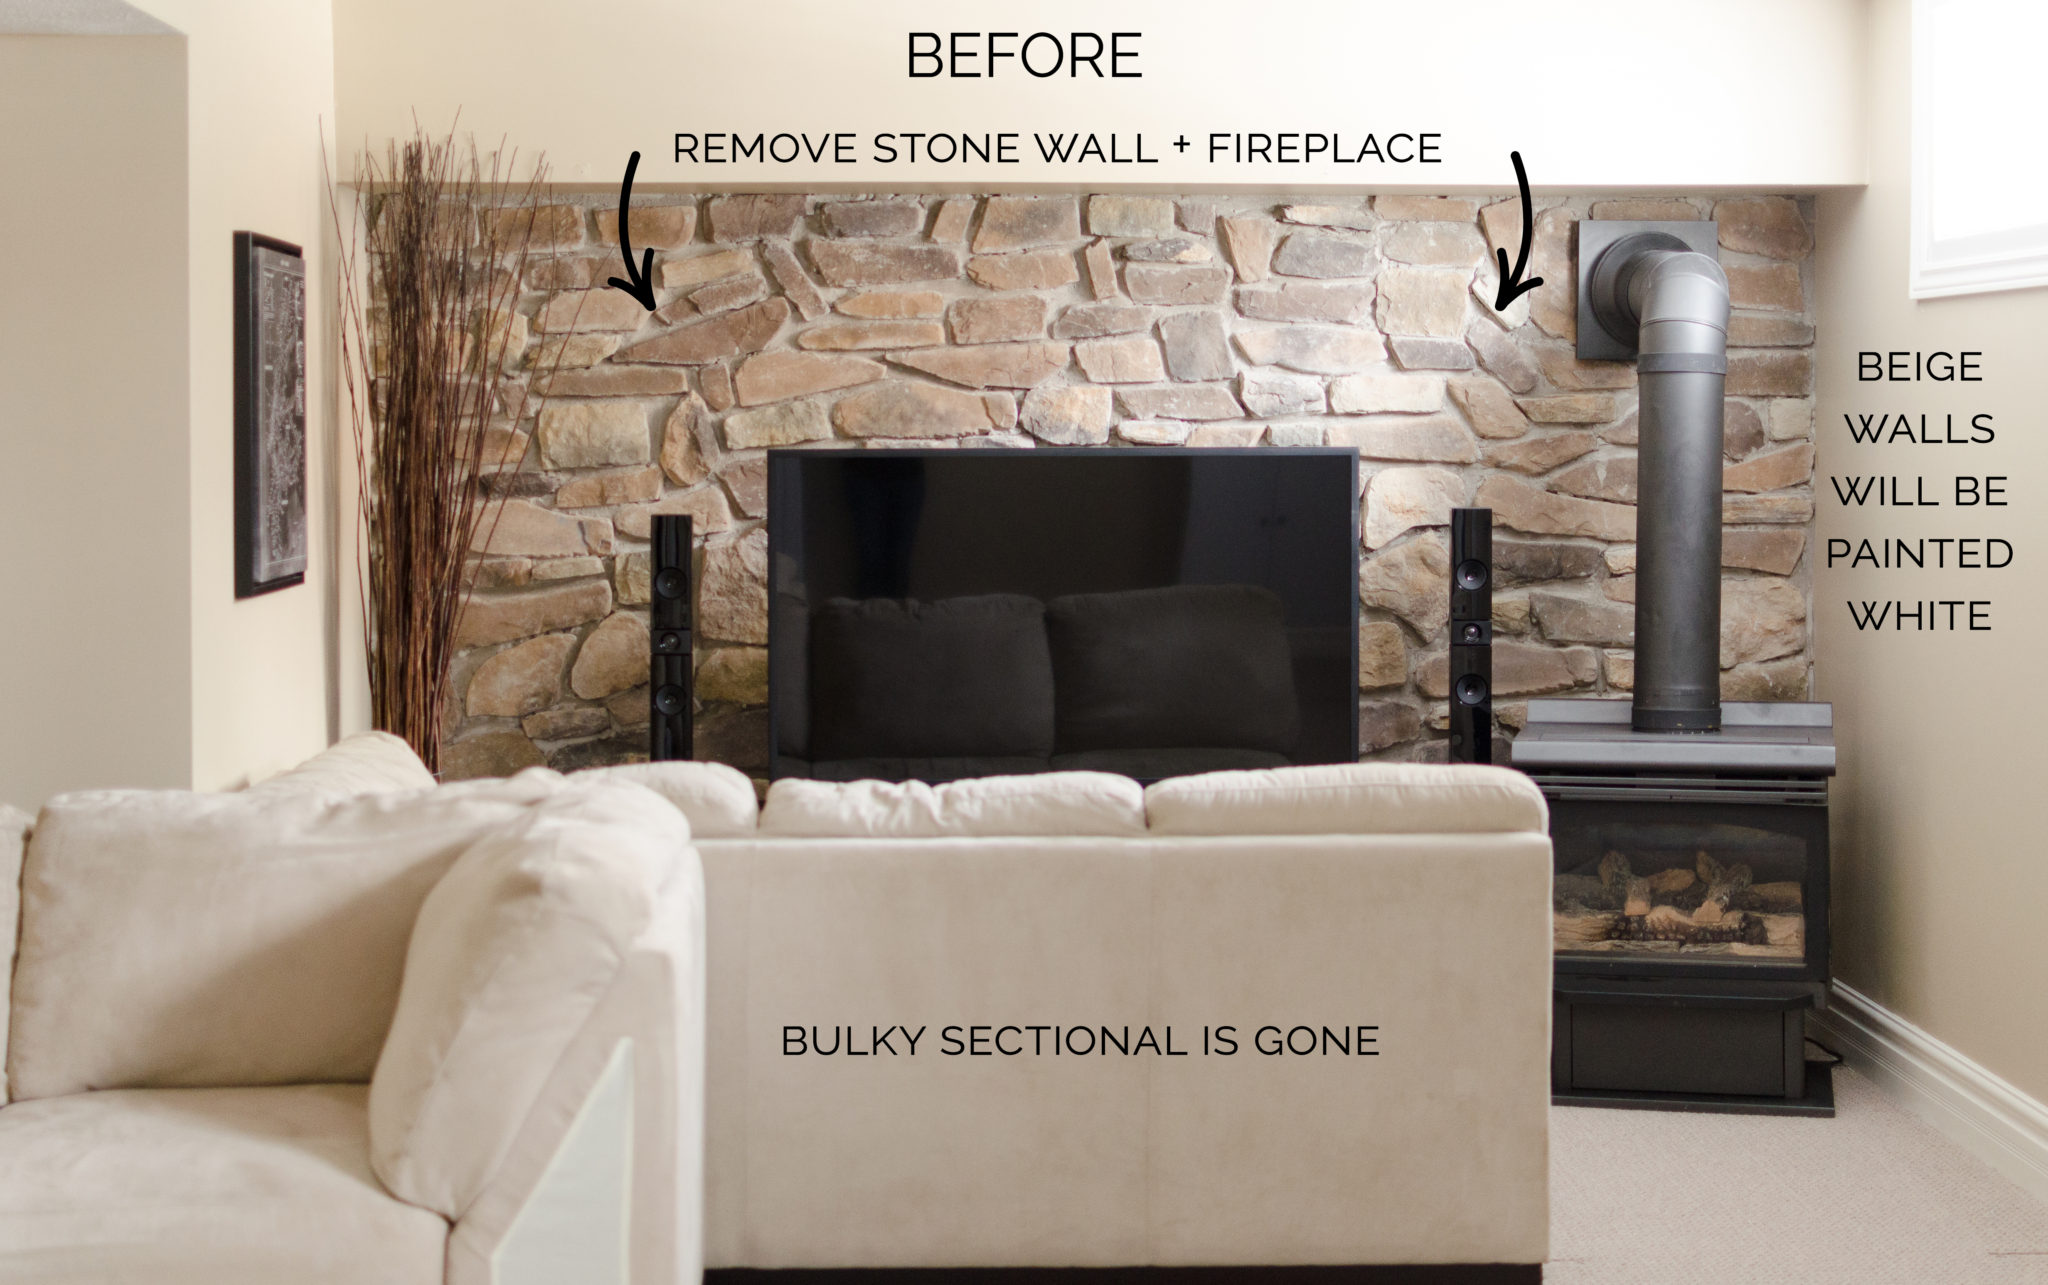
Finally, that dark stone wall and corner fireplace will be gone. Wahoo! I cannot tell you how excited I am to see that go. I remember when we first considered buying this house, I told Nick that would have to be the first thing to go, and now it’s been five years. So, needless to say, I can’t wait for the day it’s all gone. We’ll be replacing it with built-ins with open shelving on either side. Other than those two big changes there isn’t much else we are doing on this side of the room, aside from some basic design updates, like pillows, throws, lighting, and art. We just want it to be a cozy little spot that we can curl up and enjoy family movie nights (or our weekly Friday night date night, which always involves nachos and our favorite TV shows).
So, there you have it! I’m so happy to finally share these plans. As I said, I feel like we’ve got so much underway already and I haven’t had a chance to even share our initial plans with you. I’d love to hear what you think or if you have any suggestions?


Sara says
Wow! So excited to see how are you going to do this space!
Congrats on the new baby coming soon!!! Yay ? did you find out the gender this time or is it going to be a surprise again? Are you going to do a new nursery or using the same one?
Alicia says
Thank you so much, Sara! 🙂 We are keeping the gender a surprise again, it’s been tough because I just want to plan for a boy or a girl. But we love the anticipation. We will be designing a brand new nursery for this little one as well. I’ll be sharing the plans soon!
Sara says
Yay!! Looking forward to it 😉
Rebekah says
I would like to find out more about that bookcase, item #4 on your inspiration board for the playroom. Love all your choices!
Alicia says
Hi Rebekah, and thank you! 🙂 The bookcase is from Ikea, it is called Liatorp. If you look under the graphic there is a list of numbers, each one corresponds to the product in the graphic if you want to source information on anything else. I hope that helps! 🙂