
A modern silhouette and clean lines make this outdoor coffee table the perfect addition to any outdoor living space. Find the free plans to build your own here.
You can also find our plans for the matching outdoor sofa and outdoor chair!
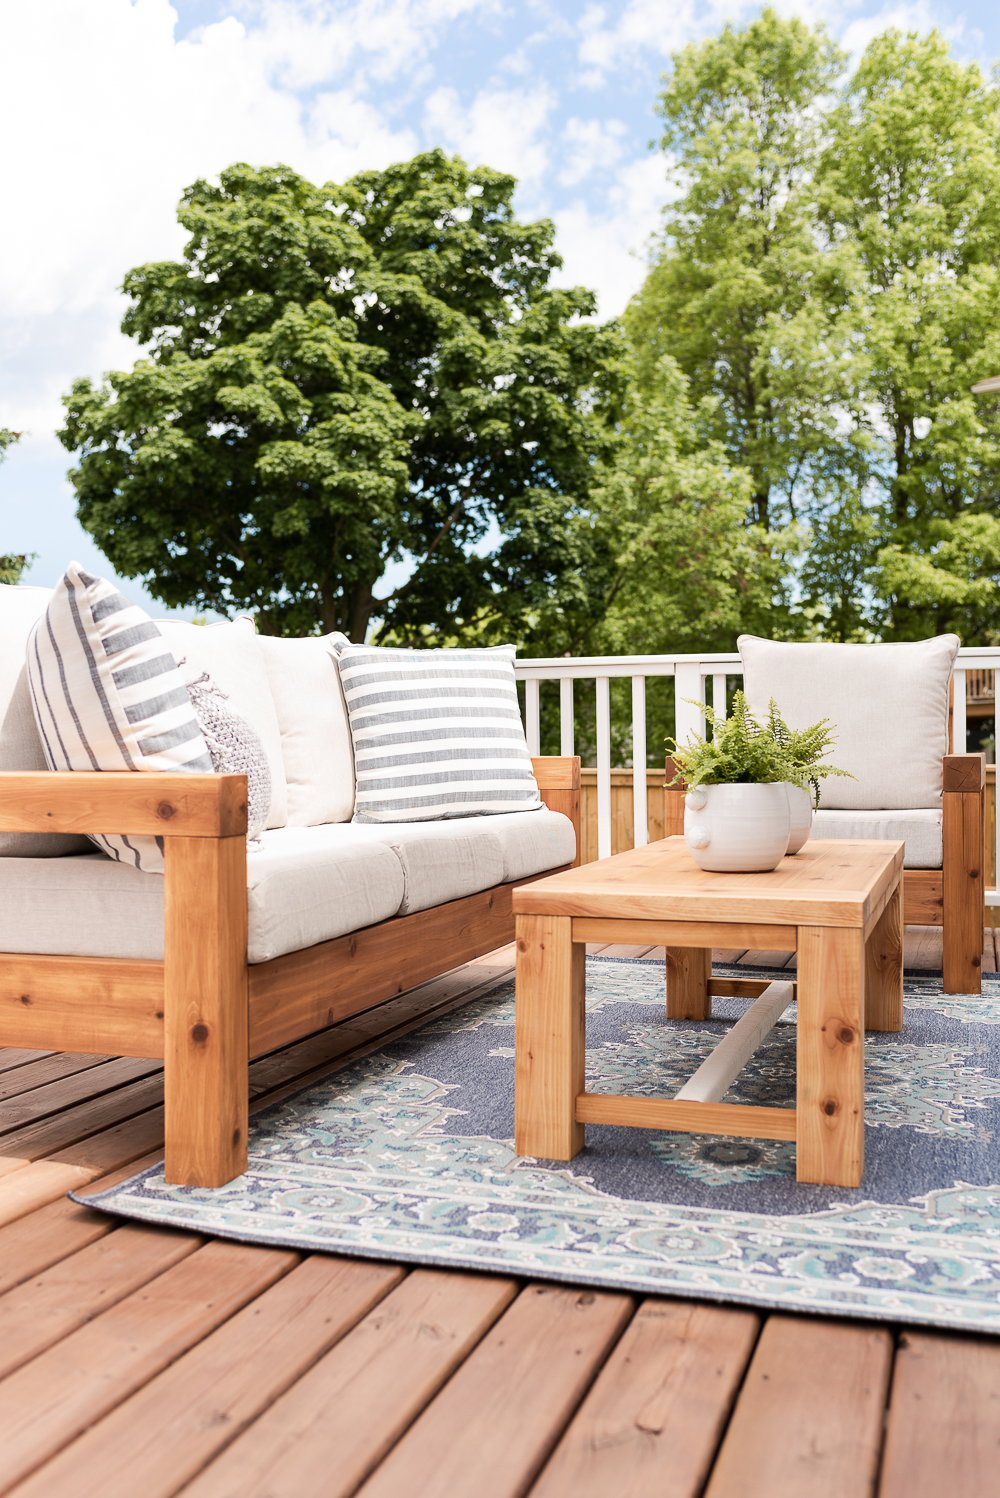
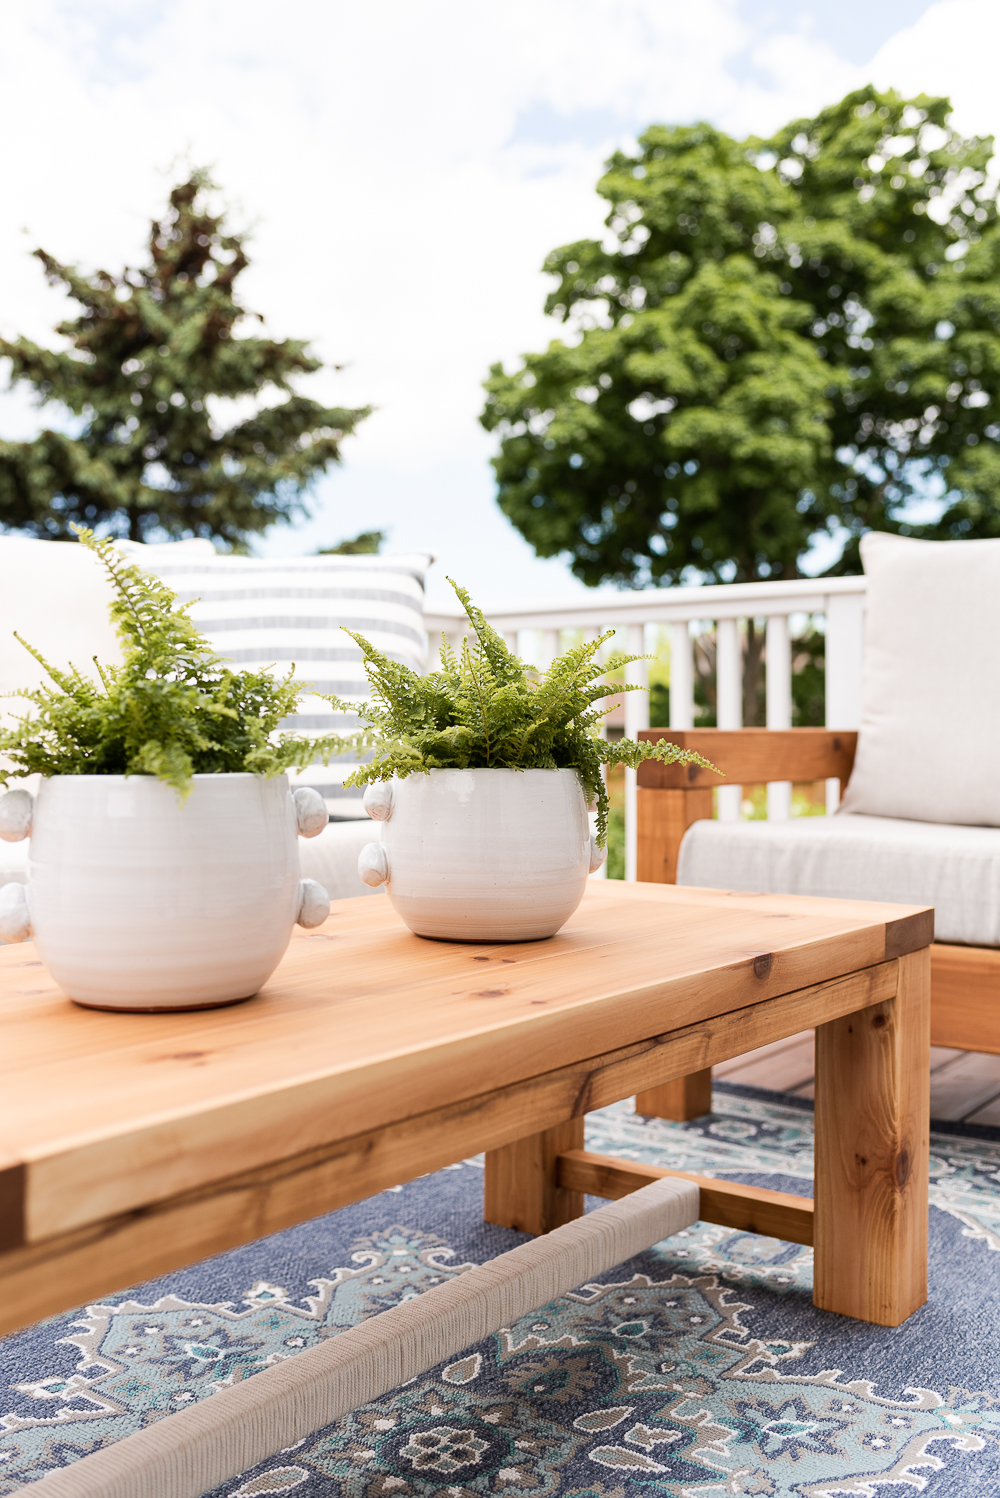
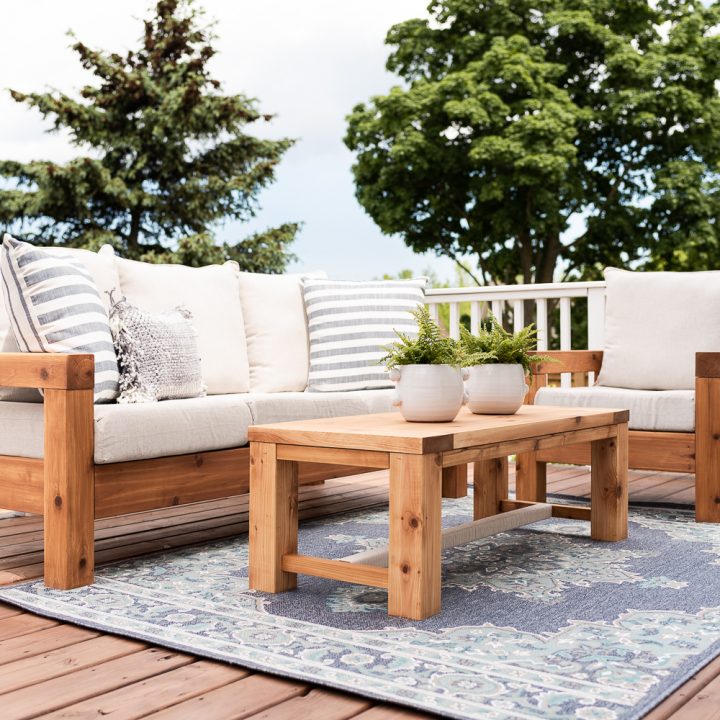
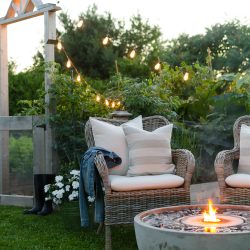
Nick built this sleek and modern cedar coffee table to pair perfectly with our outdoor sofa and chair. And now that we have our foundation pieces, we’ve been working at layering in textiles, accessories, and lighting to create an outdoor space that feels inviting, comfortable, and fun.
get the look

When we started planning our outdoor space, we were both drawn to furniture with modern designs in warm wood tones, but we continually came across the same issue. Many of the sets we loved were too far out of our budget, so Nick designed a set he could build that married form and function to create the look of high-end outdoor furniture at a fraction of the cost.
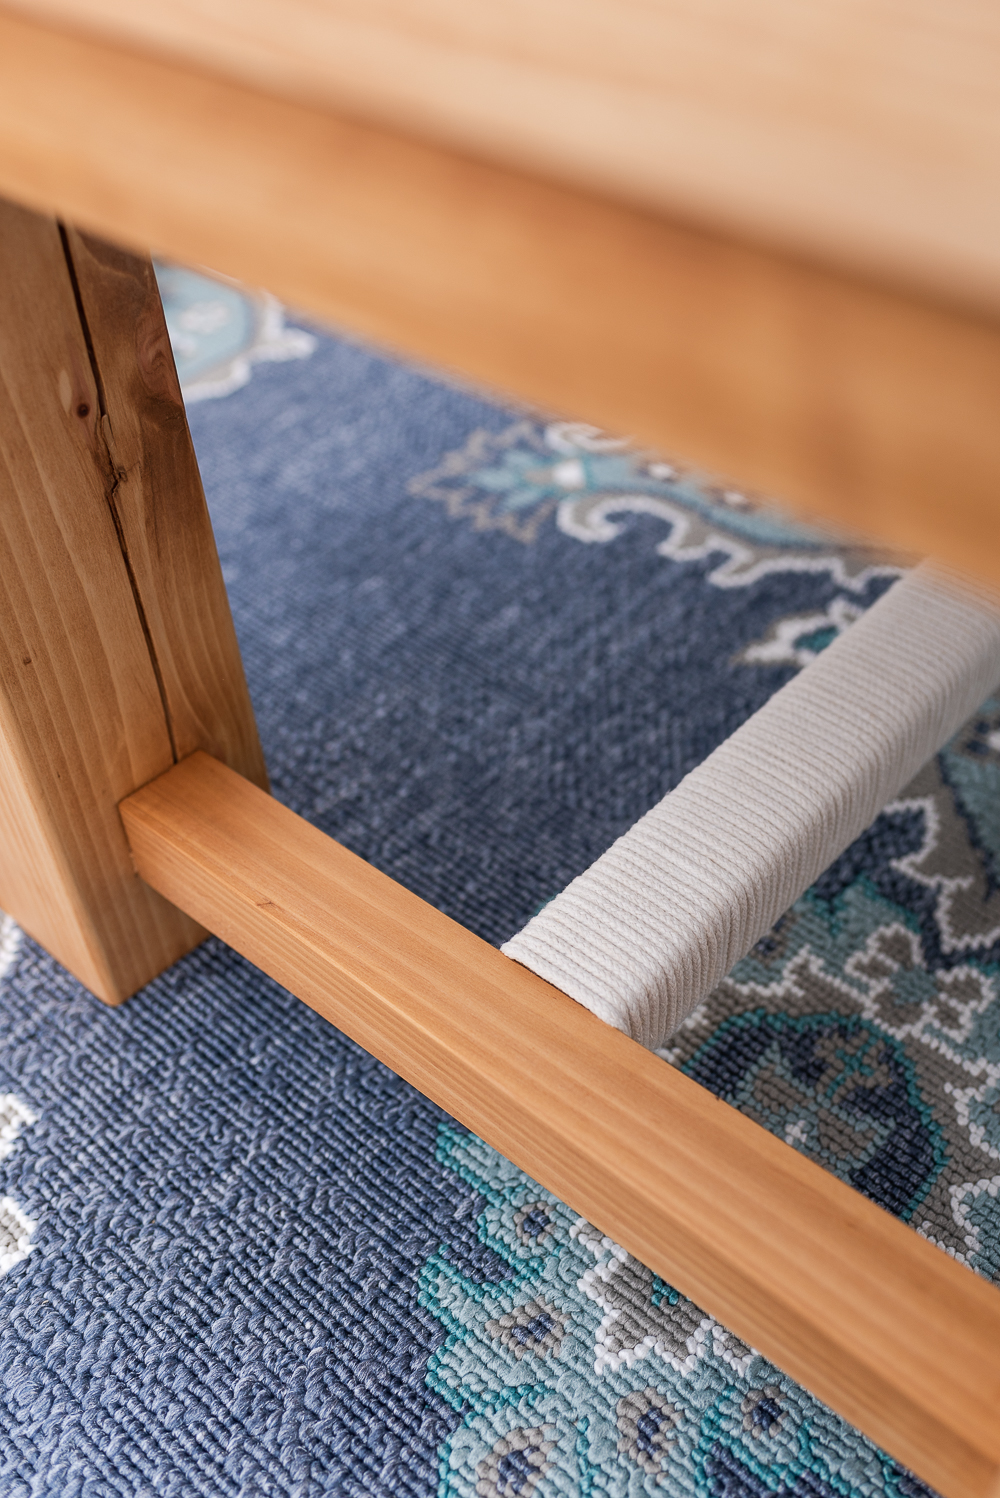
The trick was to not forget about the details because it’s the details that really make this piece shine. Nick used cotton clothesline rope to wrap the bottom span. It was an easy and inexpensive addition that adds a little bit of texture and helps to soften the coffee table.
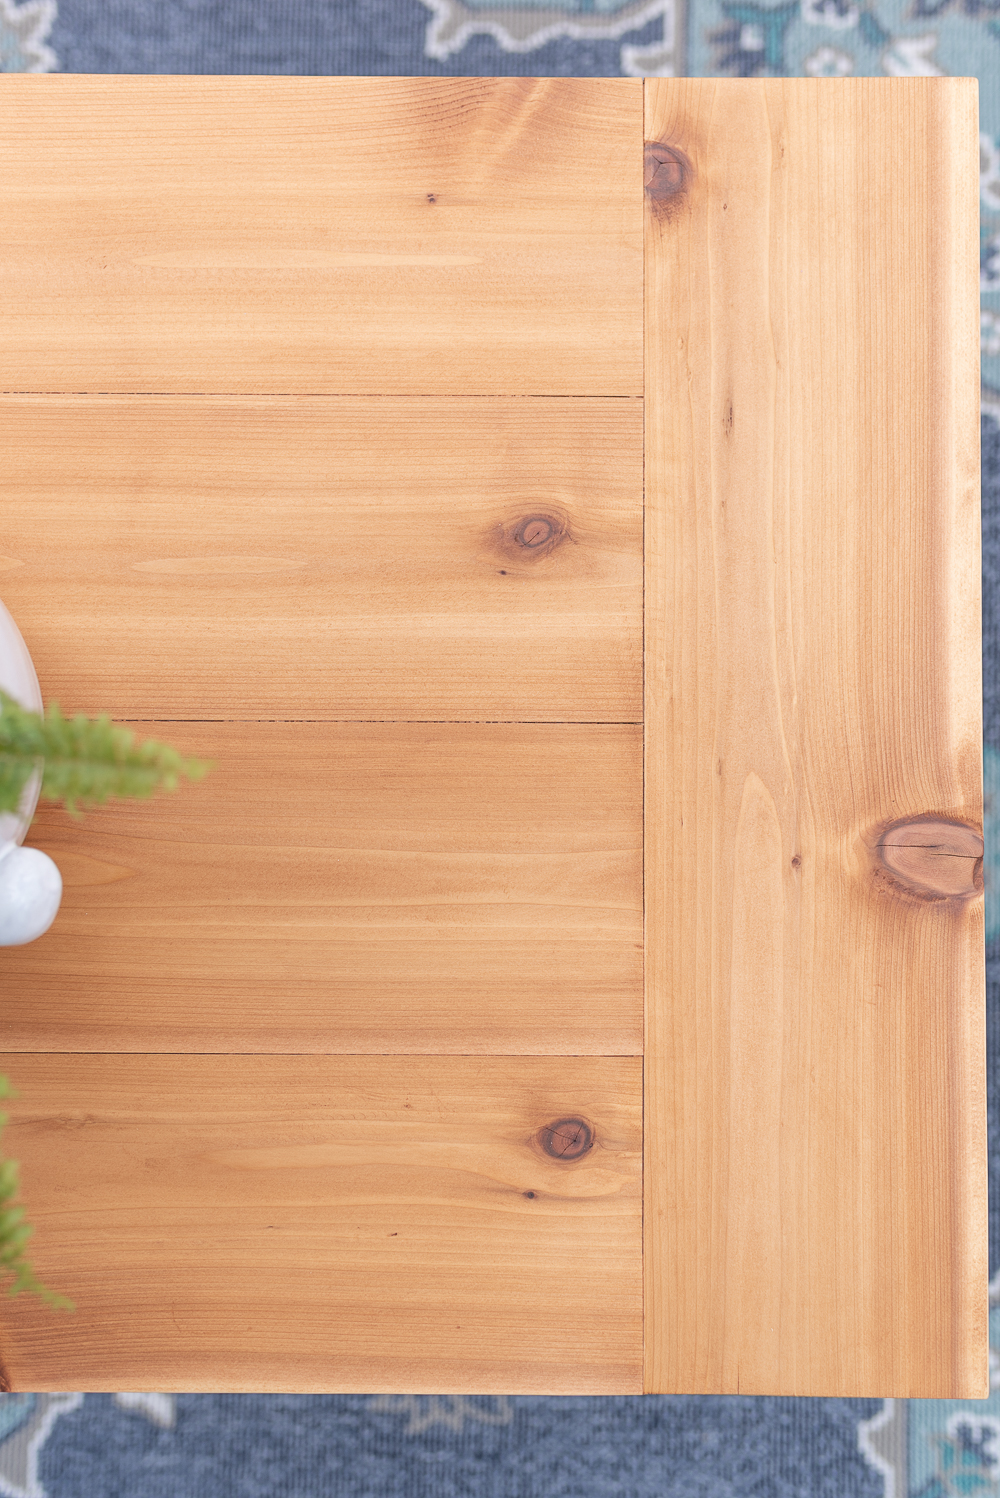
Nick also added breadboard ends to the coffee tabletop. I know their function is to provide support, but we also just liked the way they looked. He worked so hard on these pieces to make sure they are both comfortable and beautiful. To learn more about the materials and design choices we made, read our post on The Perfect Outdoor Sofa.
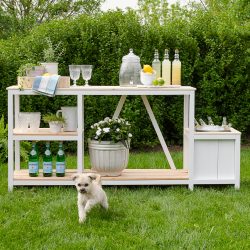
Pair this coffee table with our outdoor sofa and chair to complete your patio. We also offer plans for our patio bar, it’s perfect for hosting outdoor get-togethers or as a BBQ prep station.
Details at a Glance
- Sofa (DIY)
- Chair (DIY)
- Coffee table
- Chair Cushions
- Rug
- Striped pillows
- Lumbar pillow
- Planters
The Perfect Outdoor Coffee Table | Free Plans
Take a weekend to build yourself some beautiful, long-lasting patio, high-quality patio furniture.
Materials
- (1) 4 x 4" x 8' Cedar Posts
- (2) 2 x 4" x 8' Cedar Boards
- (2) 2 x 6" x 8' Cedar Boards
- (1) 2 x 2" x 8' Cedar Boards (or rip down larger boards to actual size of 1-1/2 x 1-1/2"
- (89) 2-1/2" Kreg Blue Kote Pocket Hole Screws
- (14) 2-1/2" Deck Screws
- <Waterproof Exterior Wood Glue
Cut List:
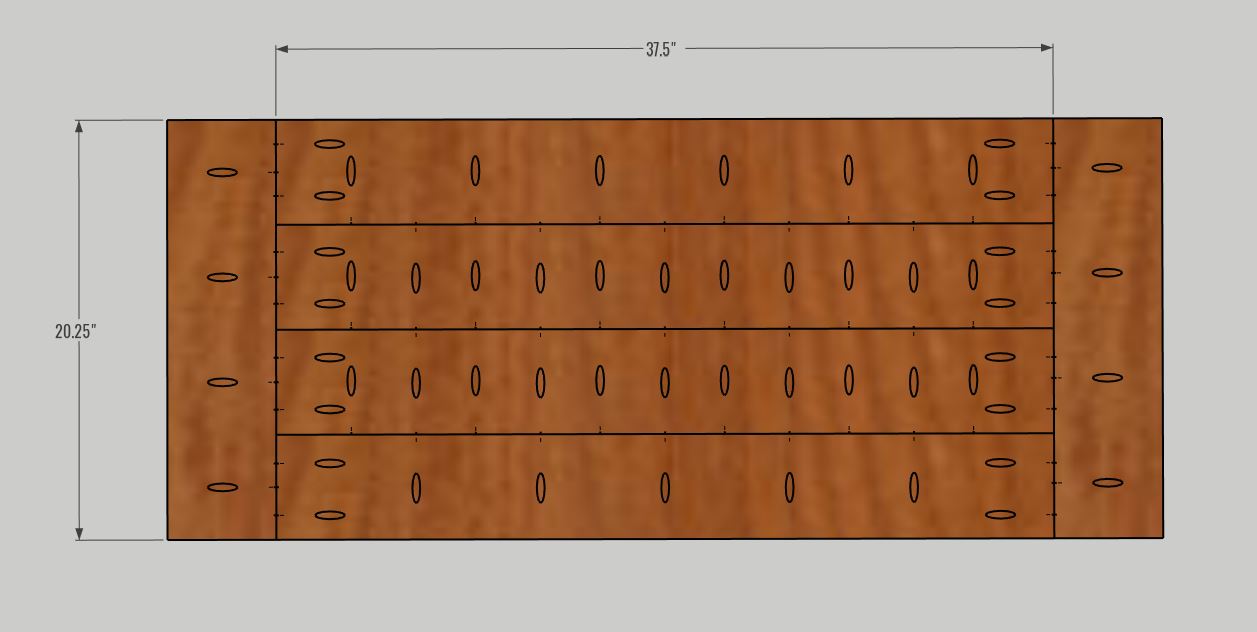
- (4) 4 x 4" x 14.5" Legs
- (4) 2 x 4" x 13" Side &Top Spans
- (2) 2 x 2" x 13" Bottom Side Spans
- (1) 2 x 2" x 42.75" Bottom Center Span
- (2) 2 x 4" x 40.75" Front & Back Top Spans
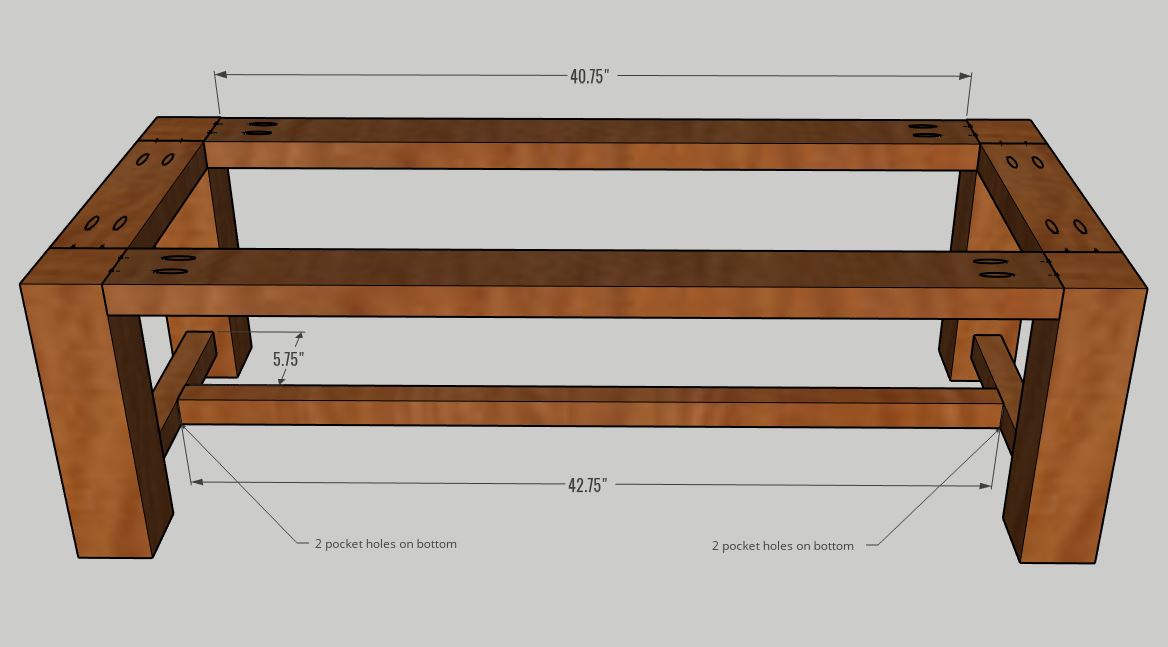
- (4) 2 x 6" x 37.5" Tabletop Boards (Use table saw to take 1/8" off each side for a square edge)
- (2) 2 x 6" x 21" Tabletop Bread Board Ends (Use table saw to take 1/8" off each side for a square edge)
Instructions
- STEP 1: ASSEMBLE ENDS

Make two of these end pieces. Drill two pocket holes on each end of the TOP & SIDE SPAN boards (all 4). Attach a board flush with the tops of each set of two legs using wood glue and (2) 2-1/2" Blue Kote pocket hole screws. Drill two pocket holes on each end of the BOTTOM SIDE SPANS. Attach 1-1/2" from either side of the leg as shown, ensuring the pocket holes are facing the bottom so they don't show when the table is complete. Secure with wood glue and 2-1/2" Blue Kote pocket hole screws. - STEP 2: ATTACH ENDS WITH SPANS

Drill pocket holes on each end of the FRONT & BACK SPANS. Attach to the leg assemblies you made in the previous step using wood glue and 2-1/2" Blue Kote pocket hole screws. Drill pocket holes at either end of the BOTTOM CENTER SPAN. Attach in the centre of the BOTTOM SIDE SPANS at 5.75" from the inside of the legs, ensuring that the pocket holes are facing down so they don't show when the table is complete. - STEP 3: ATTACH TABLETOP SUPPORTS

This is to ensure that the table is very sturdy (we have young kids that like to climb on things!). Positions don't have to be exact as they will not show when the table is finished. Secure with wood glue and 2-1/2" Blue Kote pocket hole screws. - STEP 4: BUILD TABLETOP

*NOTE: There is an error in the diagram - bread boards at the ends should be 21". Use a table saw to take 1/8" off each side for a square edge so that the boards will butt nicely. They will be approximately 5.25" when squared up. This will leave a slight overhang on all sides of the table. Follow the diagram for pocket hole positioning. You can put fewer pocket holes in if you wish. These are spaced approximately 6" apart. Attach the four TABLETOP BOARDS together first using a generous amount of wood glue and 2-1/2" Blue Kote pocket hole screws. Drill pocket holes on the TABLETOP BREAD BOARDS as shown. Then attach TABLETOP BREAD BOARDS using a generous amount of wood glue and 2-1/2" pocket hole screws. Sand edges of breadboards down to the correct width if they are not flush. - STEP 5: ATTACH TABLETOP & FINISHING

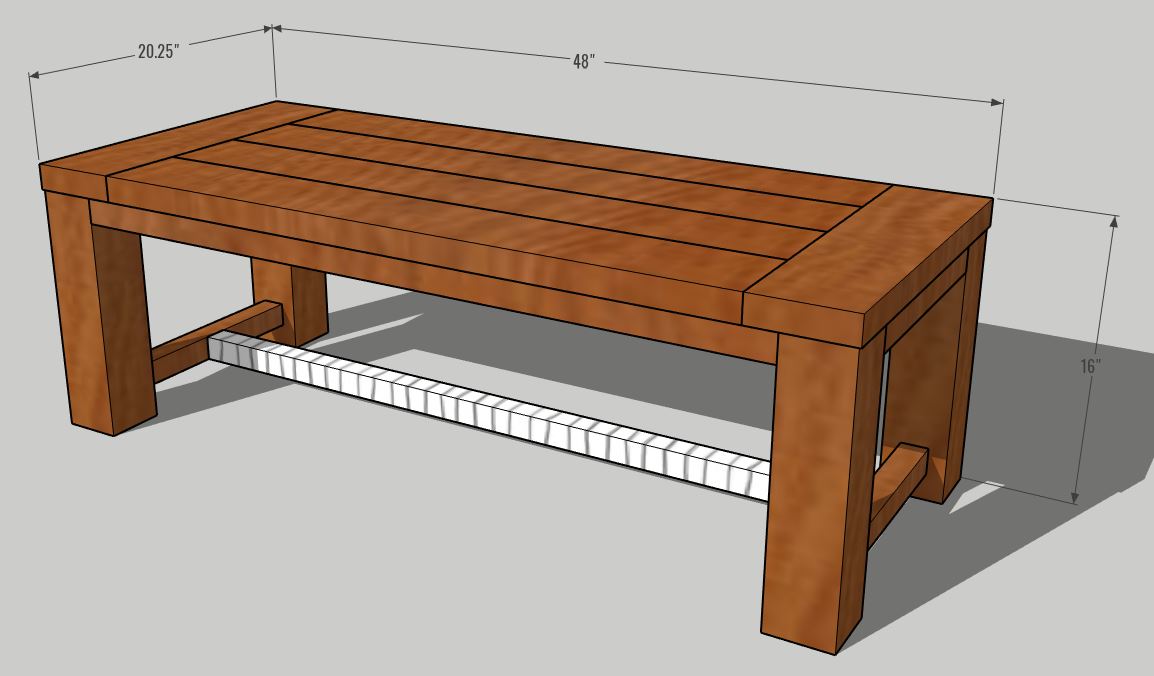
NOTE: There is an error in the diagram - bread boards (top) are actually 21". Center tabletop on the base and attach from the underside (through spans and supports with 2-1/2" deck screws. Sand with 120-grit sandpaper, then 220-grit sandpaper. Finish with some kind of sealer or wood penetrating oil (we used penetrating oil from BEHR - colour, chocolate). Allow it to dry thoroughly.
Optionally you can wrap the span on the bottom with 3/16" cotton rope (laundry line rope) or any alternative rope material. Enjoy all summer long!


Pete says
Great plans, easy to follow for the whole set. Thank you for posting!
Alicia says
So glad you found the plans helpful, Pete!
Jake says
Hi – thank you for sharing these plans! I was wondering if you have run into any issues with the breadboard table top splitting with weather changes? Thanks again for sharing.
Alicia says
Hi Jake, we haven’t had any issues with it yet!
scott r syre says
Hi, thank you for the plans. I already built the sofa, chair and I built an ottoman. I want to make the table and was wondering if the bottom center board is necessary or are there alternatives, I would like to be able to slide the ottoman under the table. Any assistance would be appreciated.
Scott
Nick says
Hi Scott,
I think you could get away without the board at the bottom. it was more of a design element, although it does offer extra sturdiness when our kids are climbing on it.
Danny says
Hi,
If the tabletop boards are supposed to be cut down to 5.25, should the breadboard be cut to 21” instead of 20.25?
Thanks, I’m excited to build the whole set!
Nick says
Thanks for pointing that out Danny! I have made notes in the plan to reflect this!
Sam says
How exactly did you connect the top to the bottom? Did you just use the deck screws and go through the bottom of the board supporting the top through the top of the table?
Alicia says
Hi Sam,
Yes, step 5 details how you use 2 1/2″ deck screws to attach the top by screwing in from the bottom.
MH says
FYI, for folks who don’t have a table saw to make the 1/8 rip cut. I changed the table top design to be 45 degree cuts instead. I think you should be able to complete it with 2x 2x6x8’.
https://imgur.com/a/Y21LUat
Nick says
Beauty! I love it!
Fredrick J Inman says
I want to build it but cannot download the plans. There are many ads for PDF downloads, which are spam. It would not print the plans, so I am left with nothing.
Alicia says
Hi Fredrick, I am sorry you have a hard time printing our plans. At the very top of the post, you should see a link that reads “Jump to How To”, if you click on that it will scroll to the bottom of the post where the plans are. Within that widget, you should see a button centered right underneath the title that reads Print. If you click that Print button, it should open a new page within your browser where you can print the plans. If you are still having trouble, please send us an email and we can email them to you directly.
Lauren says
Hi! Love this plan! What did you use to attach the rope to the wood?
Thank you in advance!
Alicia says
Hi Lauren, we wrapped the rope tightly around the wood piece and secured it with stainless steel staples on each end. Let us know if you have any other questions!
Zak vanier says
Hi, I was wondering how long it took you to build the set of three. Thanks
Alicia says
Hi Zak, Nick built all three pieces in one weekend, but depending on your skill level and the amount of time to dedicate to building it could be a little longer. 🙂
Paul says
I built the sofa, two chairs and this table for our patio, which is a wonderful addition to our outdoor space! Many thanks for the plans. One thought I had for the table is that the length maximizes the use of the 2×6 material. If you have a board with an end that is not perfect (i.e. checked or rough cut), there is no way of trimming the end without leaving the breadboard a little short. Something to consider when you are selecting your pieces for the top – make sure they are good end to end!
Nick says
Thanks Paul! That is a great tip! Hope you enjoy your plans for many years to come!!
Malcolm says
Hi there–
Is the coffee table already stained in the pictures you have, or did you take those before staining.
I wasn’t sure what that Behr stain looks like once it’s on the wood.
Alicia says
Hi Malcolm, the photos show the furniture without any stain, it is just natural cedar. We have since stained it with Behr Penetrating Oil in Chocolate and it’s a really nice deeper/natural look still with protection properties.