
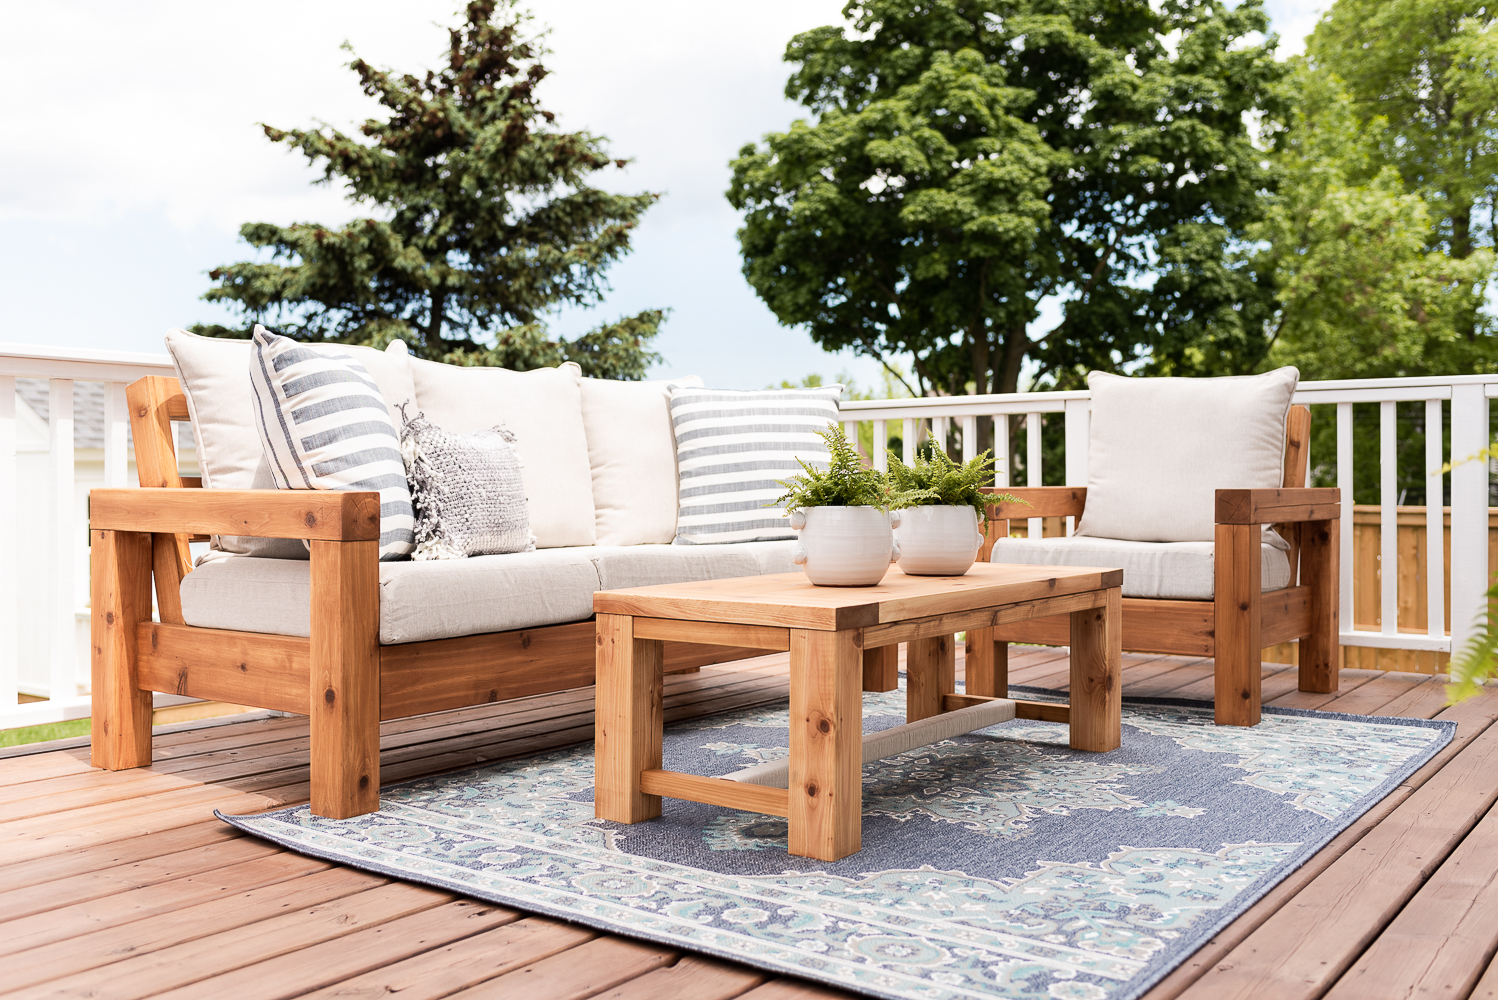
A modern silhouette and clean lines make this outdoor sofa the perfect addition to any outdoor living space. Find free plans to build your own here.
Looking to build the set?
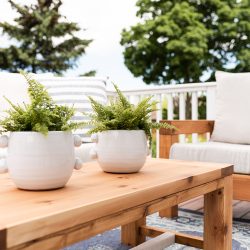
We also have plans for the matching outdoor chair and coffee table!
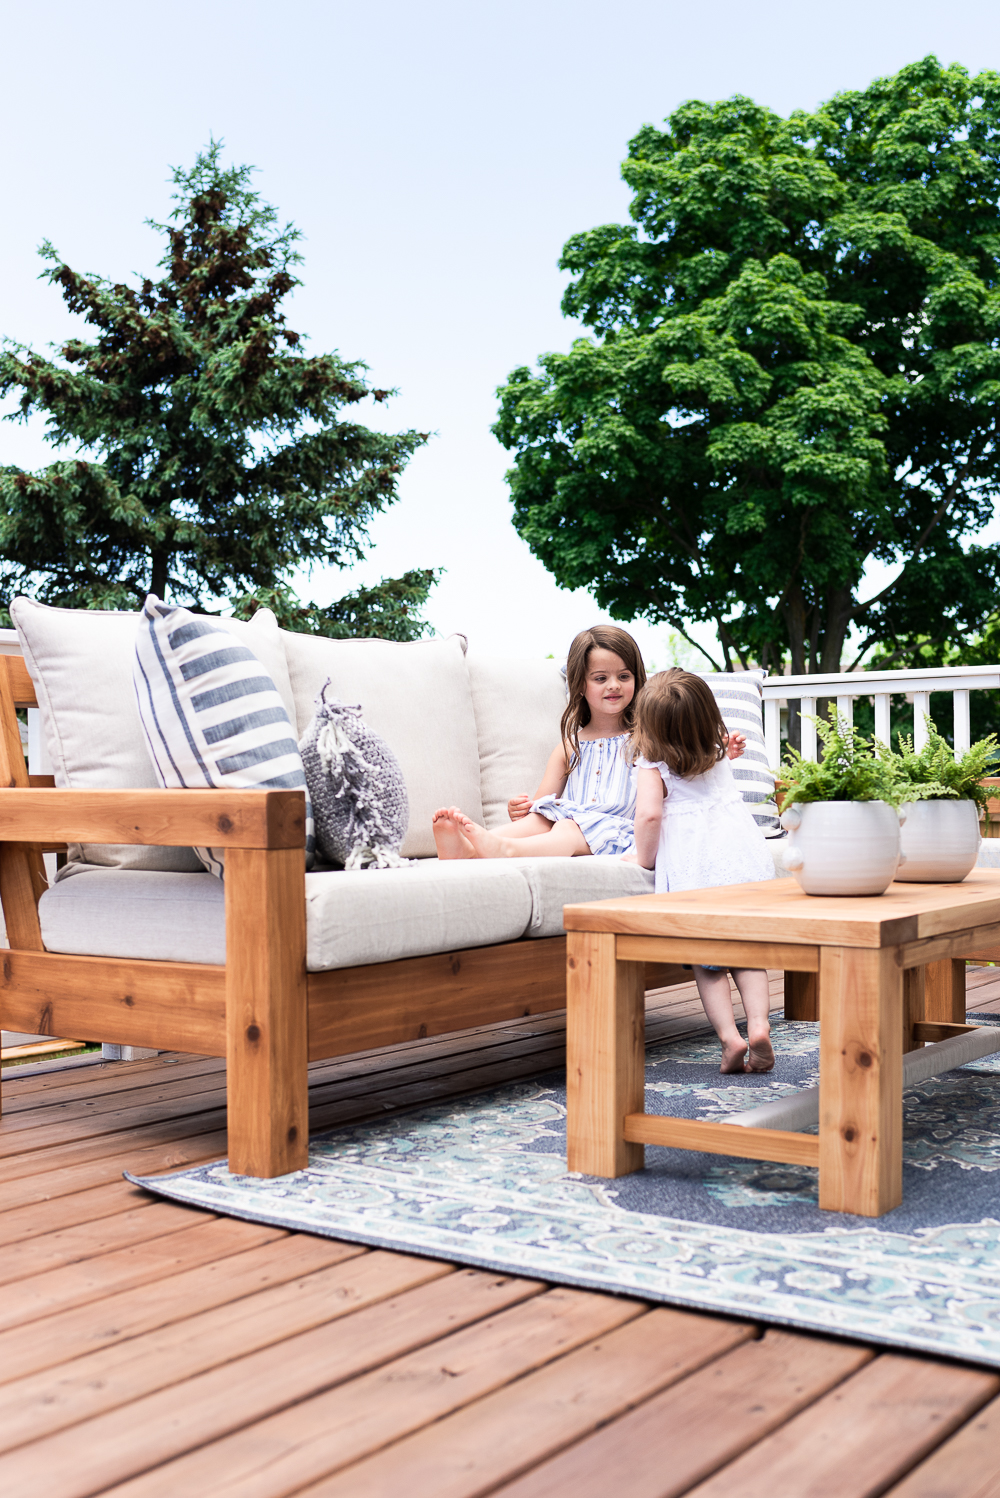
Creating an outdoor space that is beautiful, safe, and practical can make a huge difference in how you use and enjoy your home. It’s the best way to increase your living space, and really make the most of the summer weather. Last spring we began working on our backyard, and with the completion of this beautiful outdoor furniture, it’s finally shaping up to be the space we imagined (take a peek at our outdoor design plan).
We dreamed of a backyard that reflected our style and flowed with the interior of our home, and with that in mind, we began looking for the perfect outdoor sofa. But we came up empty-handed. Most sets that we found were lacking in some way, whether it was the size, quality, or style. And the few sets that we did find and fell in love with were wildly out of our price range. So we decided to partner with our friends at Kreg and Buildsomething.com to build our own, and of course, share those plans with you.
We took a lot into consideration before Nick began building this project, from the material we chose to make sure we thought about even the tiniest details, we wanted this to be the perfect outdoor sofa. And I’m so glad we did because this is the perfect outdoor sofa.
The Perfect Outdoor Sofa
The Shape
I showed Nick a few of the outdoor sofas I loved and he mocked up a few options for me. Just like any space in your home, your outdoor living space should reflect your style and flow with the other rooms in your house. This meant we wanted an outdoor sofa that was traditional but still felt modern and fun.
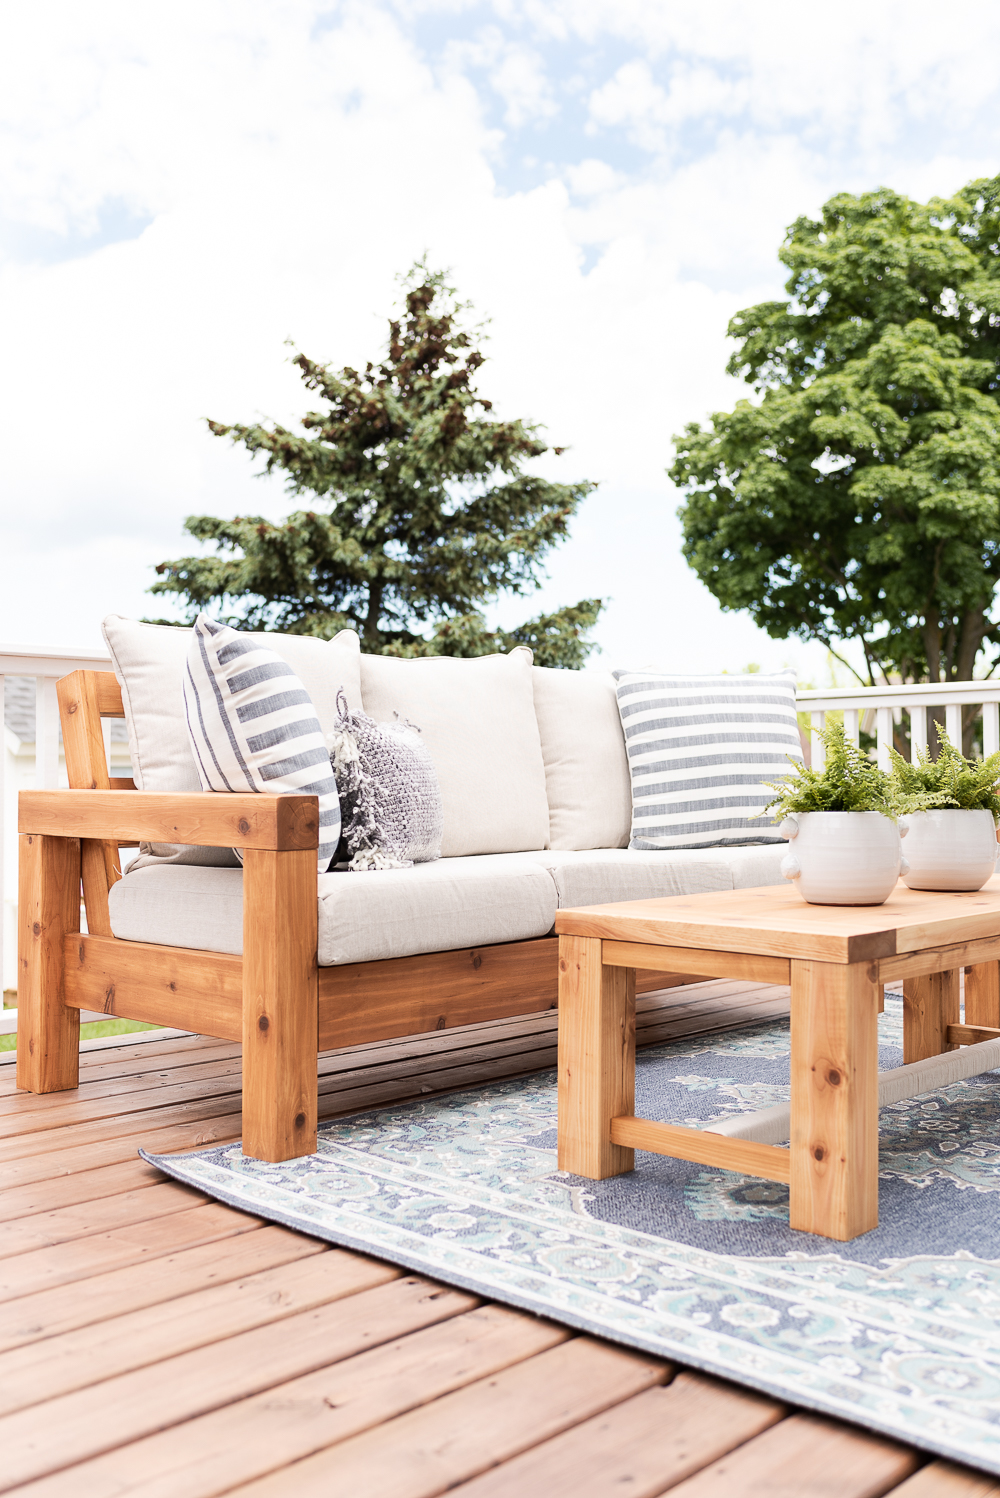
We settled on this classic design that features a modern silhouette and sharp clean angles that are simple and streamlined.
The Material
This was another big decision for us. Like most households, our budget is always front and center, so we considered our options. We could use dimensional lumber or pressure-treated wood and while the cost was definitely in line with our budget we knew the quality and resilience just wouldn’t be there.
Nick also looked into cedar as an option, which would provide much more durability to the elements, as well as look beautiful for many years to come (with the right upkeep). But it was a big jump in price, it was more than double the cost of pressure-treated and five times the cost of dimensional lumber.
We ended up choosing cedar, even though it cost more, but we wanted to be confident these pieces would last. Cedar was definitely the right choice, it’s beautiful and sturdy and we know we won’t be replacing this outdoor sofa anytime soon.
The Details
Nick really paid attention to the details while designing this piece.
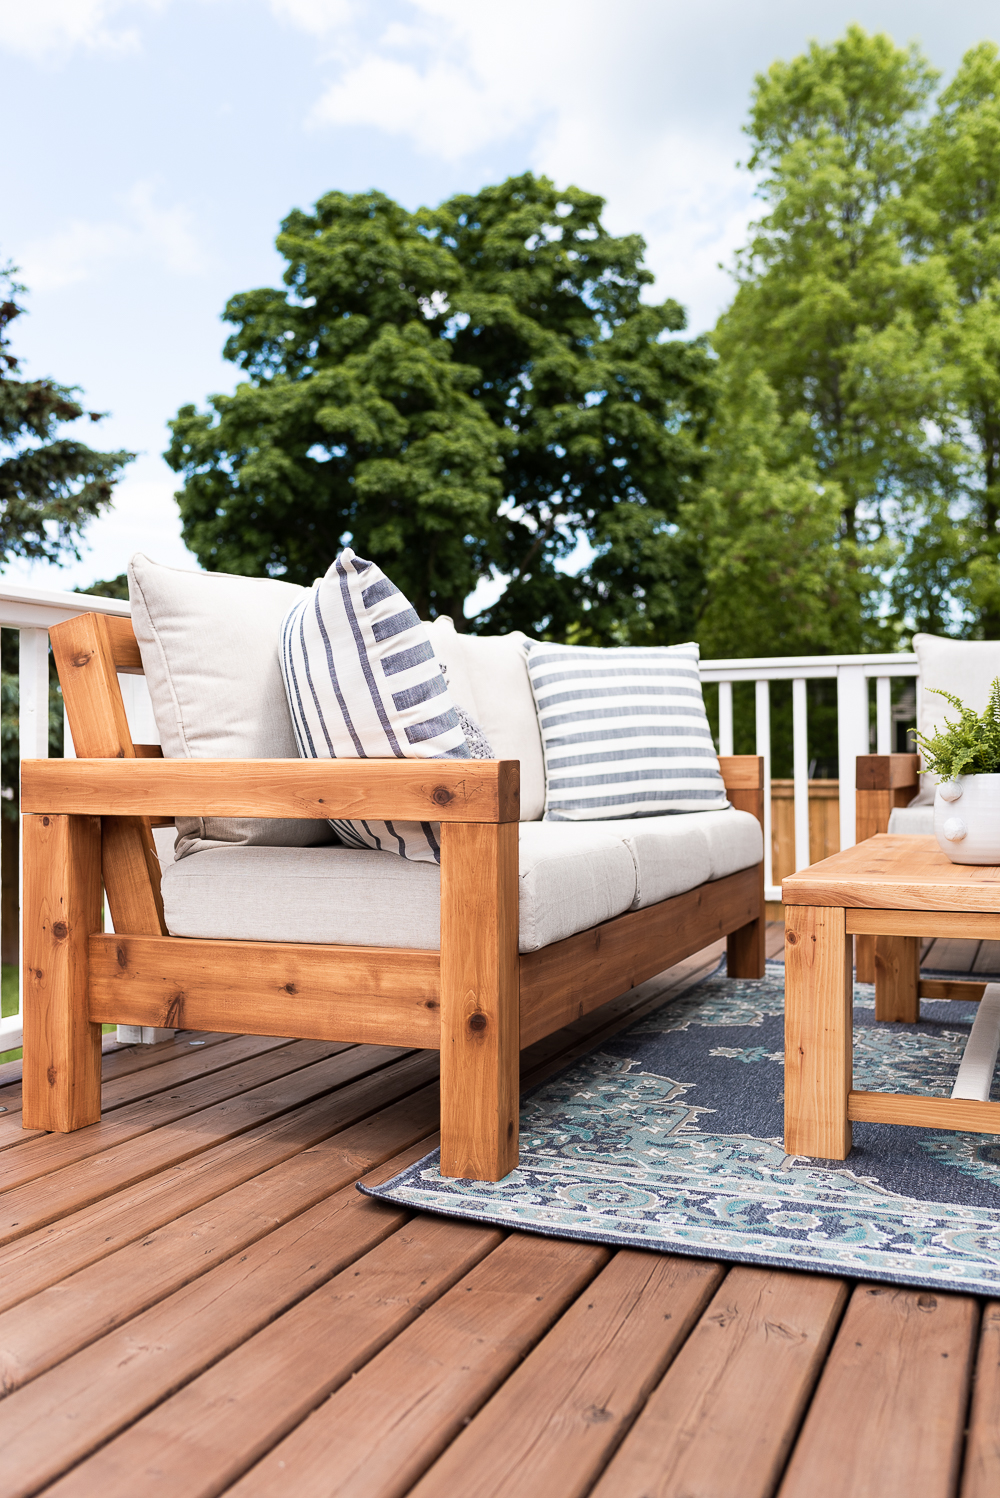
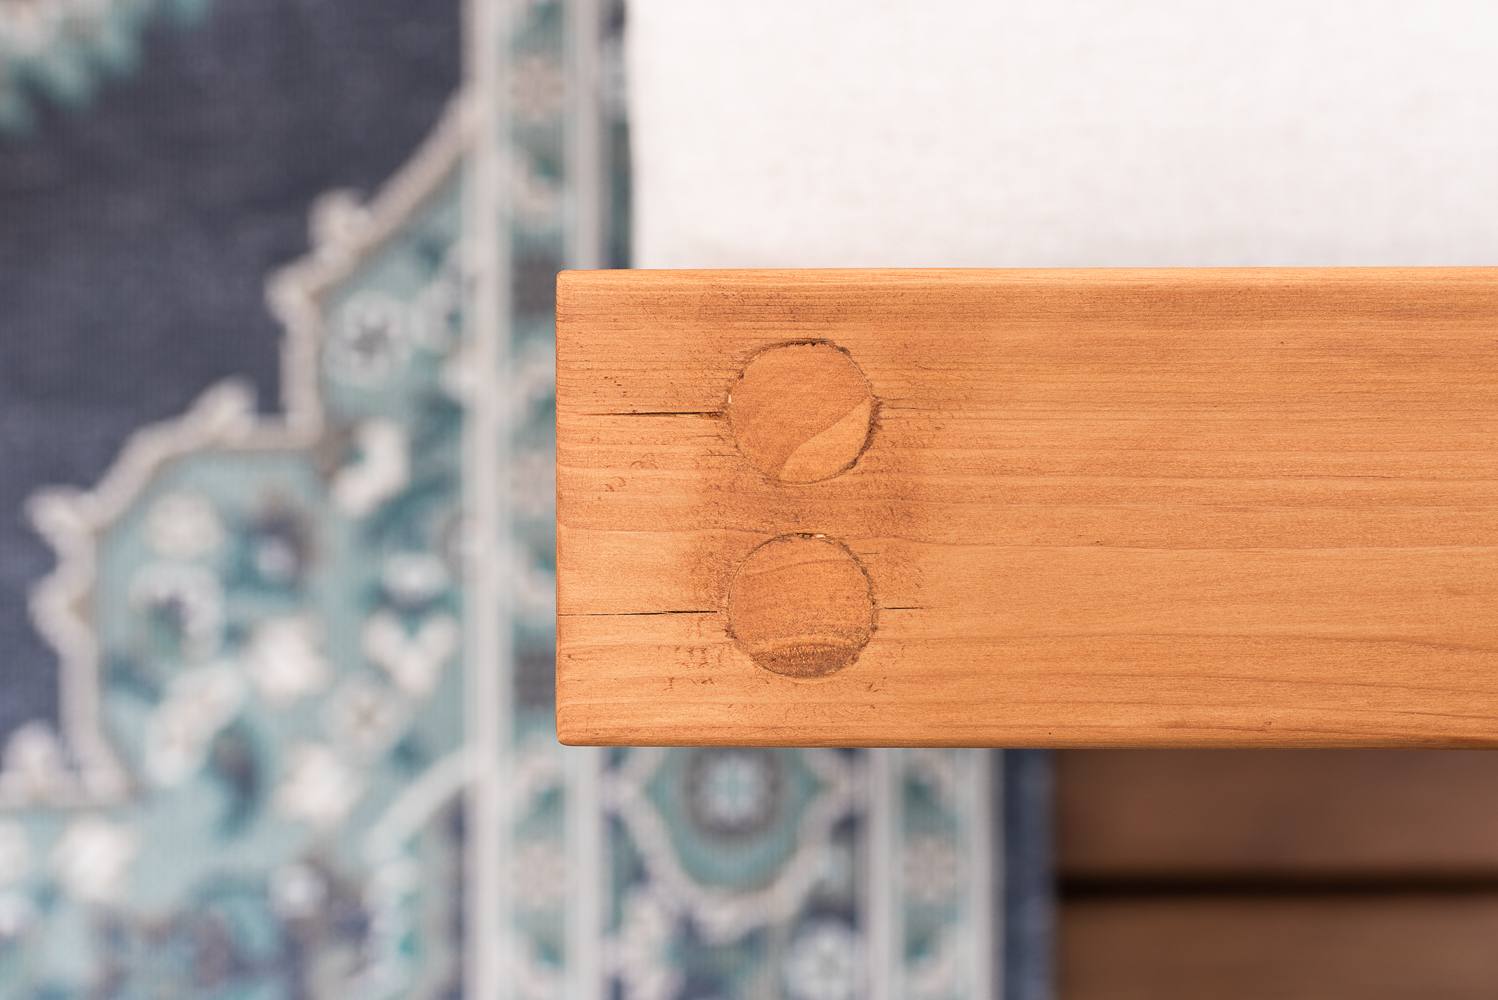
The addition of the dowel inlays on the arms gives a handcrafted feel to the sofa.
And he found the perfect recline for the sofa from both a comfort and design perspective. He didn’t want it to be apparent that the sofa seat and back are actually reclined when you first look at it. This was a deliberate attempt to help keep the modern silhouette that we were looking for.
We also thought long and hard about the finish we would use. Nick considered using deck and furniture stains, but we didn’t like the idea of it peeling and something about it felt inauthentic to the look we were striving for. He did a bit of research and decided to use a penetrating wood oil with a stain mixed in. This will help prevent the cedar from turning grey as it offered some UV protection, help repel water, and would not peel when exposed to the elements. It’s also a one-coat process and won’t require too much effort if the furniture requires another application next year.
The Textiles
Once Nick finished building the sofa I couldn’t wait to set it up with the cushions and pillows we had purchased to see the final look and test out just how comfy it is. As we all know, furniture can look beautiful, but it needs to be comfortable too.
We used outdoor cushions in a neutral colour perfect. I also added these striped pillows and a textured lumbar pillow to complete the look.
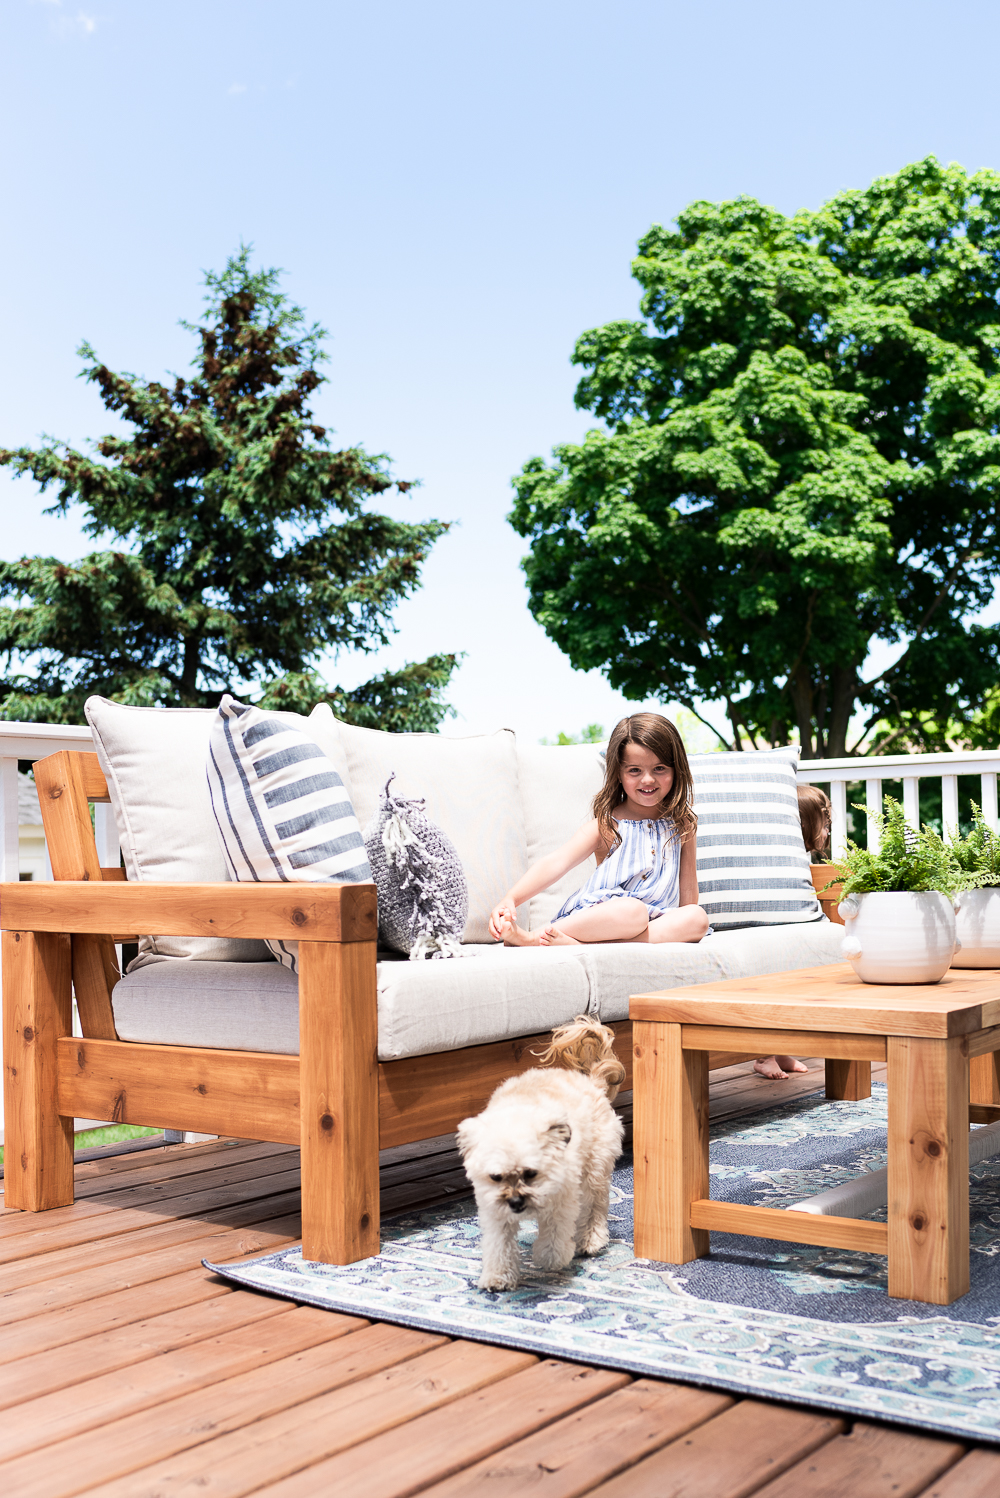
It’s been put to the test already, and it’s the perfect place for a little nap under the sun.
We also offer plans for the matching outdoor chair and coffee table to complete your patio.
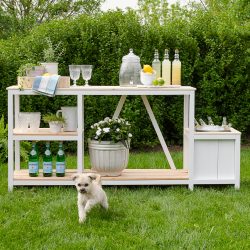
And while you’re at it, why not build a patio bar, it’s perfect for hosting outdoor get-togethers or as a BBQ prep station.
Details at a Glance
- Sofa
- Chair (DIY)
- Coffee table (DIY)
- Rug
- Sofa and chair cushions
- Striped pillows
- Lumbar pillow
- Planters

Jill says
Hi! Where did you find the cushions for your sofa?
Thanks!
Nick says
Hi Jill,
We purchased these ones at Home Depot in Canada (Hampton Bay brand), but any 24″ x 24″ outdoor cushion set will work!
Scott says
This looks great, the best I’ve seen online and awesome plans too. Moving to a new place with a big patio first of August and thinking of building the full set. If you don’t mind me asking, any ballpark on your lumber / material costs ?I’ve always been partial to cedar for durability, 100% agree it’s worth the added cost. Thanks !
Nick says
Hi Scott,
For the sofa, it was around $200 in cedar, the chair was about $150, and the table was about $100. The expensive part was the cushions! It cost us about $80 per set of bottom and back – about $320 total. But you know what, it was worth it!
Scott says
Thank you for this – super helpful. We recently renovated a fibreglass travel trailer, including reupholstering the seat cushions and it was one of the most expensive components – so i’m no longer surprised! Thanks again and looking forward to tackling this project!
Nick says
No problem Scott! We’d love to see a pic of your build so make sure to send us a photo when you’re done!
Kathleen Shirk says
HOw do I get the sofa plans?
Alicia says
Hi Kathleen, at the end of the post there is a link that says “Click Here for the free plans”, it will take you to our partner site with the plans to build the sofa. Let us know how it goes! 🙂
David Balfour says
No where do I go
Alicia says
Hi David, look for the button that says “Click here for our outdoor sofa building plans”, if you click on it, it will take you to the Kreg website with the full building plans!
Michael Kiley says
How long did it take to build?
Nick says
Hi Mike,
I built the sofa, chair and coffee table in about two full days, then a few weeknights to do the final sanding and applying the penetrating oil.
Michael Kiley says
Impressive! It’s a beautiful set, thank you for sharing the plans!
Alicia says
Thank you, Michael! 🙂
Sherry says
Thanks for sharing these ideas and plans. Your ingenuity always amazes me!
Alicia says
Thank you, Sherry! Your comment brightened our day! 🙂
DBrooks says
Hi –
Do you know what the stain color you used for this was? I like the color you guys chose, and the post says you had some stain tint mixed in.
Thanks
(bonus question: did yall use a orbital sander? I am using a sheet sander and the sanding is absolutely taking forever)
Nick says
We used Behr Transparent Penetrating Wood Oil – Chocolate. Some people have been having trouble finding the transparent version, and only finding the semi-transparent, which turns out darker. You can ask the paint counter at Home Depot to see what they have available.
So, since cedar is soft, I actually only hand-sanded (for a few late nights). I used orbital on the arms a bit, but a sheet sander may actually yield better results. If you used cedar, I think you’re doing the right thing using a sheet sander!
DB says
Thank for responding. After reading about it that Bher product seems pretty perfect for getting this to hold up outside. And glad to hear I am not alone with the difficulty sanding, the rough cut cedar just required so much material to be taken off to get a smooth surface, but it really does look great.
Pieter says
Just built these plans. Couldn’t find cedar for anything except the 4×4 and ended up having to use studs and deck boards. Made the rear part of the sofa look janky at best (given the rounded edges meeting straight cuts).
Great plans, however! Added another cedar 4×4 along the top of the rear portion with 6 1/2 inch spade holes with dowels. Will be building your coffee table this weekend.
Quick question: I have a 18×8 covered patio, was the additional chair enough seating for you? I am thinking about building a ‘loveseat’ type setup by subtracting 24″ from the linear dimensions of this sofa. Alternatively, I’d just build the chair!
Thanks for all you do!
Pieter
Nick says
Hi Pieter!
That would be a great idea to add a loveseat! We did find that it was enough seating for us now. The sofa fits 3 people comfortably and one on the chair. We have our set placed near our patio table and the benches that go along with them. So when we have more guests over we just pull over the benches!
Pieter A Vernon says
Thanks for the Reply, Nick!
Decided on two of your chairs, instead!
That said, have you had any issues with the cushions you selected from Target? I have read they compress, and stay compressed, after a relatively short lifespan.
Thanks for the replies!
Alicia says
Hi Pieter, we actually purchased our cushions from The Home Depot in Canada (there is a link to them in the post with the sofa plans). However, they were not available in the US so we provided a few different options for our US followers. We love the cushions from The Home Depot and they have held up very well but I can’t give any feedback on the Target cushions as I haven’t seen them in person. I’m sorry, I know that doesn’t help very much, if you have any other questions please let us know!
SEAN SELF says
Nick,
I just finished building the couch and two chairs this weekend. Your plans were perfect. I’m not a huge builder but I was able to finish the project in about 13 hours and that including planing my own rough cut cedar. I had a blast doing it. The end product has awarded me the admiration of my wife who didn’t think I had it in me. The furniture will last a life time. I’m going to tackle the coffee table next. Thank you for the plans Nick.
Sean
Highland Village TX
Alicia says
Sean, your comment made our day! We are so happy that you tackled this project and we hope you’ll stick around because we’ve got a lot more projects planned for this year too!
Tim Shippy says
thank you very much for these plans. I am in the middle of making my sofa right now. it’s looking great so far. I am making it XL using full 96″ length (4 cushions wide versus 3) which will make for a nice massive sofa. Added benefit is less cutting of wood. Sanding took a while but will be well worth it. I am about to start on the back, but I am debating on having the pocket holes face the cushion side (not rear side) since my back will be facing my living room windows. I think it will make for a cleaner back. Any issues or concerns?
Nick says
You can certainly do that. The reason I had mine facing the back is so that water wouldn’t contact the area as much, but you can get plugs to fill the holes if you want!
Steve says
Has anyone done this with 6x6s?
Any pictures?
Nick says
Hi Steve,
I haven’t seen or heard of anyone doing this with 6×6’s. They’d be pretty chunky for sure!
Justin says
Hello! We are trying to plan out this build and are wondering:
1) Which Kreg pocket hole jig to purchase
2)Which of the Besseys Clamps to purchase.
Thanks,
Justin
Nick says
Hi Justin,
I definitely recommend the new Kreg 720Pro Pocket Hole Jig for this. It just came out and I got one and it is miles better than their older K5 model!
I have a whole assortment of these Bessey Clamps. I have some 48″, some 24″ some 18″. They all come in handy for various projects!
Tracey Korn says
Hi Nick and Alicia,
My husband is currently building me two of these couches for my birthday, upon my request. Thank you so much for the plans! Quick question. We want to make sure the furniture lasts a while! Would you recommend some type of feet or rubber feet on the bottoms of all the legs to keep the wood off the ground, or do you think the wood oil/stain does a good job of protecting it from rot? We ended up having to use redwood, as cedar is not available in our area. I’d appreciate your thoughts on this.
One other small note is that my husband said that the supply list did not list our 3″ deck screws, but the first step called for 3″ deck screws. He had only purchased 2.5″ so not sure if that was a mistake or an oversight.
Also, do you have any plans or thoughts of building an ottoman to go with this? We’d be interested in those plans, as well!
Thank you,
Tracey and Andrew
Nick says
Hi Tracey and Andrew,
That’s such a nice birthday present and I’m sure they’ll get a lot of use this summer! We didn’t put anything on the bottom of the feet other than the oil, but you can definitely put something on the bottom just to keep them from sitting directly on the ground and drawing up water. We live in Canada and get quite the snowy winter and I just covered these up with a giant tarp, being sure to put the tarp under the legs as well to reduce the contact with the deck and they seemed to have held up really well.
I did get Andrew’s message through the BuildSomething.com website and I will be sure to add the 3″ screws to the list!
We had thought of building an ottoman to go with this, however, we didn’t have enough space on our deck for one. You could easily adjust the measurements of the chair to remove the back and alter the height of the arms to create an ottoman!
Good luck on this build and we would love to see some photos of the finished product!
Nick & Alicia
Tom Pienaar says
Thanks so much! Just finished building mine exactly as plans outline, except I used a stained pine/fir mix, and also I joined the arms to the legs with finger joints, which make it look a bit different.
Nick says
Hey Tom, that sounds awesome, we would love to see some pics if you have some to send our way, or tag us on instagram @nick.and.alicia and @nick.and.alicia.bts!
Taylor Graham says
Hey Tom, I’m thinking of using pine as well, would love to see your pictures if available, as well as hearing about your staining / sealing strategy! You can reach me at budgetpinatas@gmail.com
Kyle Shaffer says
Hi Tom, Can you send pics of the pine to kshaff93@gmail.com. I a m wondering what the best alternative to cedar is?
steve says
could you do this with 4×4 instead of the 2×6 ? replacing 2×6 bottom front and sides spans with 4×4.
Nick says
Hi Steve,
You sure could! As long as the 4×4’s line up in the same location at the top as where the 2×6’s would have been.
Steve says
Does anyone know the seat cushion thickness?
Nick says
Hi Steve, sorry for the delay in response. These are 5.75″ thick cushions on the bottom. Hope this helps!
Eliane Leblanc says
Hi! 🙂
Did you receive any photo of someone who did a 4 cushions wide version of the sofa? We are planning on making one and would really like to see an example.
Thanks!!
Nick says
Hi Elaine,
I haven’t seen anyone do a 4 cushion wide one yet! If you were to build that, I would suggest putting an extra support leg in the middle!
Scott says
What are you using for furniture feet?
Nick says
Hi Scott,
I didn’t put anything under it for furniture feet. I considered it, but I ended up soaking the ends in penetrating wood oil (same as what I used on the entire sofa) and it seems to keep any water from drawing up into the legs!
Nicholas Fitzpatrick says
Hi Nick and Alicia!
I just wanted to leave a comment and say thanks for the plans! I built the sofa yesterday and it turned out great, especially for was my first real building project! Now to find a stain and some cushions, and the time to build the chair! Hope all is well 🙂
Cheers!
Nick says
Hi Nicholas!
That’s great, I’m happy to hear that you found our plans helpful!
Michel Turcotte says
Just want to say thanks for the plans! I now have 2 beautiful sofas in my backyard. I wanted to use cedar but made them with treated wood instead. The price of wood is crazy this year!
Are you still happy with your cushions? I was thinking of going DIY because of mixed reviews on every cushion I see, the Home Depot Canada (fellow Canadian here) included unfortunately but it may only be few unsatisfied and frustrated customers…
Take care and have a great summer!
Nick says
Hi Michel,
You’re very welcome for the plans! I’m glad they worked out for you. Yes, the price of wood is absolutely insane right now! So far we’re happy with them. This is our second season with them and they have not faded, still repel rain fairly well and provide enough cushion. I have noticed the bottoms are less firm than last year, but that is to be expected of any cushion!
Randy Gallant says
Starting my build today. I was fortunate to purchase two incomplete patio sets as a source of cushions (each set being a love seat and two chairs) at a massive reduction so I have 8 seat bottoms and 8 seat backs. My plan is to modify your plans to build a sectional using 7 bottoms and 8 tops. The 8th bottom will then become an ottoman. I’ve got some thoughts about how I am going to deal with the outside back corner but it’s hard to completely envision at this point. Wish me luck!
Nick says
Hey Randy, that’s awesome that you got such a great deal on the cushions! Cushions are so expensive. Good luck and I’d love to see photos when it’s complete!
Randy Gallant says
Hi Nick! Am I correct in thinking that the seatboards actually sit slightly below the top edge of the front 2×6? The plans say to install the bottom supports 1 and 3/8 below but the deck boards are only a full inch thick leaving a 3/8 inch difference.
Nick says
Hi Randy, that is correct. They sit just below the top edge of the 2×6″.
Chaz says
Do you have plans for a matching loveseat?
Nick says
Hi Chaz,
I don’t have one for a loveseat, however this plan could easily be adjusted so that you basically only make the actual sofa center pieces 2/3 the length that is listed on the plans for those boards!
Faith says
Hi,
I absolutely love this sofa and want to adapt it for my patio to seat 4 people. The goal is to make it in pieces that can assemble into the same sofa, with two corner pieces and two armless center pieces.
I am new to woodworking and this would be my first project. Is it possible to adapt this into a pull-apart sofa so I can rotate the pieces as needed?
Any advice on adjusting measurements or anything else to achieve this?
Nick says
Hi Faith,
That’s very ambitious! You could potentially create a sectional by building 2 of these and then making some adjustments to one of the arms (so that it isn’t there) and then you’d be able to slide them together or take them apart – however you wouldn’t have an arm on one of the sofas! I’m not sure how else you could make it work without losing an arm! (no pun intended) 😉
Emily says
Just finished this project! I was able to build it completely with lumber left over from building my deck. I had enough 4×4 for the arms and legs, but then had several 5/4 x 6 decking boards. I doubled up the back span, added extra 4×4 legs in the middle of the front and back spans, added an extra seat support board, and adjusted measurements as necessary. I may add some 2×4’s horizontally to shore up the back a bit but other than that it seems really solid. I have a Great Dane so everything I make needs to be a little extra solid!
Another modification I made was to use glue and dowel pins to attach the arms to the legs. I like the look of the sawed off dowels you used, but I was afraid they might become places for water to collect. By using dowel pins I was able to keep the top of the arms free from holes.
Thanks so much for the plans!
Nick says
That’s awesome! I like the adjustments you made and the dowel pins are such a good idea…stylish and functional! I’m glad you found my plans helpful!
Tony George says
Just wanted to say thanks! Your plans were perfect, hand some problems with the 2 degree cut. Made four chairs using pressure treated, no cedar at my local store.
Nick says
Hey Tony,
I’m glad you found our plans helpful and using pressure treated would be just as good (and less expensive!!).
John says
Hi, I love your plans. I only have the option of pine and redwood available. Which would you recommend? Also I can’t find any 5/4×6 only 1×6 or 2×6. Which would you recommend for the seat boards?
Nick says
Hi John,
I wouldn’t recommend pine as it won’t hold up well to the elements. I would definitely choose the redwood! For the seat boards, I think you would be ok to use 1×6’s, but you may want to add one more seat support across the bottom. Sometimes 5/4 are also referred to as deck boards. Maybe ask to see if they have any of those available!
Kim says
Hello! I live in Hawaii and can’t find 5/4 x 6 deck boards so I think I also have to go the 1 x 6 route. Do I have to adjust the height of the bottom back span and/or the bottom seat support to make up for the 1/4″ difference in height in the seat boards? Thank you!!
And thank you for these beautiful plans – can’t wait to make my husband regret ever suggesting we go store-bought! 😉
Nick says
I don’t think you need to adjust them for the 1/4″ difference. It only impacts the seat height very minimally!
Joel says
Thank you so much for sharing the plans. I really enjoyed building the sofa and the chair and my wife loved them. They look great in our patio. Thank you!!!
Marie says
Hi Nick!
I absolutely LOVE this set! Thanks for sharing. This will be my very first time trying to build something from scratch so wish me luck! I live in NY and the only place where i can purchase any type of wood would be in Home Depot or Lowe’s. Unfortunately, they do not carry Cedar. What other type of wood would you recommend i use? THANK YOU
Nick says
Hi Marie,
You could use pressure treated wood, but sometimes it is wet for a while after you buy it. I would wait a few weeks and let it dry out before you s tart building because it will shrink up a bit.
Good luck!!
Nick
Bert says
Thanks so much for the plans, I think we found our new patio sofas! We also want to go the cedar route, but our local box store only have rough cedar. Did y’all also use rough cedar? If so, what grit sandpaper did you use to get the great finish?
Nick says
Hi Bert, our local box store had sanded cedar. I think that there has been a shortage of cedar with everyone doing outdoor projects! If you are going to sand down rough cedar, be sure not to use a really low grit because cedar is very soft.
Marc says
Thanks so much for the plans. They were very easy to follow and it came out amazing. I added some x-braces to the arms to give it a more “farmhouse” feel.
Nick says
That sounds like a great little addition! Glad you found the plans helpful!
Lisa Ogden says
Hello and thank you so much for the plans! A few questions- would you say these are high back? We are hoping so- and if not – could you recommend an adjustment to make them so? Also we thght about making an ottoman or two to go with the couch- any recommendations there as well? Thanks so much!
Nick says
Hi Lisa,
They are normal backs, I don’t know if I’d consider them high necessarily. If you want them higher, you’d have to modify the back vertical pieces to be longer – that would do it. You could easily design a simple ottoman to go with the couch that follows the same type of design. Have a look at the outdoor coffee table plans. You could probably find a way to modify those to give you what you want!
Angie says
I’m interested in making both the sofa and chairs using your plans. I started to make the 2 arm pieces for the chair and quickly realized how heavy the finished pieces are going to be. Do you think I could substitute 2×4 for the arms and adjust the leg height to make up for the difference? Or could 2×4 be used for both the arms and legs?
Alicia says
Hi Angie,
I suppose you could use 2×4’s for the arms and make the necessary adjustments. It wouldn’t impact the support, just the look of it.
Paul says
Could you also lease the seat at right angles/flat as opposed to 2 degree ‘recline’. Thanks
Paul says
leave the seat vs lease the seat that is.
Nick says
Sure can!
Robert Preston says
I built this for my father for his balcony as the store bought furniture just flew around in a stiff wind.
I made 2 significant enhancements/modifications for his environment that I think are useful considerations regardless of the winds. First, when I bought the 24” Hampton Bay cushions from Home Depot Canada I also purchased 2 bolster cushions for each end.
So I added a vertical upright mid-way between the front and rear legs from the side of seat base frame up to the underside of the armrest that prevents the cushion from pushing out under the armrest when leaning on it.
The second modification I made was to run a wire on the back and then used Carabiner’s to clip each pair of seat & back cushions; enabling quick release to take inside and keep dry or remain secure left out. Arthritis-easy to use vs. fussing with ribbon ties.
Nick says
Those are all great ideas Robert! I’m glad these were able to withstand the wind!
Gerard Hammond says
Hi Nick
I am going to be starting this project this week. It is absolutely what I need in my backyard. Just confirming that the cushions are 24“ x 24“. I am looking on Home Depot and all I find is 24 x 22“, I want to make sure before I start building. I don’t have to adjust the plans. Thanks.
Nick says
Hi Gerard,
We built this sofa a couple of years ago and back then the cushions were 24×24″. I would go have a look in-store. When I look at the Hampton Bay cushions online it says 24×22″ in the name, but then in the description it says 24×24″. Maybe it’s a typo in the product name. It says the cushion back is 22″ high which is maybe where the confusion is. That size would be fine for the back cushion, just go in and measure to ensure the bottom is 24×24″ and then you won’t have to make any revisions. If the bottoms are indeed only 22″ wide, I would change any of the boards that go lengthwise across by 6″. That would help you keep the cushions nice and tightly together!
Good luck!
Ross says
Was gonna try to make this but have a question about the 2 degree cuts. Are both sides cut with the same angle like a parallelogram? Or are they supposed to be cut opposite like a trapezoid. Thanks!
Nick says
Hi Ross, yes, they will need to be cut like a parallelogram! Good luck with your build!
Leslie says
My husband made this set for our patio and it turned out beautiful! We made the sofa, two chairs and coffee table. We used cedar and stained it chocolate as you recommended. I bought cushions off wayfair for a great price. I just love the simplicity of the design. It’s comfortable and we look forward to enjoying it for years to come!
Alicia says
That is so great to hear, Leslie! It is such a timeless design, and nothing beats making pieces like this for your home as you know the quality and material that went into it. Thank you for sharing with us!
shelley says
i finally finished the table… sat unfinished in the garage all winter 🙁 but finally finished and it is beautiful!! Not sure I would make it again lol I’m just a mom but I did it and my son helped with the sofa and it was a great project – learned a ton. Wish I could send a picture it is a beautiful little set. I made it out of cedar!
Alicia says
That is so amazing to hear, Shelley! We are really happy you gave it a go! You can send us a photo of the project at hello@nickandalicia.com, we would love to see it!
Kyle says
What is the best alternative to cedar for looks and durability?
I ask because I am having a hard time finding the cedar + where I do find it is quite pricey
Nick says
Hi Kyle,
Cedar will be expensive, but that’s because it holds up to the outdoor elements. Teak is another outdoor wood but will be very very expensive.
You could also use regular pressure treated wood. It will stand up to the weather better than pine or standard framing lumber.
I would suggest if you don’t want to go with cedar, you at least use pressure treated wood.