BROWSE BY CATEGORY

  • Design
  • Projects
  • Lifestyle
  • Recipes
  • Shop Our Home
  • Home
  • About
  • Work With Us
  • Design Services
  • Contact
  • Design
    • View All Design Posts
    • Decor
    • Design Tips
    • Makeovers
    • Design Plans
    • Shopping Guides
  • Projects
    • View All Project Posts
    • Woodworking
    • DIY
  • Lifestyle
    • View All Lifestyle Posts
    • Entertaining
    • Seasons
      • Spring
      • Summer
      • Fall
      • Winter
    • Holidays
      • Gift Guides
      • Valentine’s Day
      • Easter
      • Thanksgiving
      • Halloween
      • Christmas
    • Recipes
      • View All Recipe Posts
      • Appetizers
      • Drinks
      • Breakfast
      • Dinner
      • Dessert
      • Seasonal
        • Easter Recipes
        • Fall Recipes
        • Halloween Recipes
        • Christmas Recipes
  • Browse by Room
    • Kitchen
    • Dining Room
    • Living Room
    • Bedroom
    • Kids Bedrooms
    • Family and Playroom
    • Office
    • Outdoor Living
  • Shop
    • Shop Our Home
    • Shop Our Cottage
    • Nick’s Workshop

Nick + Alicia

Timeless Design

July 27, 2021 | by Nick

Modern Nightstands | Free Plans

These free plans for a set of modern nightstands have clean architectural lines with a linear look. They have a single drawer and feature inset panels on the top, sides, and drawer front.
Free DIY building plans for a pair of modern nightstands.

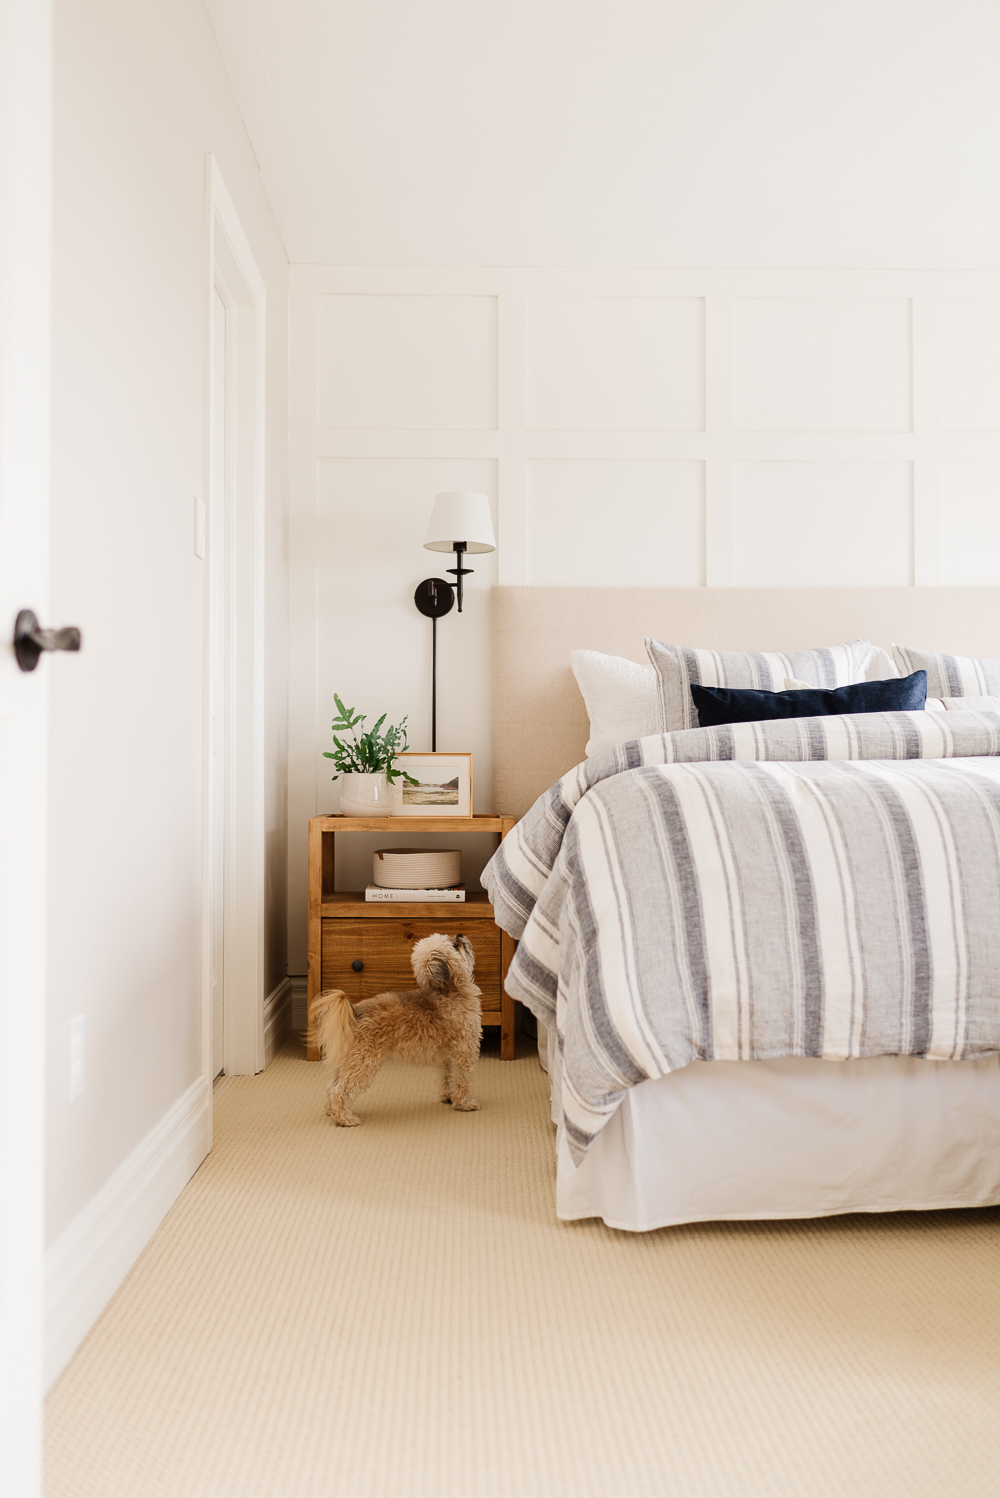
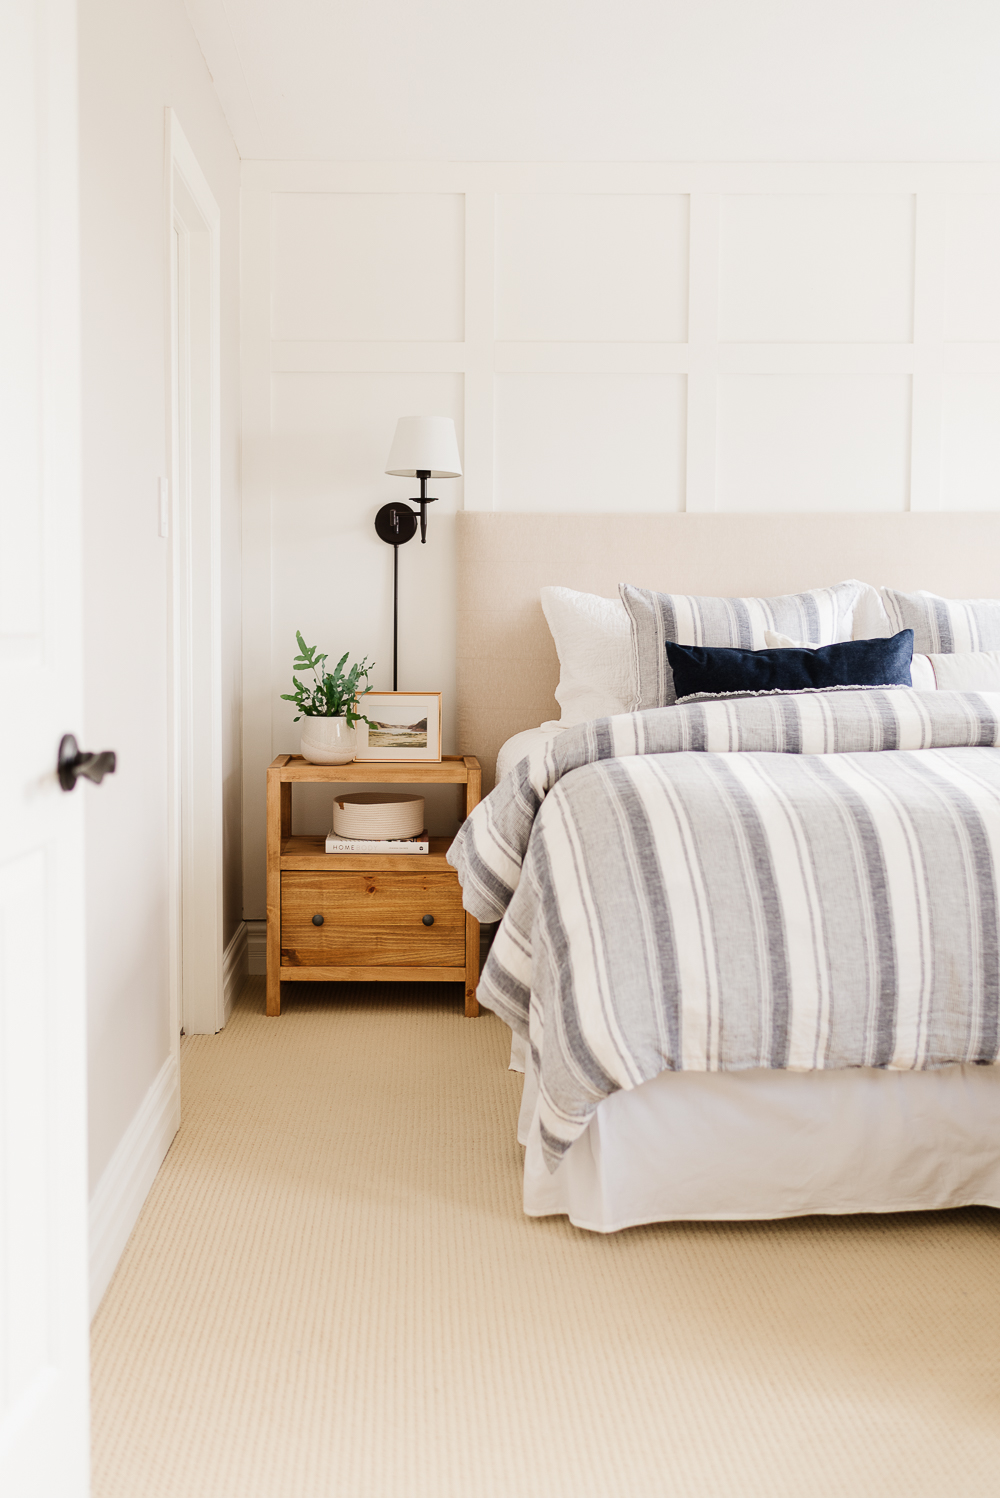
In my quest to build every piece of furniture in our home, I recently built these two nightstands to replace the basic ones we had in our master bedroom. It’s not the first time I’ve built a pair of nightstands. A couple of years ago when we designed Zoe’s bedroom, I built these little nightstands which are a totally different style but suit her room so well.

We found a style we liked for our master bedroom nightstands, but they were too large for either side of our bed, and frankly, well out of our price range. Every time Alicia sends me a photo of something she likes, I know that I’m going to have to find a way to recreate it on a budget and scale to fit our space while keeping the essence and intent of the piece. I like a challenge, so I rarely say no.

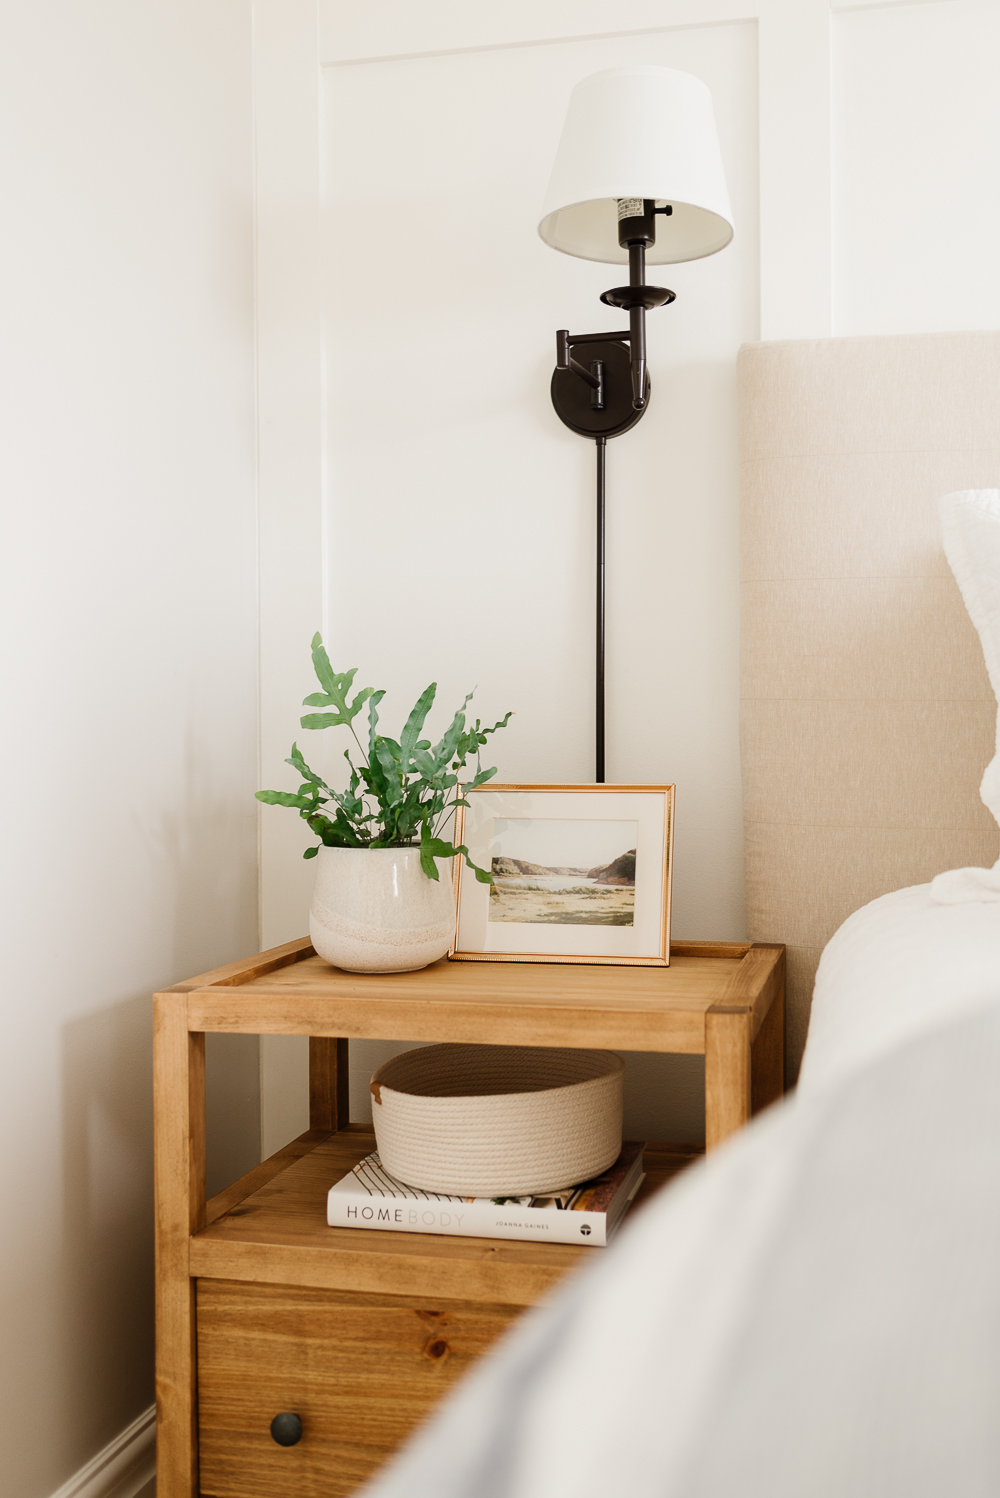
Plus, it’s really nice to find a way to build something at a fraction of the price of the original. In this case, these nightstands would have cost more than $1,700 to purchase and I built them in just a few hours for $200, including hardware!

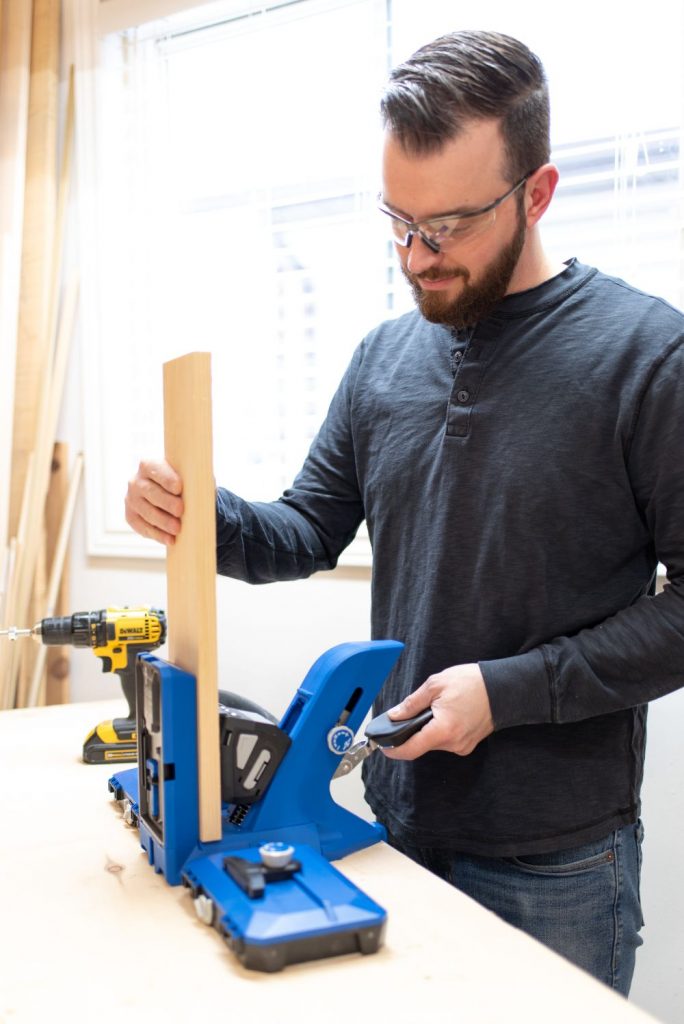
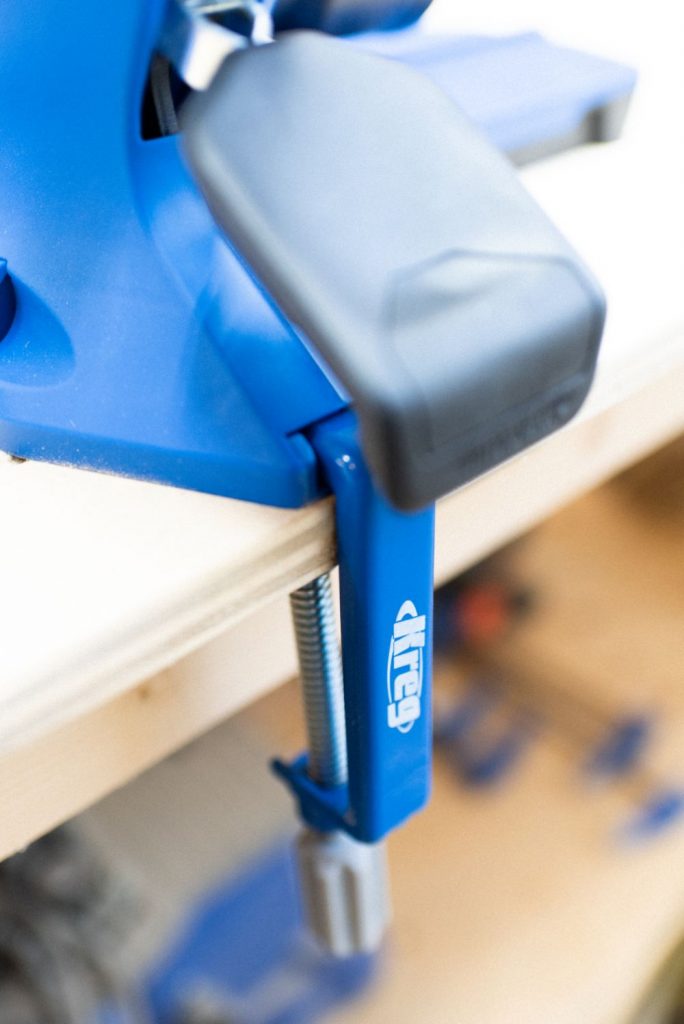
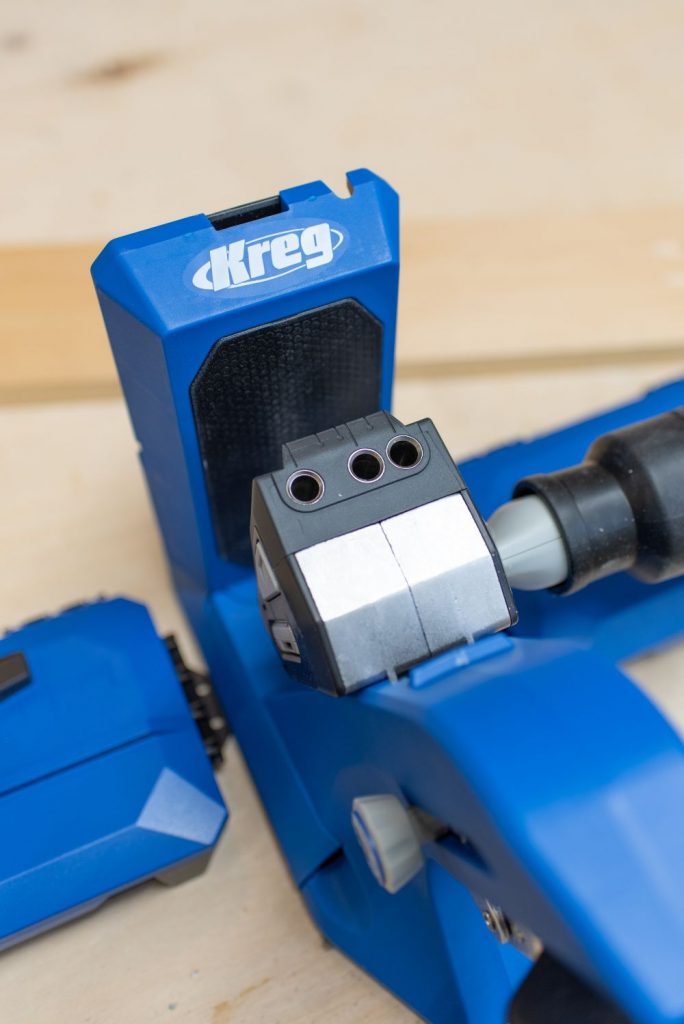
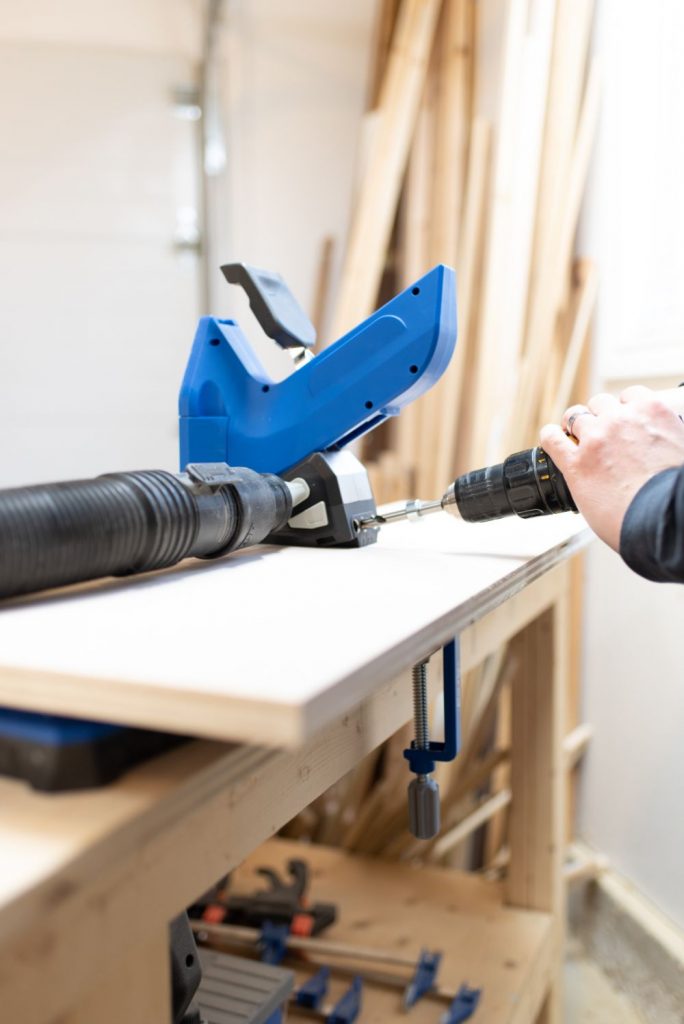
For this project, I’m going to use my Kreg Pocket-Hole Jig 720PRO. This is the newest model that hit the market this year, and it’s honestly such a huge upgrade from the previous models. It now has features like the Automaxx™ clamping that really does save time and effort because it adjusts to the exact thickness of your material. Previously you’d have to set the jig manually and adjust as you drilled pocket-holes into different size boards.

Puppy in front of modern nightstands. Free DIY building plans.

Two of my other favourite features are the Jig Clamp so that I can secure it directly to my workbench and the dust collection port. I mounted my last model to a plywood board and would clamp it to my workbench, but this is so much easier and allows me to fold the wings up and keep it out of the way when I’m not using it.

The ability to flip the pocket-hole jig around so that I can lay a board flat on the support wings and drill pocket holes is also a game-changer! I’m no longer trying to balance a giant piece of plywood vertically. I can now safely complete the task with the board in a horizontal position.

The Design

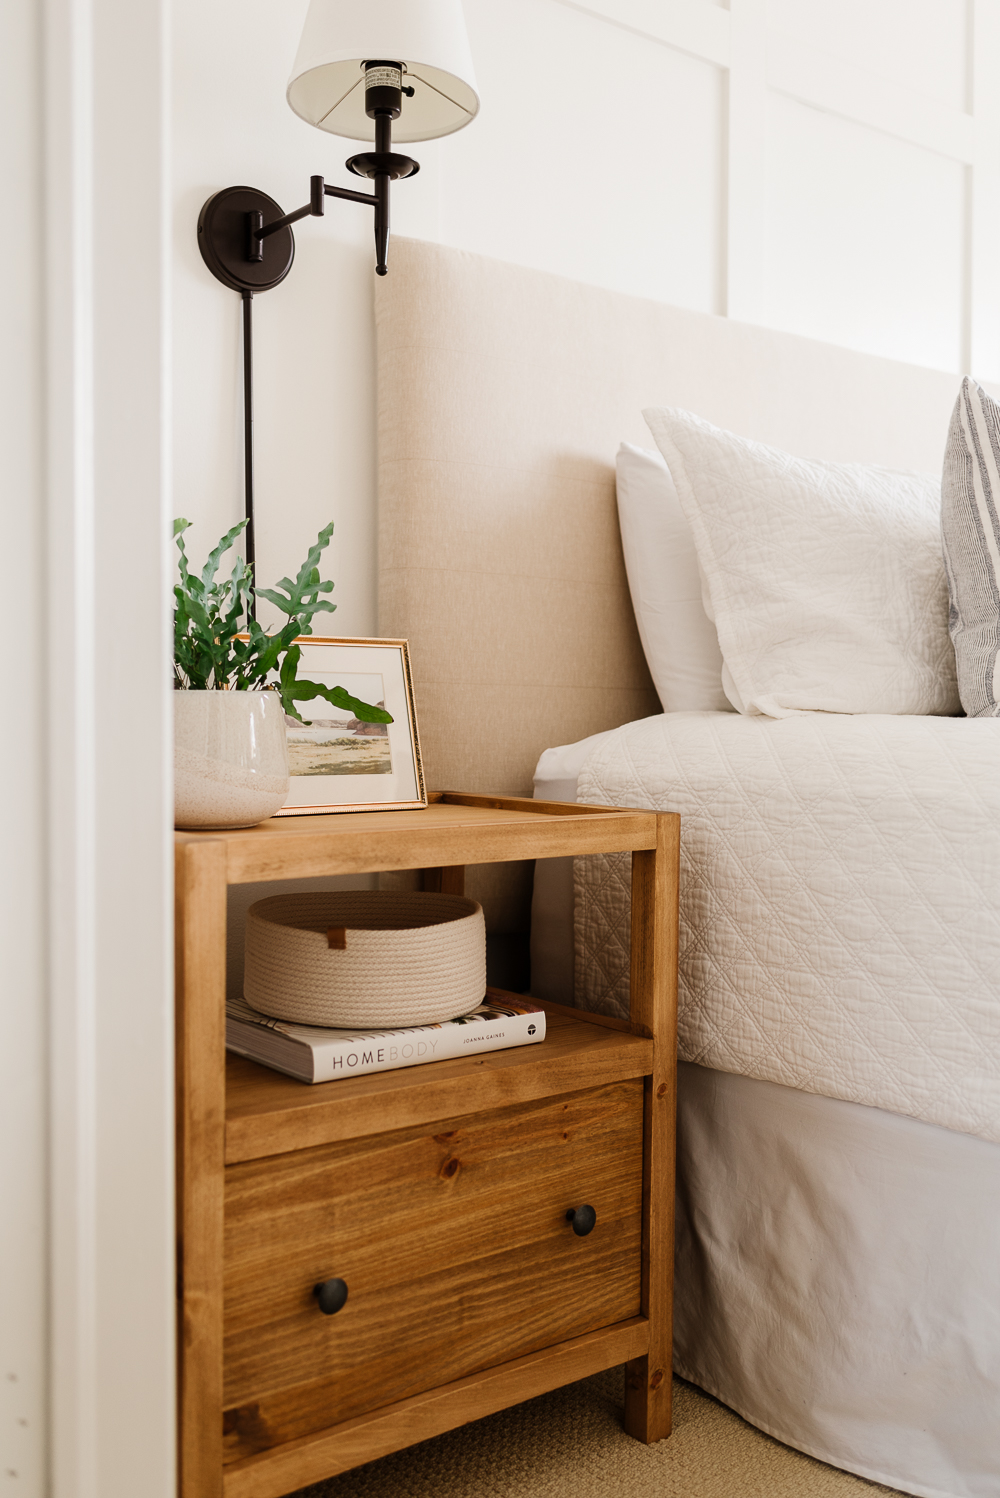
The design of these nightstands features a large drawer with soft-close slides, a shelf for easy access to your books, magazine, tablet, or phone. It also gives you another space to display items (and we can never have enough of those in our home…just ask Alicia!).

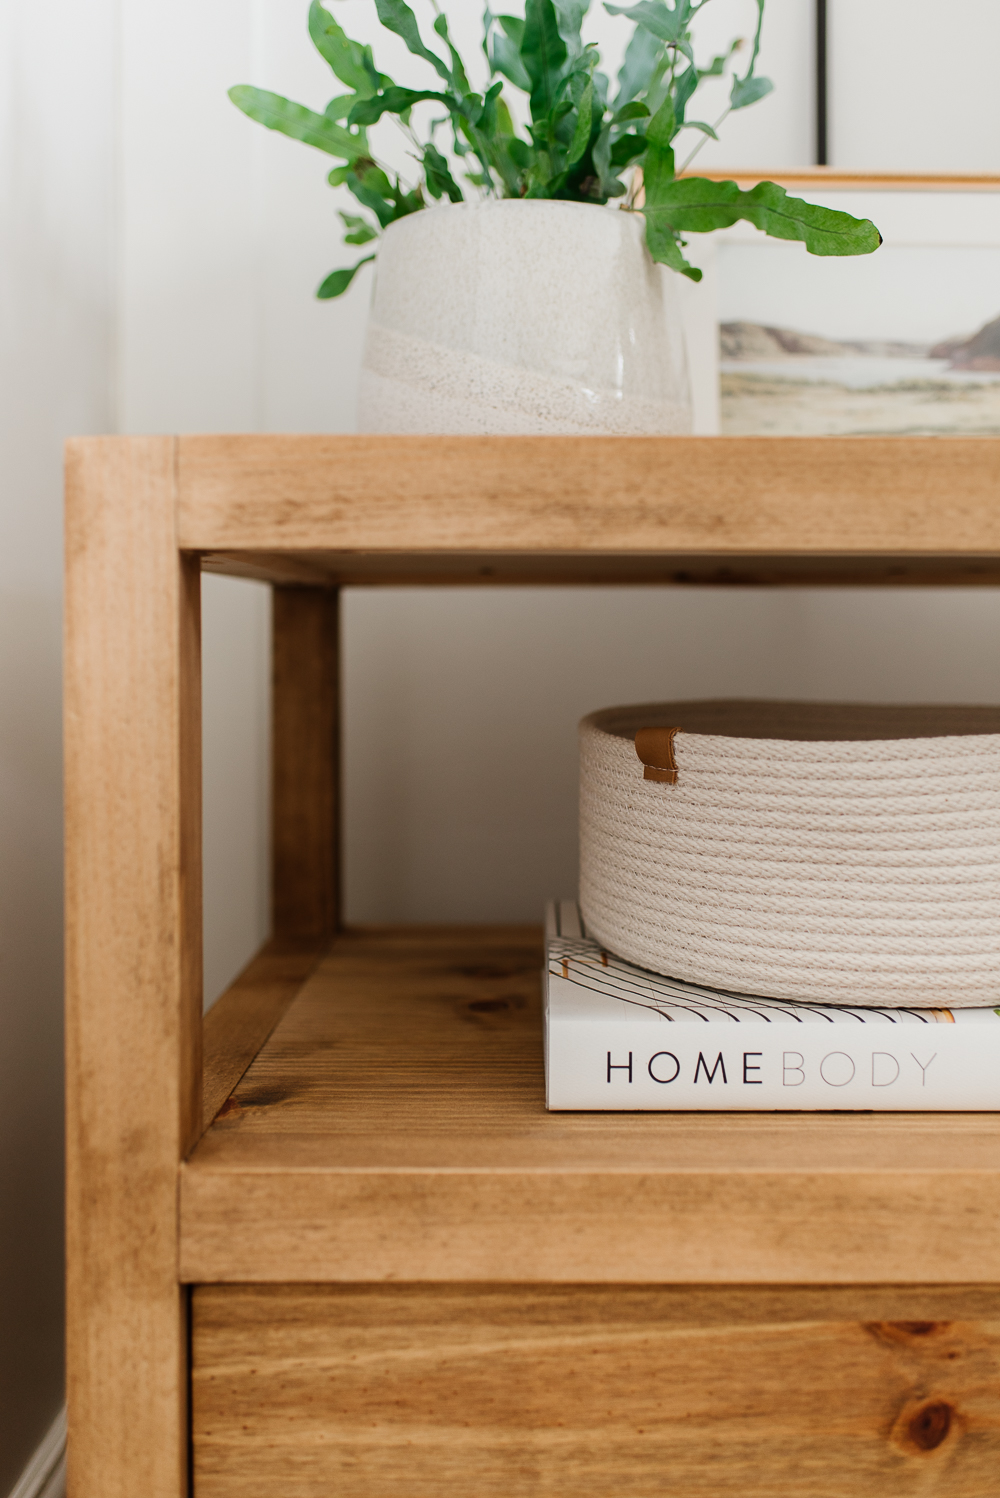
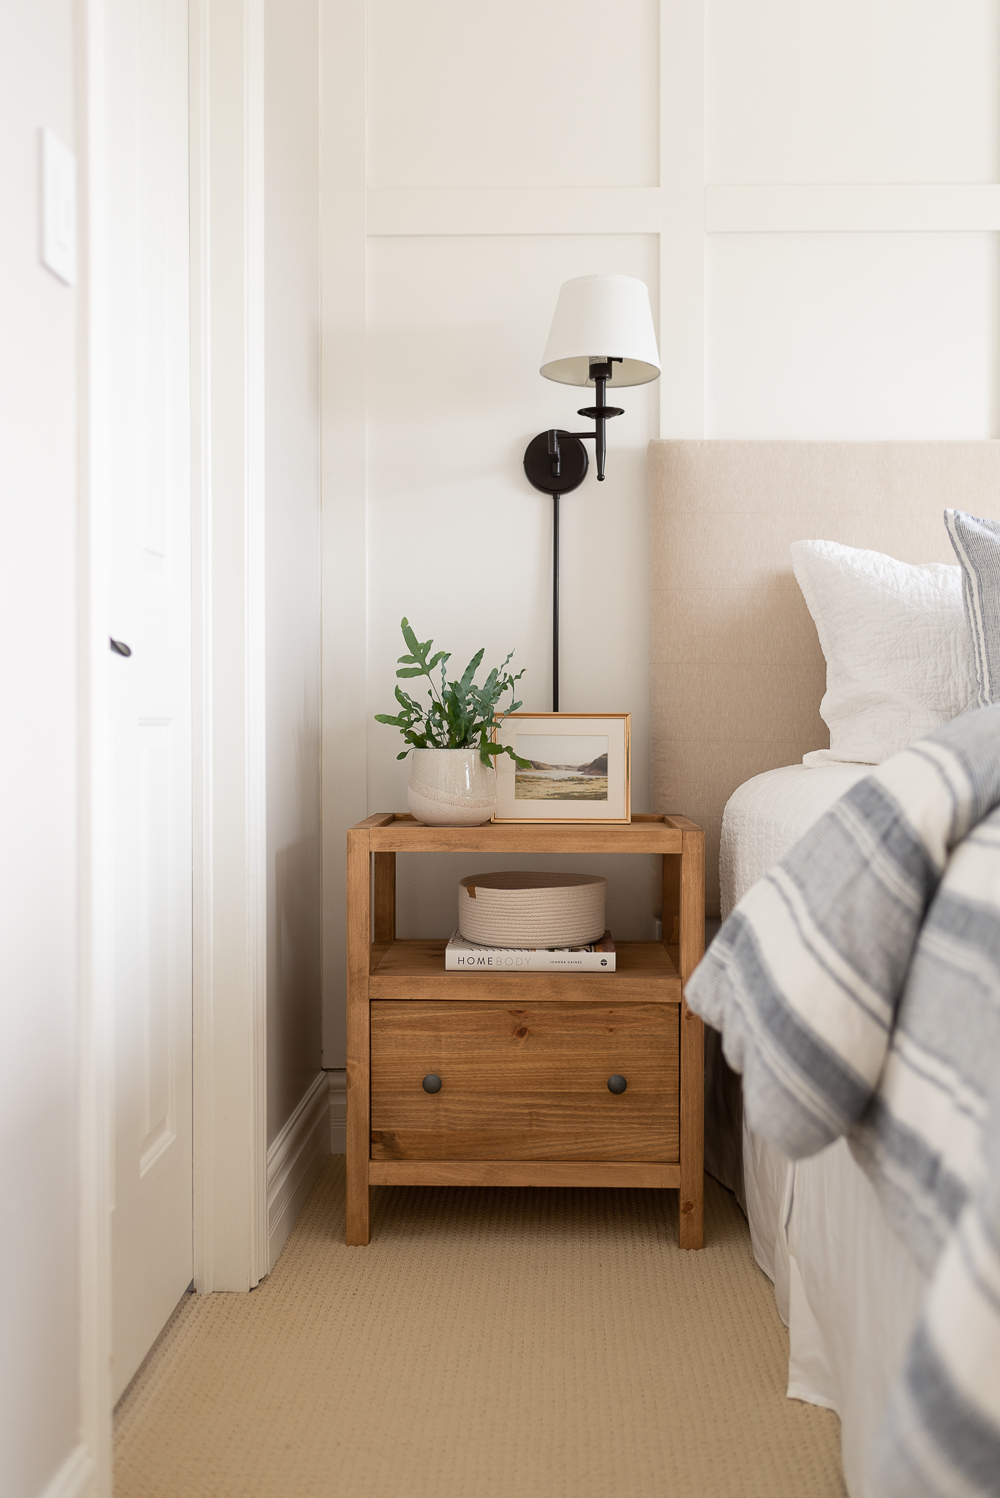
The drawer fronts, sides, and top are all inset to add dimension and a bit of visual interest to the piece. When I was designing the nightstands, I had originally planned for a flat top and flush drawer front, but I thought that was too boring. I had to make these small tweaks to give it a more interesting look.

I chose pine boards to make these nightstands because I wanted the grain to have some character. I thought of using white oak or maple, but they lacked a more obvious grain pattern. The stain colour is Early American by Varthane and is a perfect neutral wood tone. It adds just enough pigment to the wood without being too dark. I do always use a preconditioner on the wood when I’m working with pine as it tends to absorb unevenly.

The Plans

We’ve teamed up with our friends at Kreg to bring you these free plans for a pair of modern nightstands. And while you’re there, I’m sure you’ll find lots of other projects to build with your Kreg Jig.

MODERN NIGHTSTAND PLANS
DISCLOSURE:

This post is sponsored by Kreg Tool Company.
We have received compensation and/or product for this post.
However, as with all our partnerships, all opinions and ideas are our own.

YOU MAY ALSO LIKE...

  • The Cottage Remodel - A Charming Cottage Kitchen
  • Transitional Style Coffee Table Building Plans
  • Neutral and Relaxed Primary Bedroom

Comments

  1. Sarah Cook says

    July 13, 2022 at 7:34 am

    Do you have a version of these plans for just 1 nightstand? Just the plywood configuration would do. 🙂

    Reply
    • Nick says

      July 18, 2022 at 8:30 am

      Hi Sarah,

      Unfortunately, I only have the plans drawn up for the set of nightstands!

      Reply
  2. Victor Au says

    October 7, 2022 at 4:25 pm

    I made one of these and everyone likes it. It was fun to build. I used discounted (distressed) lumber and scraps. The KV soft close slides were the major cost item! Thanks.
    Photo at the link.

    Reply
    • Nick says

      October 19, 2022 at 3:14 pm

      Looks amazing Victor! I love the distressed lumber and scraps. It’s amazing how you can build something beautiful even with scraps!

      Reply
  3. Kimberly Troske says

    October 30, 2022 at 4:28 pm

    I love these! I just made your outdoor sofa, two chairs, and table — and I came back for more. 🙂

    If I wanted to modify this by leaving the bottom open (no drawer), would you recommend that I still install the lower sides and/or back, for stability purposes? This will be in a spare bedroom, fairly light use…

    Thank you!!

    Reply
    • Nick says

      November 3, 2022 at 1:53 pm

      Hi Kimberley! I’m so glad you found our outdoor furniture plans helpful!

      You could try leaving those pieces off. You might be ok if it’s only for light use. The back usually helps keep things square, but if there isn’t going to be much weight applied to it, you will likely be ok! The good thing is you could always add a piece or two in if you find it’s not stable!

      Reply
  4. Jason says

    January 29, 2023 at 4:32 pm

    I just finished building these nightstands and love them. I was curious if you recall what stain you used. That color is perfect!

    Reply
    • Alicia says

      January 30, 2023 at 9:35 am

      So glad to hear you enjoyed these plans! We used Early American by Verathan for the stain, which is one of our favourites!

      Reply
  5. Grady Moredock says

    April 25, 2023 at 12:17 pm

    Hi! Looking forward to building these nightstands but had a question: are the 12” soft close drawer slides under mount or side mount? The link I. The post isn’t working!

    Reply
    • Alicia says

      April 26, 2023 at 12:00 pm

      Hi Grady, thank you, we will update the link! In the meantime, the slides we used are side mount.

      Reply
  6. katie says

    September 13, 2023 at 11:24 pm

    Hi there could I possible pay you to build me two of these? or could I have the plan?

    Thank you!

    Reply
    • Alicia says

      September 19, 2023 at 9:23 am

      Hi Katie, if you scroll to the bottom of the post there is a link to access the plans for free!

      Reply

Leave a Reply Cancel reply

Your email address will not be published. Required fields are marked *

Sweeping away the cobwebs to make room for summer Sweeping away the cobwebs to make room for summer adventures! ☀️#playhouse #playhouserefresh #springcleaning #interiordesign #interiordesigner #cottagecorehome #modernvintage
Vintage art prints: my secret to infusing charm, c Vintage art prints: my secret to infusing charm, character, and nostalgia into any space.While remodelling our family cottage, I incorporated a handful of beautiful pieces of coastal art into each room to evoke the timeless charm and character of days gone by.Head to nickandalicia.com today for a peek into my process of selecting, printing, and framing the perfect vintage coastal art prints, along with links to my fave pieces!
Our homes are so much more than just walls and roo Our homes are so much more than just walls and roofs—they’re where some of life’s best moments unfold.Do you have a favourite memory in your home?#modernhome #interiorinspiration #collectedhome #modernvintage #vintagestyle #transitionaldesign#smmakelifebeautiful
This is the drink of the summer! 🍹 With just fo This is the drink of the summer! 🍹 With just four simple ingredients, our lychee, guava, and elderberry cocktail is easy to make and oh-so-delicious. Save this recipe for your go-to summer drink!Lychee, Guava & Elderberry CocktailIngredients •1.5 oz St Germain liqueur •1/3 glass guava juice •1/3 glass lychee juice •Lemon-flavoured sparkling water: Top off glass •Fresh lemon juice: Squeeze from lemon wedge •Lemon zest: A pinch for garnish •Thyme sprigs: For garnishInstructions 1. Mix Ingredients: In a glass, combine 1/3 of the glass with lychee juice and 1/3 of the glass with guava juice. Add 1.5 oz of St Germain Liqueur.2. Add Sparkling Water: Top off the glass with lemon-flavored sparkling water.3. Add Lemon Juice: Squeeze in fresh lemon juice from one lemon wedge and stir everything gently to mix.4. Garnish: Garnish the drink with a pinch of lemon zest and a sprig of thyme for a fragrant touch.5. Serve and Enjoy: Your lychee, guava, and elderberry cocktail is ready to be served. Enjoy this refreshing summer drink!Will you be giving it a try this summer?
Obsessed with this versatile shade of green, it’ Obsessed with this versatile shade of green, it’s perfect for walls, trim, or cabinetry!Looking for more? Check out our all-time favourite green paint colours at nickandalicia.com today!#paint #greenpaint #kitchen #kitchenisland #kitchencabinets #classicdesign #traditionalcharm #vintagevibes
You’re tired of waiting on your dream home, so y You’re tired of waiting on your dream home, so you decide to make your house the dreamiest it can be. Who’s with me? 🙋🏻‍♀️#kitchen #kitchendecor #modernhome #interiorinspiration #homedesign #collectedhome #transitionaldesign #traditionalcharm
April Recap: thrift finds, spring vibes, and our f April Recap: thrift finds, spring vibes, and our first trip to the cottage! Catch up on our favourite moments of the month at nickandalicia.com.

Join our Newsletter

Copyright ©2025 Nick + Alicia
  • Contact
  • POLICIES + DISCLOSURE